
RealHomes Memberships Setup
Note: This blog post is updated as per RealHomes version 4.3.8, which comes with Stripe SCA compliance.
This article will guide you through how to configure memberships for RealHomes-based websites.
- Installing Inspiry Memberships Plugin
- Basic Settings
- Stripe Settings
- PayPal Settings
- Wire Transfer Settings
- WooCommerce Payments Setup
- Creating Membership Packages
- Memberships View/Subscription
- Assign Membership Manually
- Labels Settings
- Styles Settings
- Create a Membership Plan Page
Installing Inspiry Memberships Plugin
Navigate to Dashboard → Plugins → Add New and search Inspiry Memberships as displayed in the screenshot below:
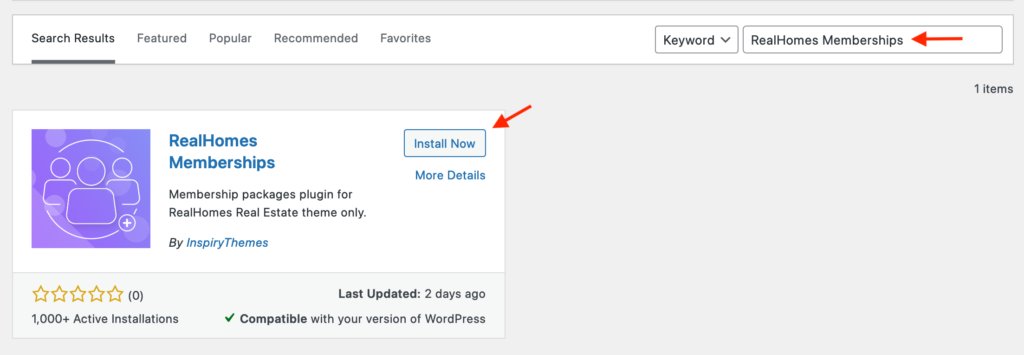
Once you have found it, click the Install Now button and activate it after installation.
Let’s start configuring the plugin by navigating to the Dashboard → Memberships → Settings page. This plugin settings page contains the following four settings tabs.
- Basic Settings
- Stripe Settings
- PayPal Settings
- Wire Transfer Settings
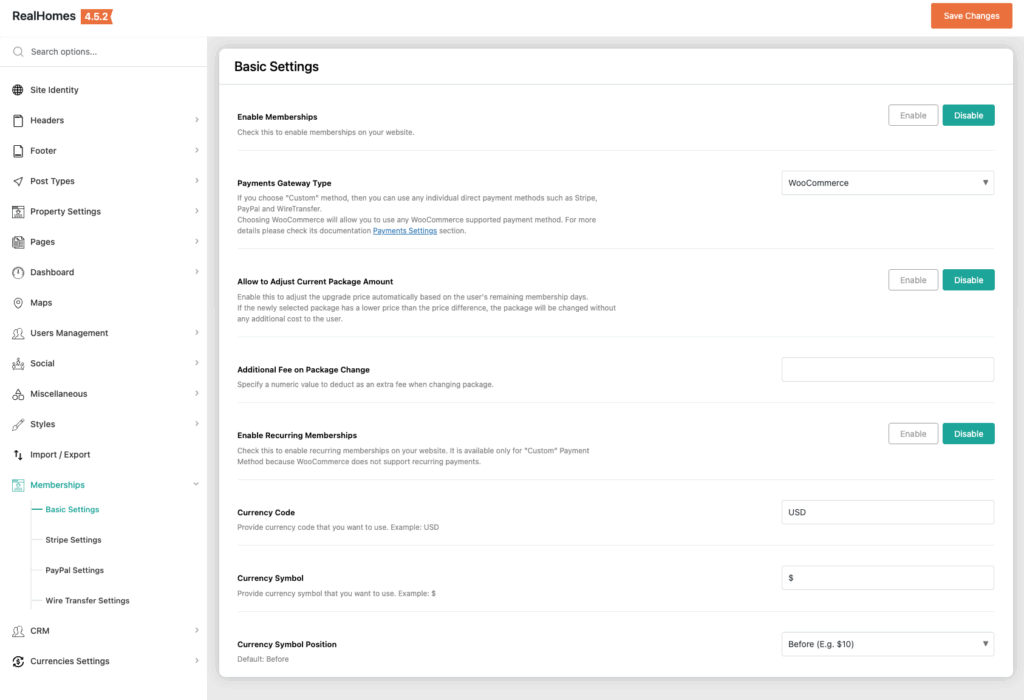
Basic Settings
This section allows you to configure the following basic settings:
- Enable/Disable Memberships.
- Select Payments Gateway Type.
- Enable/Disable Recurring Memberships.
- Currency Code in which you are going to charge your customers.
- Currency Symbol that you want to use.
- Position of Currency Symbol.
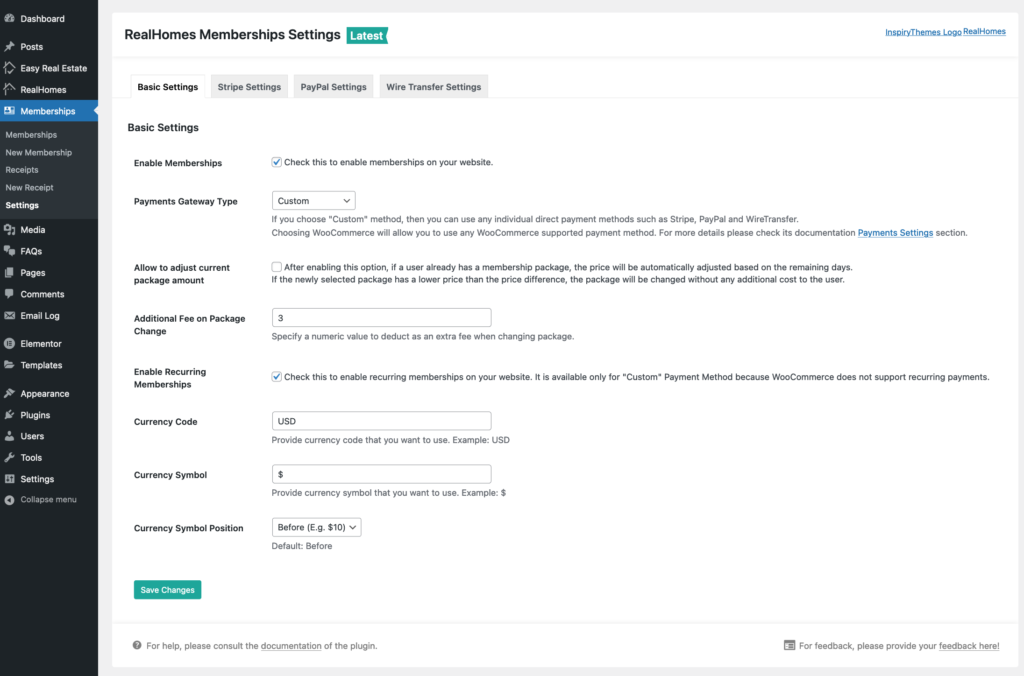
Note: if you want to use the WooCommerce Payments Gateway, skip to the WooCommerce Payments Setup guide.
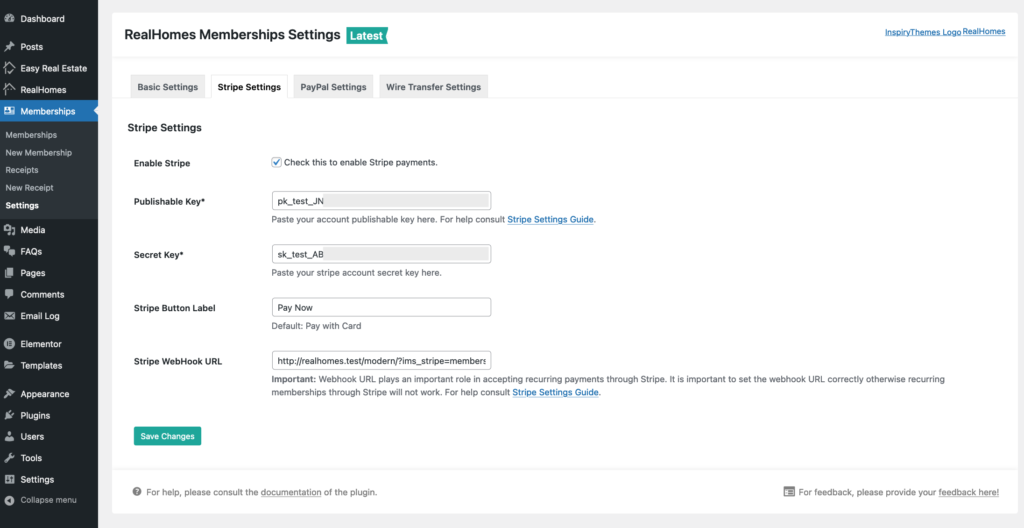
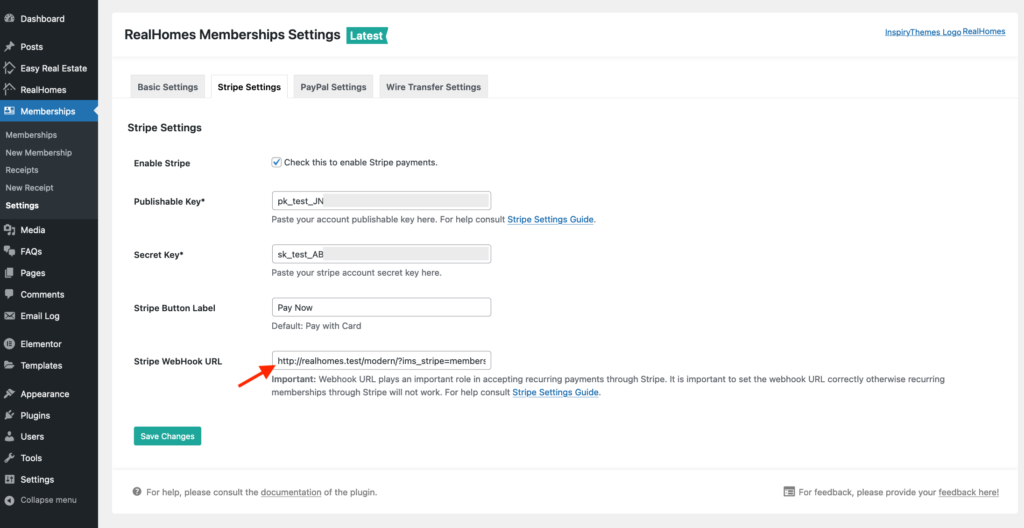
Stripe Settings
This section contains the following Stripe Payment Gateway settings.
- Enable/Disable Stripe Payments.
- Set your Stripe account API keys.
- Set custom Stripe Button Label.
- Set the Stripe Webhook URL.
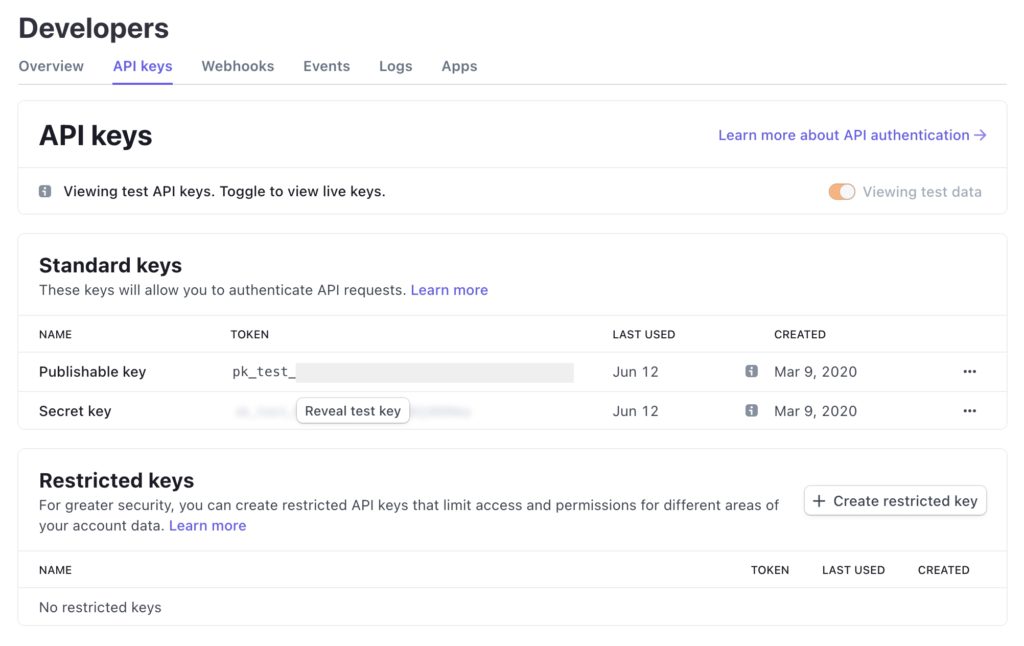
Retrieving the API Keys
Log in to your Stripe account dashboard and go to the Developers → API keys page to get the Test/Live Publishable and Secret keys.
Register Webhook URL
Important: Webhook URL plays an important role in accepting recurring payments through Stripe. It is important to set the webhook URL correctly otherwise recurring memberships through Stripe will not work.
Follow these steps to register your Webhook URL:
1. Copy the URL present in the Stripe Webhook URL text box.

2. Go to Stripe account Dashboard → Developers → Event destination page and click the Add endpoint button.
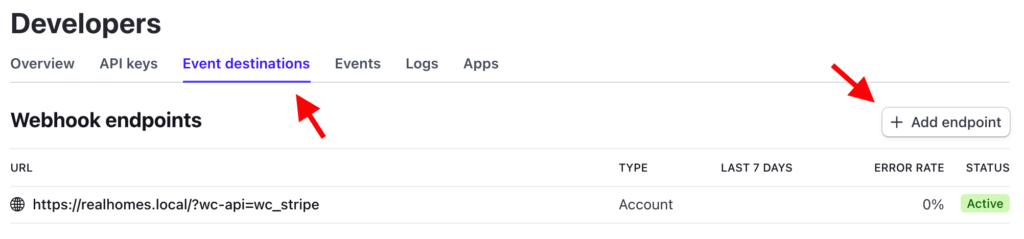
4. Paste the Webhook URL you copied earlier in the first step to the Endpoint URL field.
Select the charge.succeeded event from the Events to Send option and hit the Add endpoint button.

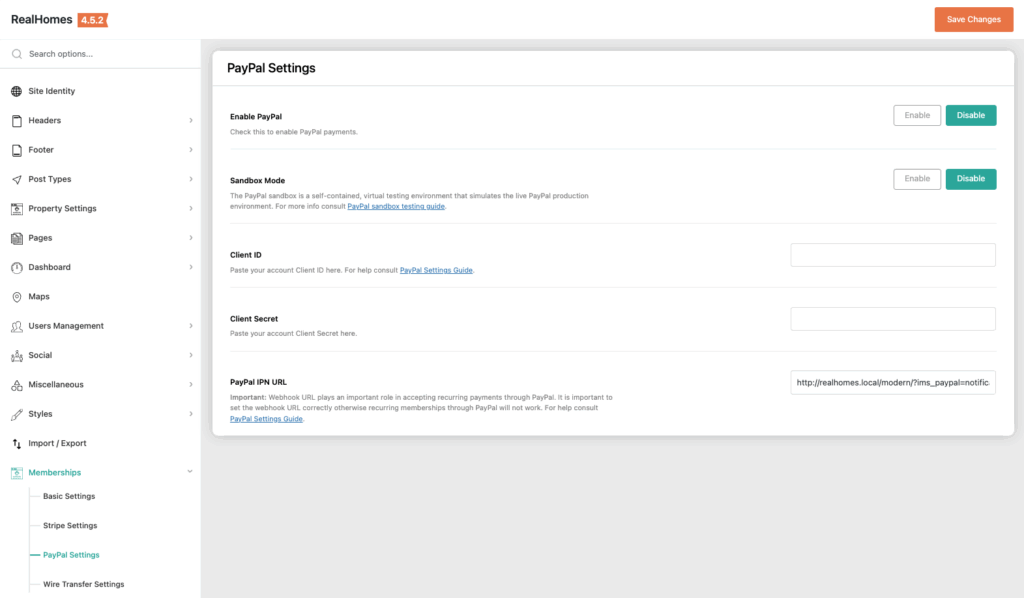
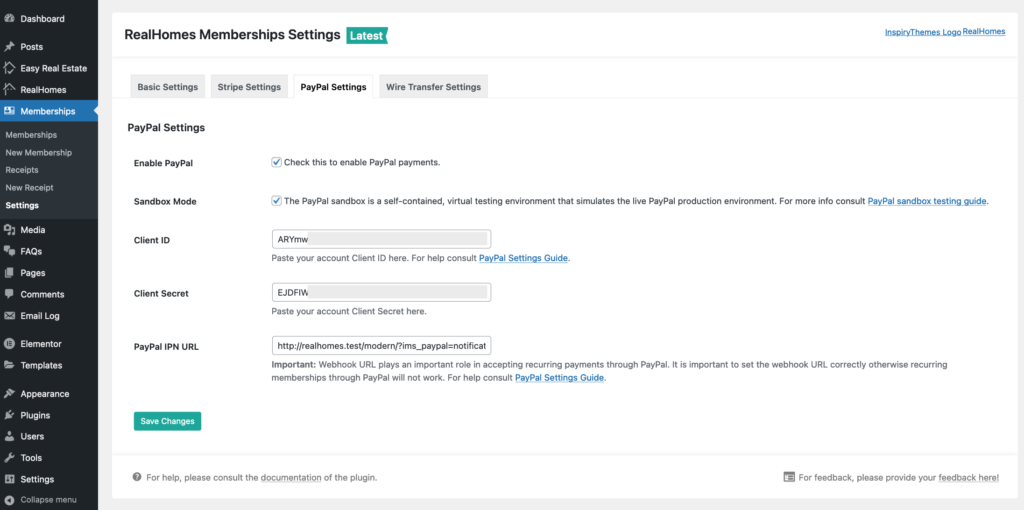
PayPal Settings
This section contains the following PayPal Payment gateway settings.
- Enable/Disable PayPal Payments.
- Enable/Disable PayPal Sandbox Mode.
- Set your PayPal account API keys and related credentials.
- Set PayPal IPN URL.
Retrieving the Client ID & Client Secret
To get a Client ID and Client Secret, you must create a PayPal App via your PayPal developer account. Please follow these easy steps to do that.
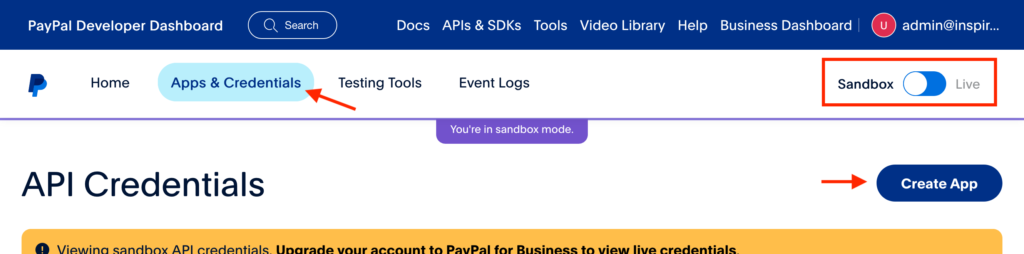
1. Login to the PayPal Developer account dashboard.
2. Go to the Apps & Credentials section.
3. Click the Create App button after selecting the Sandbox/Live mode.
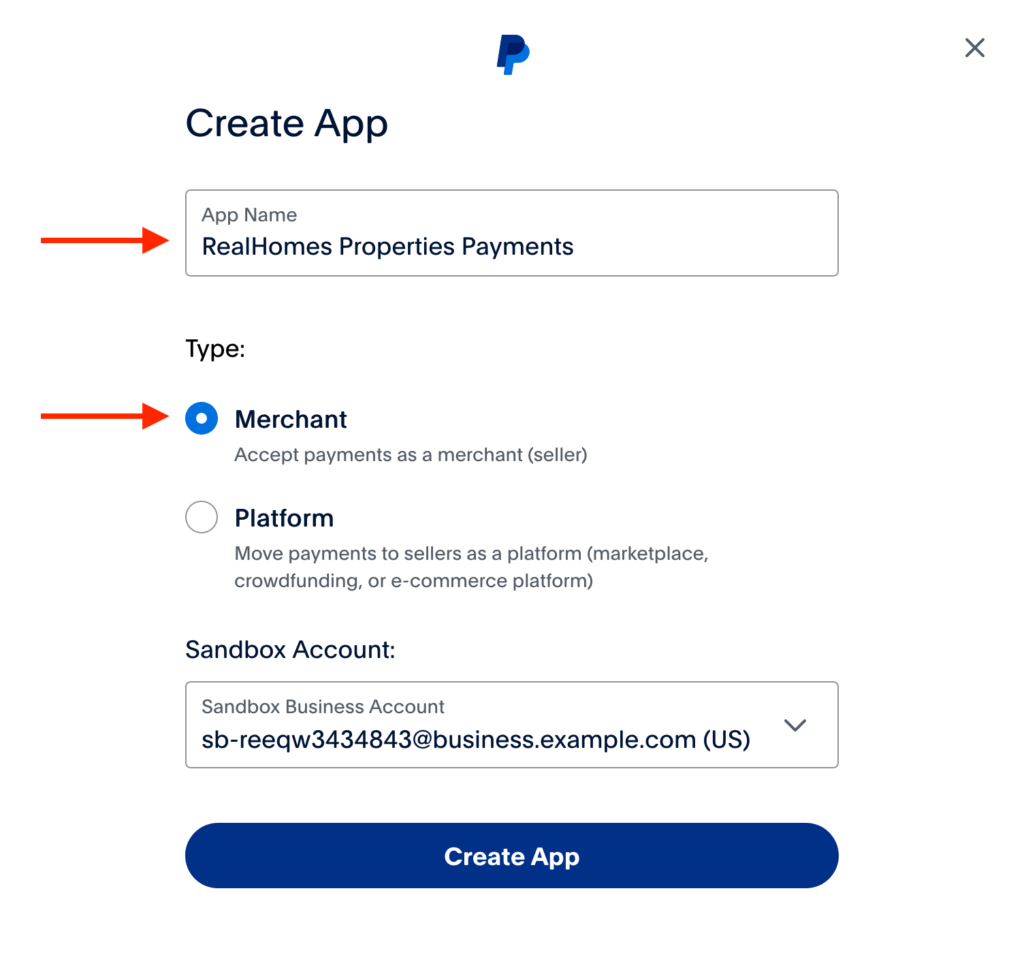
4. Give a name to your App and click the Create App button.
5. Now, you can see and copy the Client ID and Client Secret to your website’s PayPal settings. You can click the highlighted icon to copy.
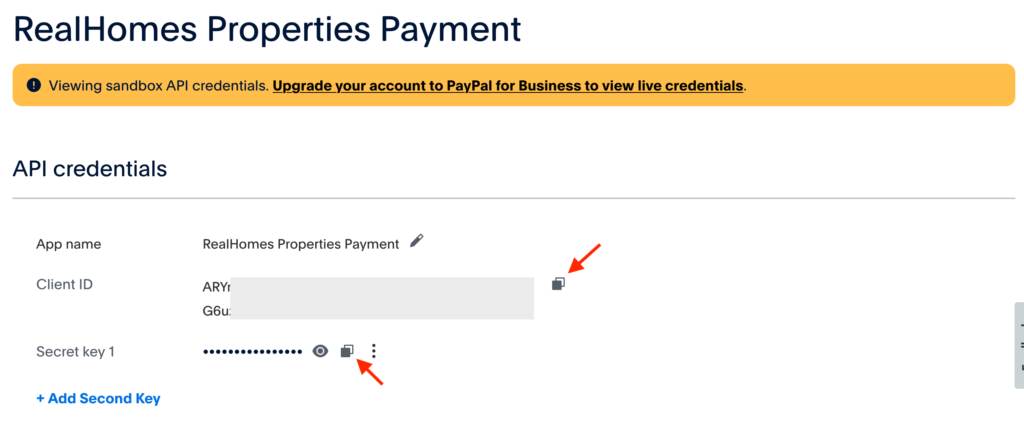
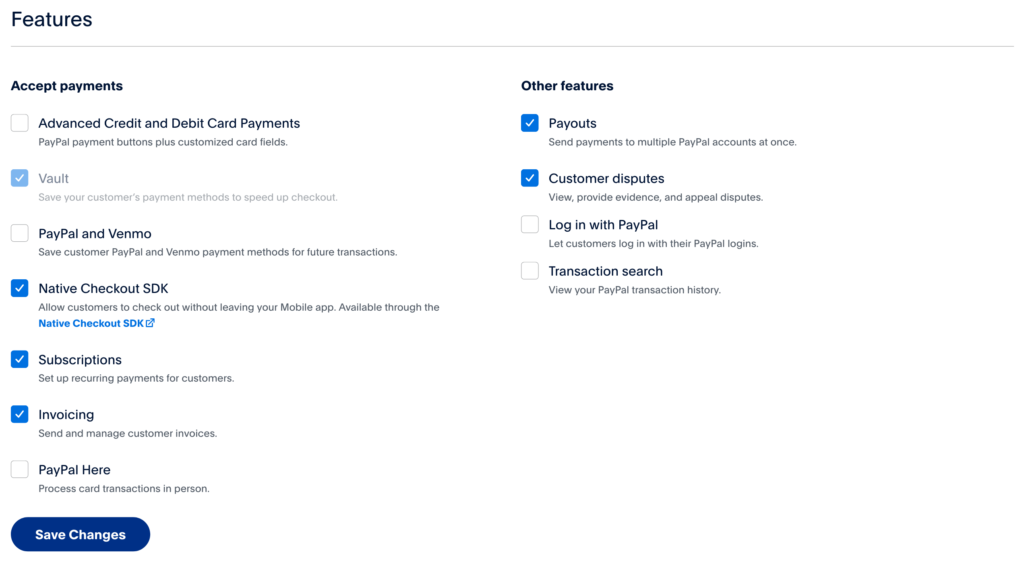
6. Keep the settings in the Features section as is; you don’t need to change anything.
Configure PayPal IPN
Next is to set up the Webhook URL and Event Types for PayPal IPN notifications.
1. To see the Webhooks section, you must scroll down and click the Add Webhook button.
2. Provide the PayPal IPN URL in the following popup and check the Payments & Payouts from the Event Types functions.
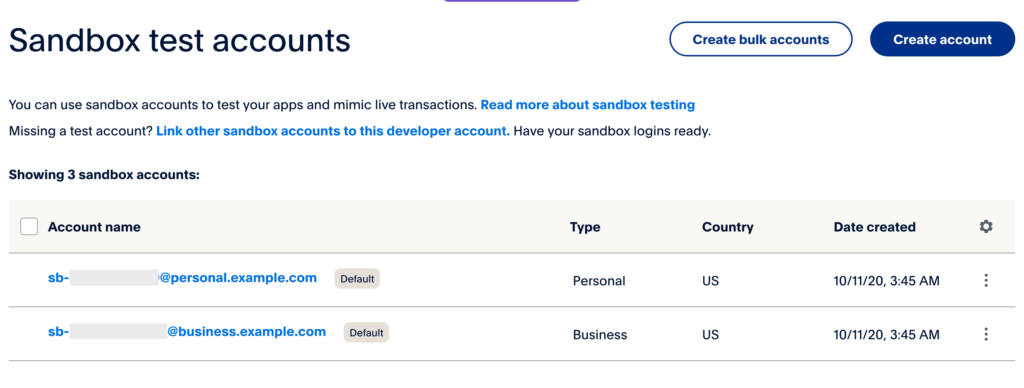
PayPal Sandbox Accounts
PayPal provides Sandbox default accounts to test the PayPal payment features. To retrieve these Business or Personal sandbox test accounts, navigate to Testing & Tools and click Sandbox Accounts in the PayPal Developer Dashboard. In this section, you can get, edit, or create existing and new PayPal Sandbox test Accounts.
PayPal Recurring Payments Setup
The setup for PayPal recurring payments involves the following vital steps. Ensure a smooth process by attentively following each of these steps.
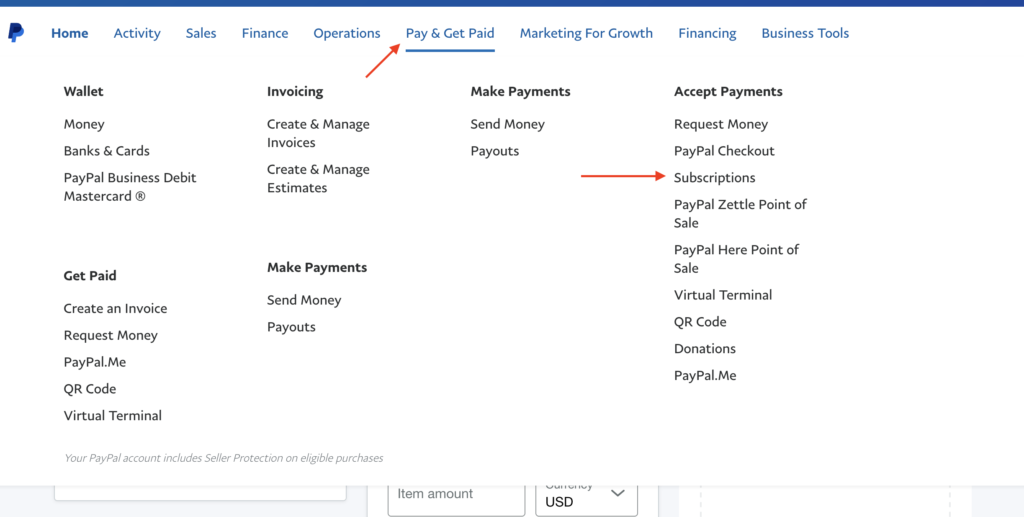
1. To set up Paypal Recurring Payments, please log in to your PayPal Business account, click “Pay and Get Paid“, and click “Subscriptions“.
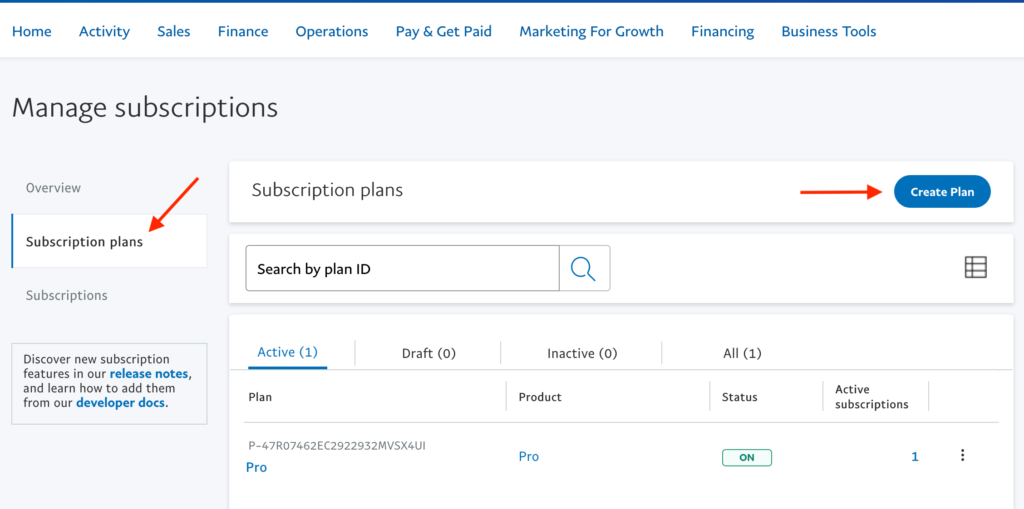
2. On the “Manage Subscription” page, click on “Subscription Plans” from the left sidebar and click “Create Plan” to initiate the creation of a new subscription plan.
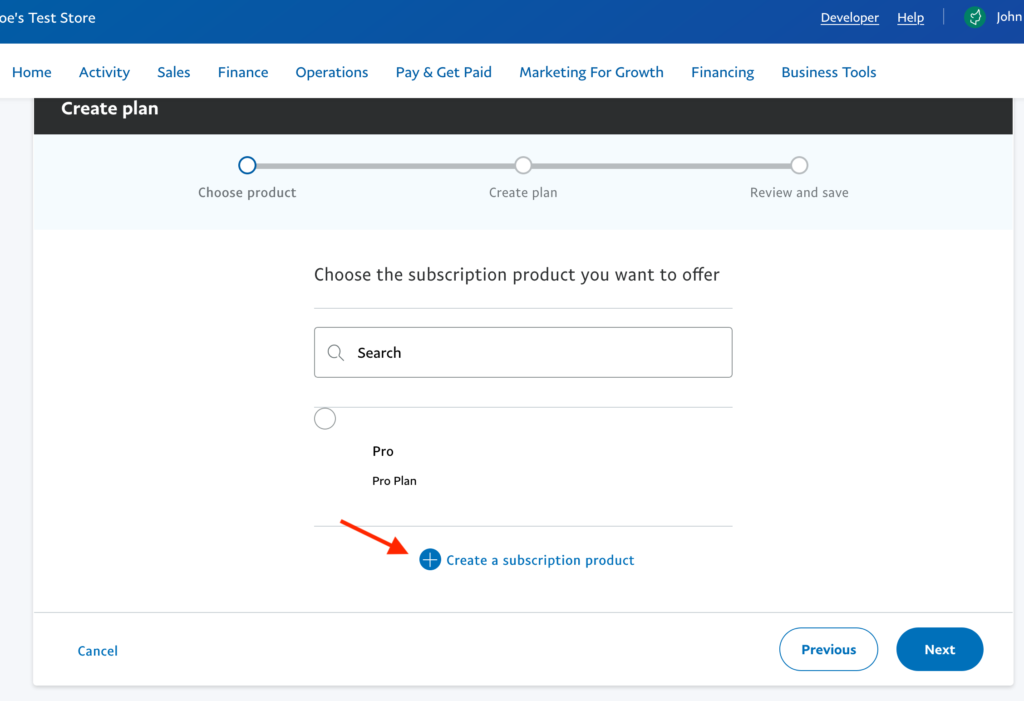
3. Click “Create a Subscription Product” and “Next” to proceed with the process.
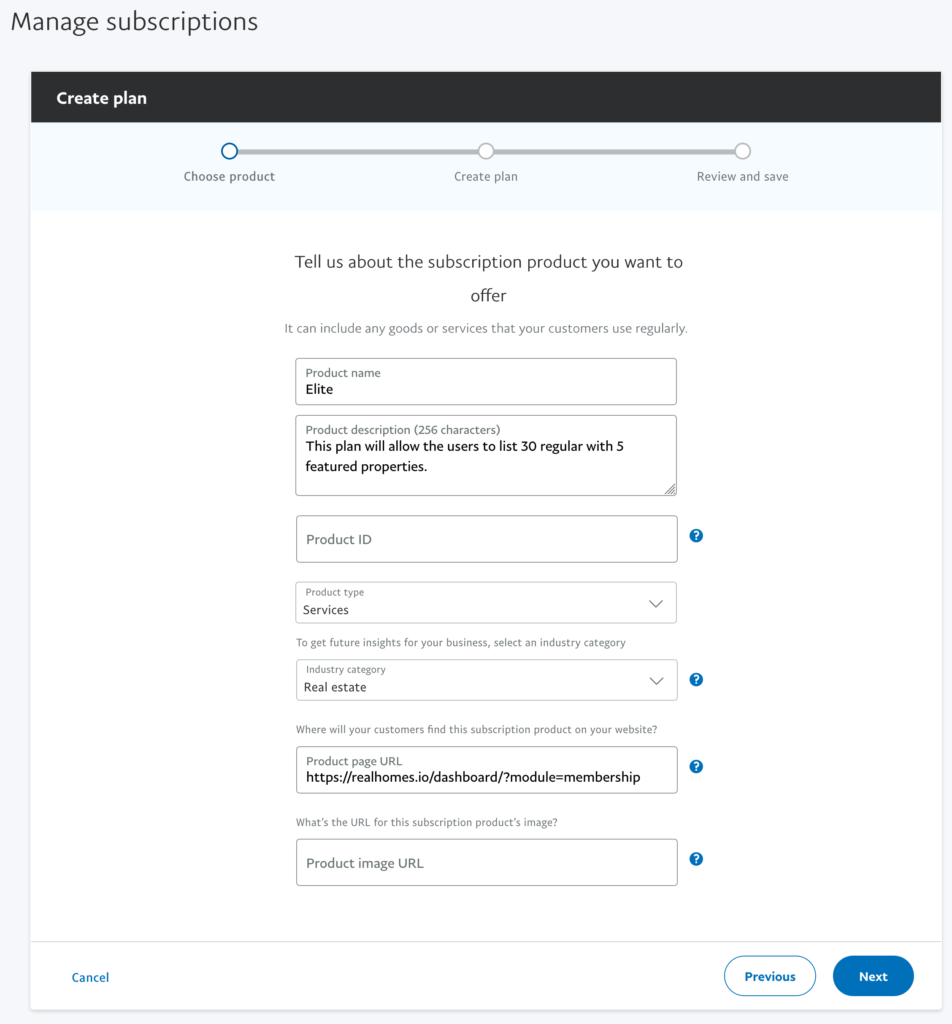
4. Fill in all the necessary information based on the updated requirements for your new membership subscription.
PayPal will automatically generate the Product ID; you can include a Product Image, though it is not mandatory. Click the “Next” button to continue creating your subscription plan.
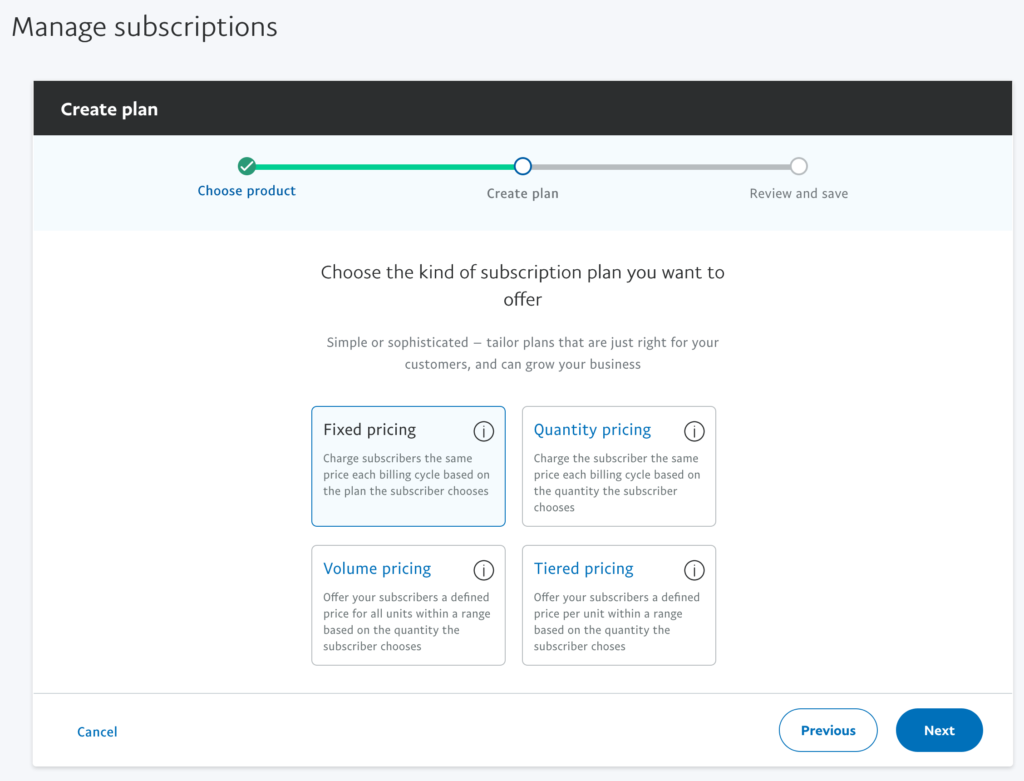
5. Select “Fixed Pricing” before proceeding by clicking on “Next“.
6. Choose your preferred currency and input the price according to your membership plan and specific requirements.
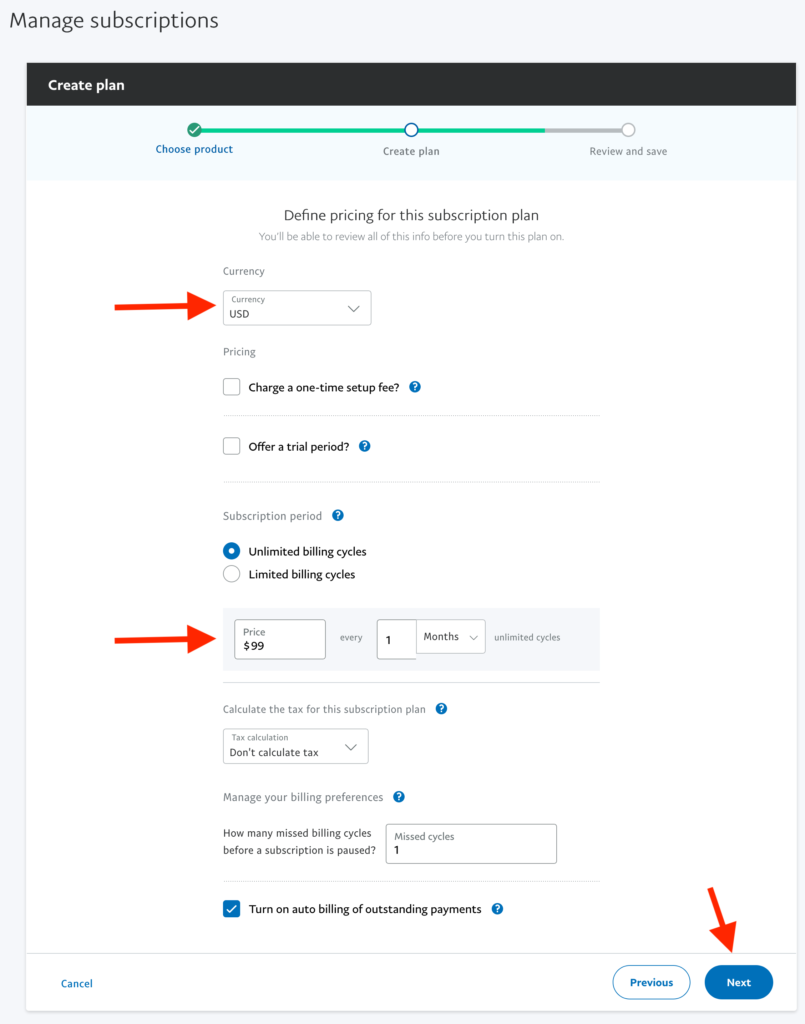
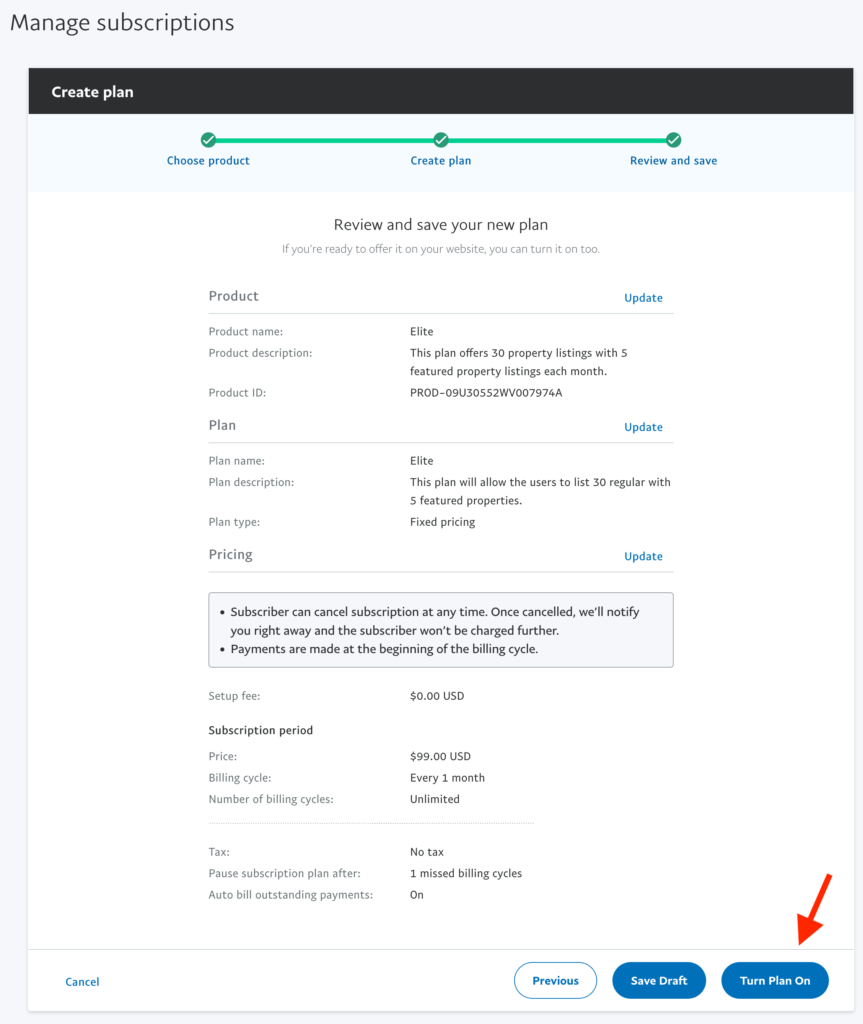
7. Carefully review all the details, and if everything appears satisfactory, click “Turn Plan On” to activate this new PayPal subscription plan.
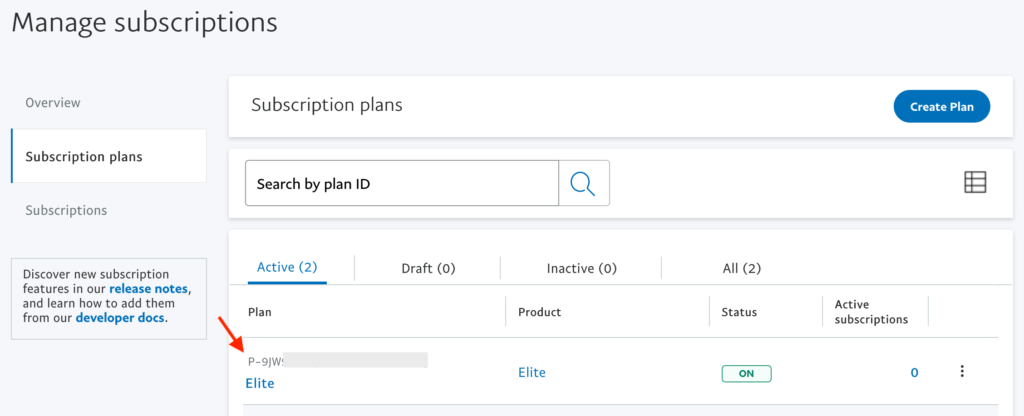
8. Upon successful creation, copy the “Plan ID” to incorporate it into the Membership package in the next step. Please ensure to copy the entire Plan ID, including e.g. P-9JW765SD3GF.
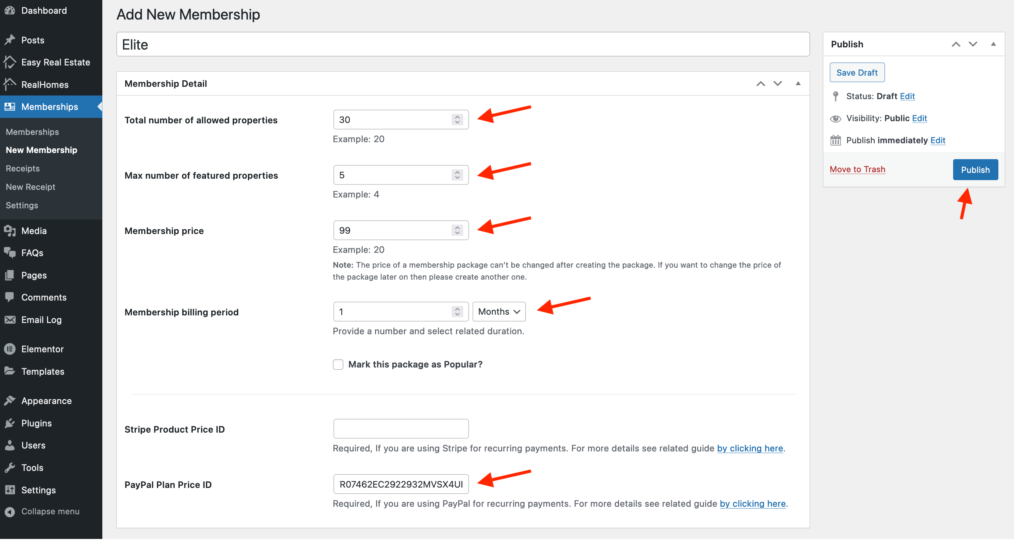
9. Complete the process by creating a new Membership plan and incorporating the “PayPal Plan ID” into the designated “PayPal Plan Price ID” field. Ensure that the price and duration align with the subscription plan established in PayPal.
Wire Transfer Settings
This section contains the following Wire Transfer settings.
- Enable/Disable the Wire Transfer payment gateway.
- Set instructions for the Wire Transfer.
- Account Name.
- Account Number.
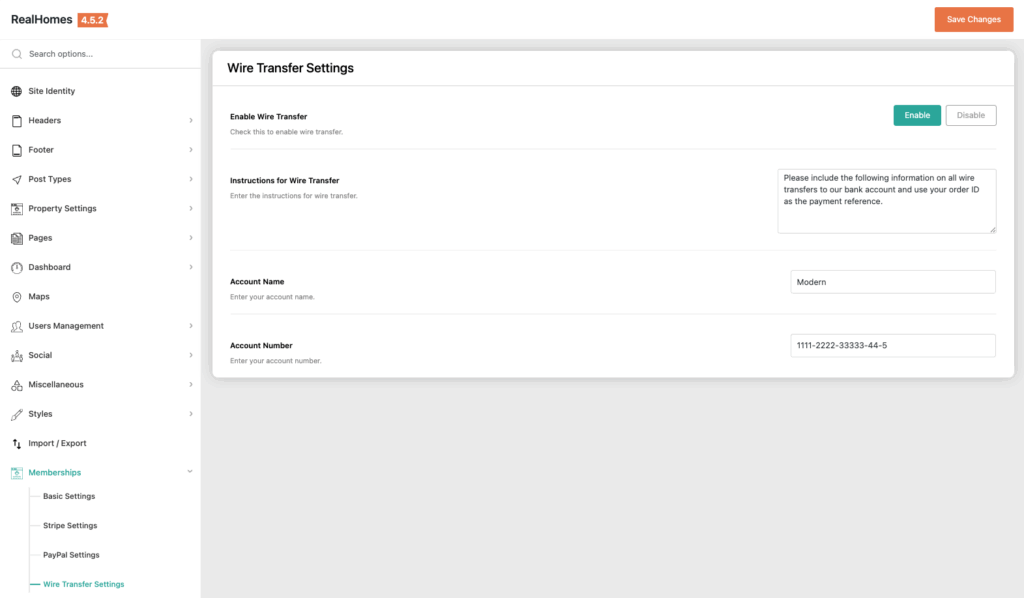
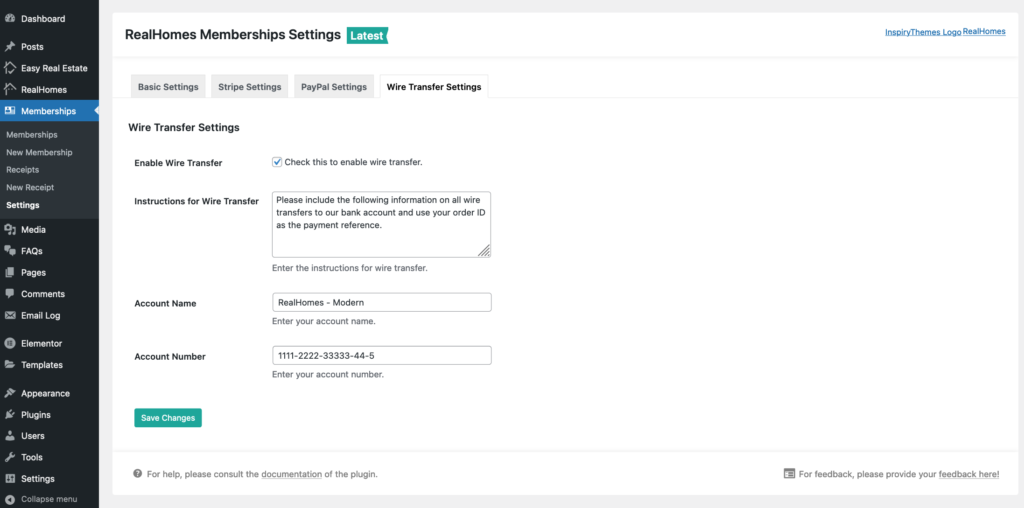
Add the Wire Transfer details and click on the Save Changes button.
Activating Membership
All the memberships bought through wire transfers require manual activation.
Once the payment confirmation is received, the membership has to be activated manually. Go to the Memberships → Receipts, edit the user receipt, check the Membership Status checkbox, and click the Update button to activate the membership.
WooCommerce Payments Setup
Info: You can use either custom payment methods such as Stripe, PayPal and Wire Transfer OR WooCommerce Payments Gateway.
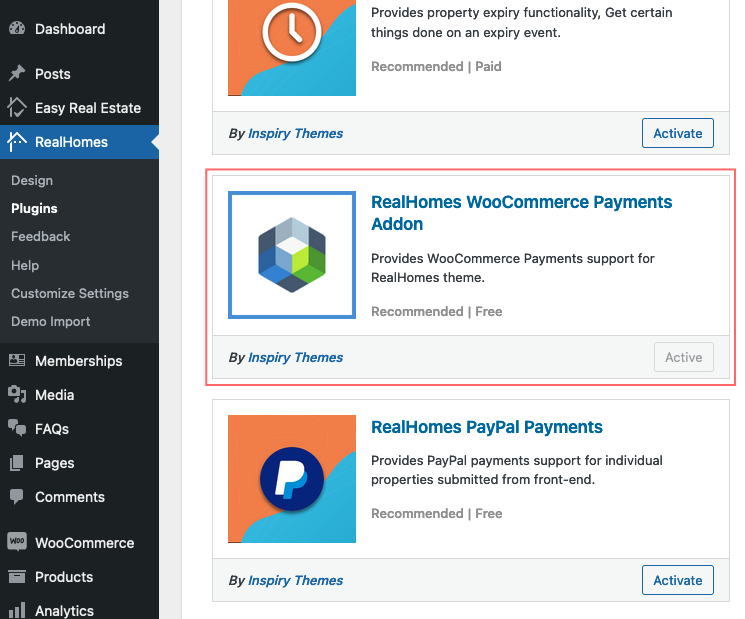
To set up WooCommerce payments for the membership packages, you must install and activate the WooCommerce and RealHomes WooCommerce Payments Addon plugin on your website.
The WooCommerce plugin can be installed after downloading from its own page. While RealHomes WooCommerce Payments Addon plugin can be installed and activated by navigating to Dashboard > RealHomes > Plugins page. Please see the following screenshot for help.
Once both plugins are installed and activated, go to the Dashboard → Memberships → Settings → Basic page and select WooCommerce for the Payments Gateway Type option.
You can see their WooCommerce payment gateway setup guide by clicking here.
Important: Recurring payments option is available only for the “Custom” Payment Methods because WooCommerce does not support recurring payments.
Creating Membership Packages
To create membership packages, follow these instructions:
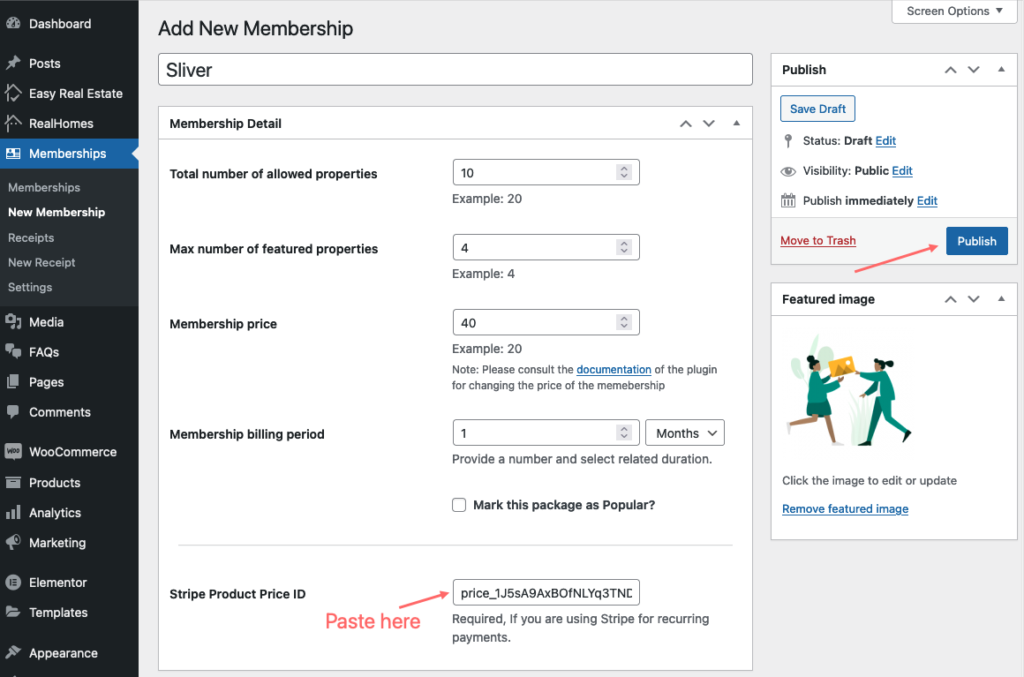
Go to Dashboard → Memberships → New Membership page. Fill in the details related to the membership, then click the Publish button.
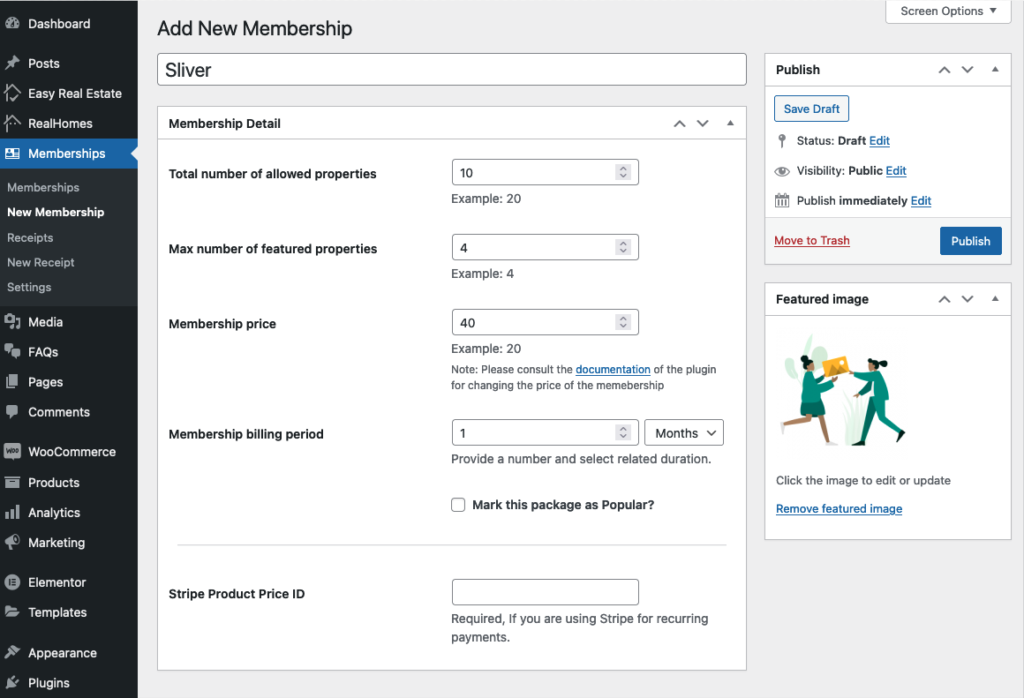
Membership package featured image will be used to display with Stripe transaction only.
Note: The price of a membership package can’t be changed after creating the package. If you want to change the price of the package then please create another one.
If you create a recurring membership package through Stripe, you must create a Product and its Pricing Plan in your Stripe account. After that, paste the ID of that pricing plan in the Stripe Product Price ID text field.
To get the Stripe Product Price ID, please follow the instructions given below.
Get Stripe Subscription Plan ID
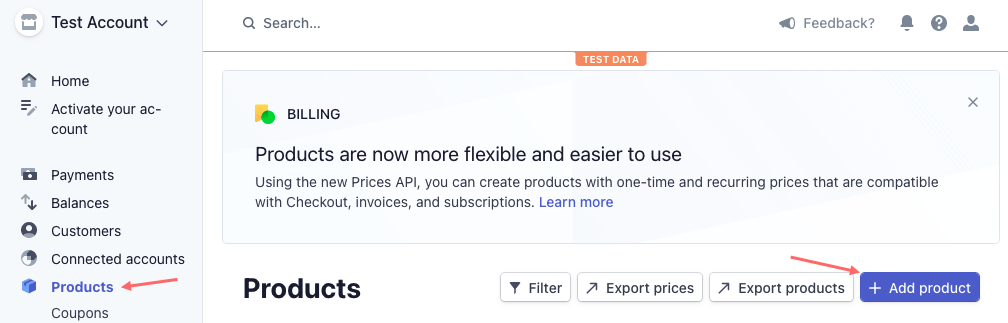
Please login to your Stripe Test/Live account and go to the Products page, then click the + Add Product button.
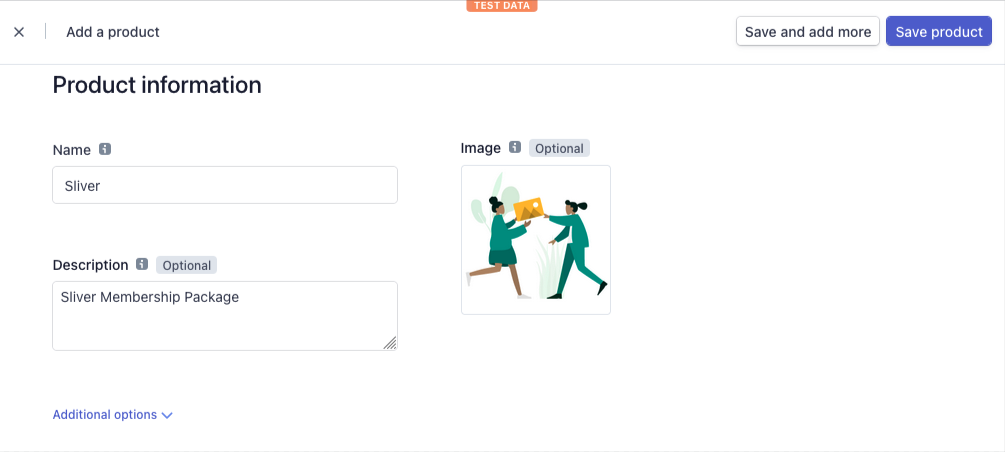
Provide the product details, Product Name, and description, and set an image to show the package payment transaction in the statement.
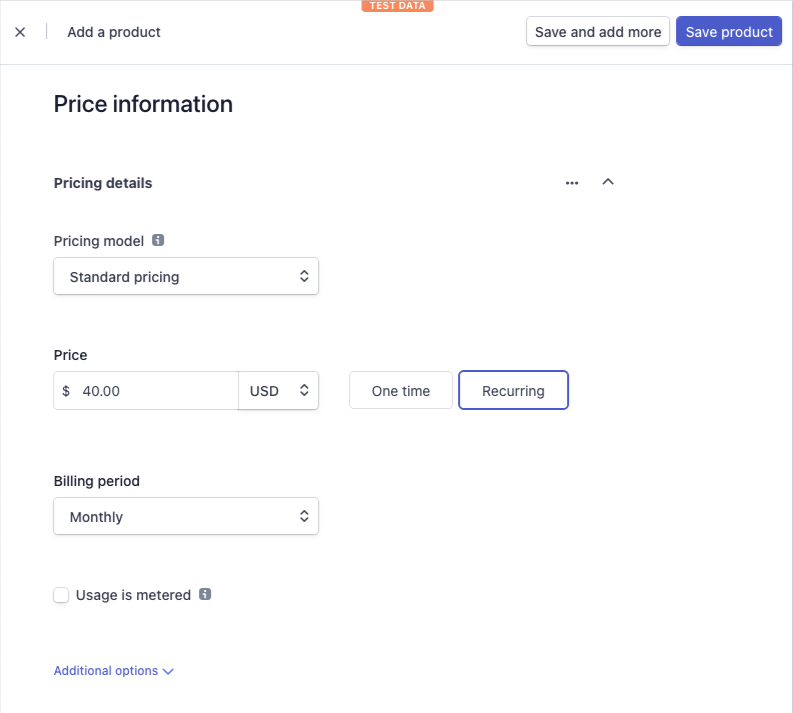
Scroll down and provide the Product Price Information. Set the Price and Billing Period the same as you did for the package to which you are going to add the Product Price ID.
Now hit the Save Product button and then copy the Price ID.
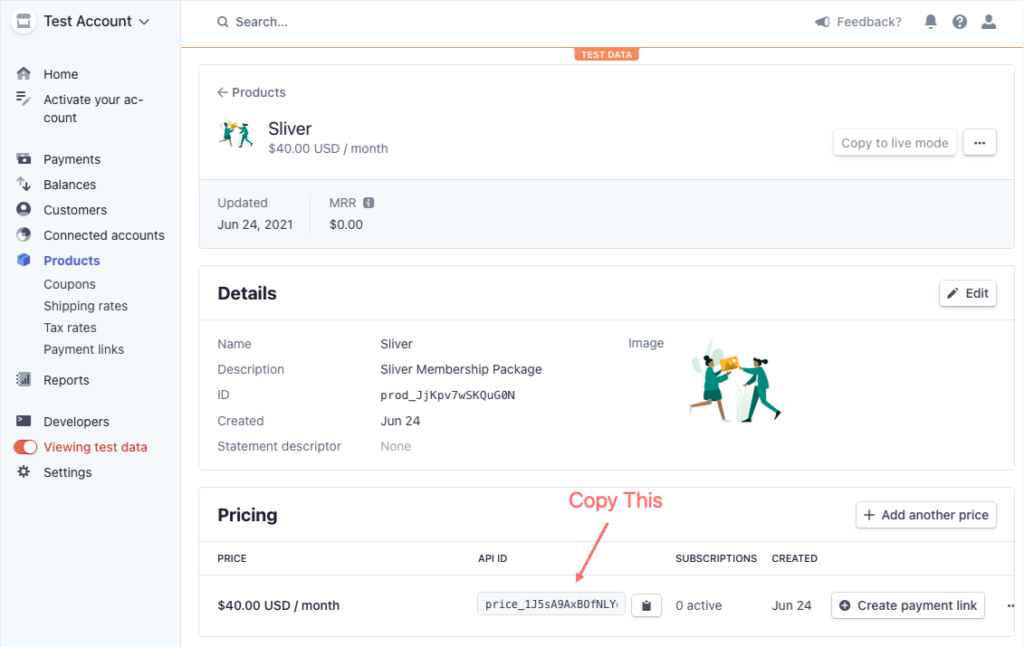
After copying the Price ID, paste it in the Stripe Product Price ID field of the related package on your website and then click the Update / Publish button, as you can see in the following screenshot.
Memberships View/Subscription
After creating membership packages, they will automatically start appearing on the Memberships page of the User Dashboard.
Users can view, subscribe to, and cancel their memberships on this page.
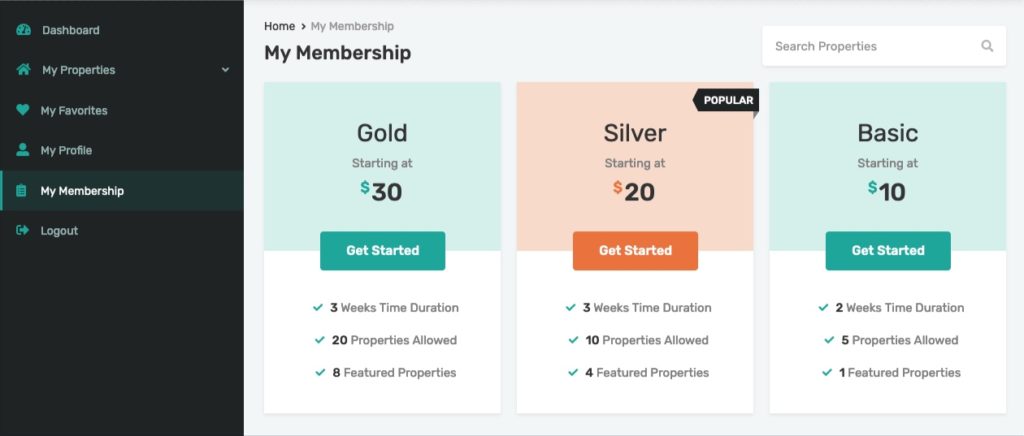
Users can easily upgrade or downgrade their membership to meet their specific requirements. During the membership upgrade or downgrade process at checkout, the membership price will be dynamically adjusted according to the membership duration.
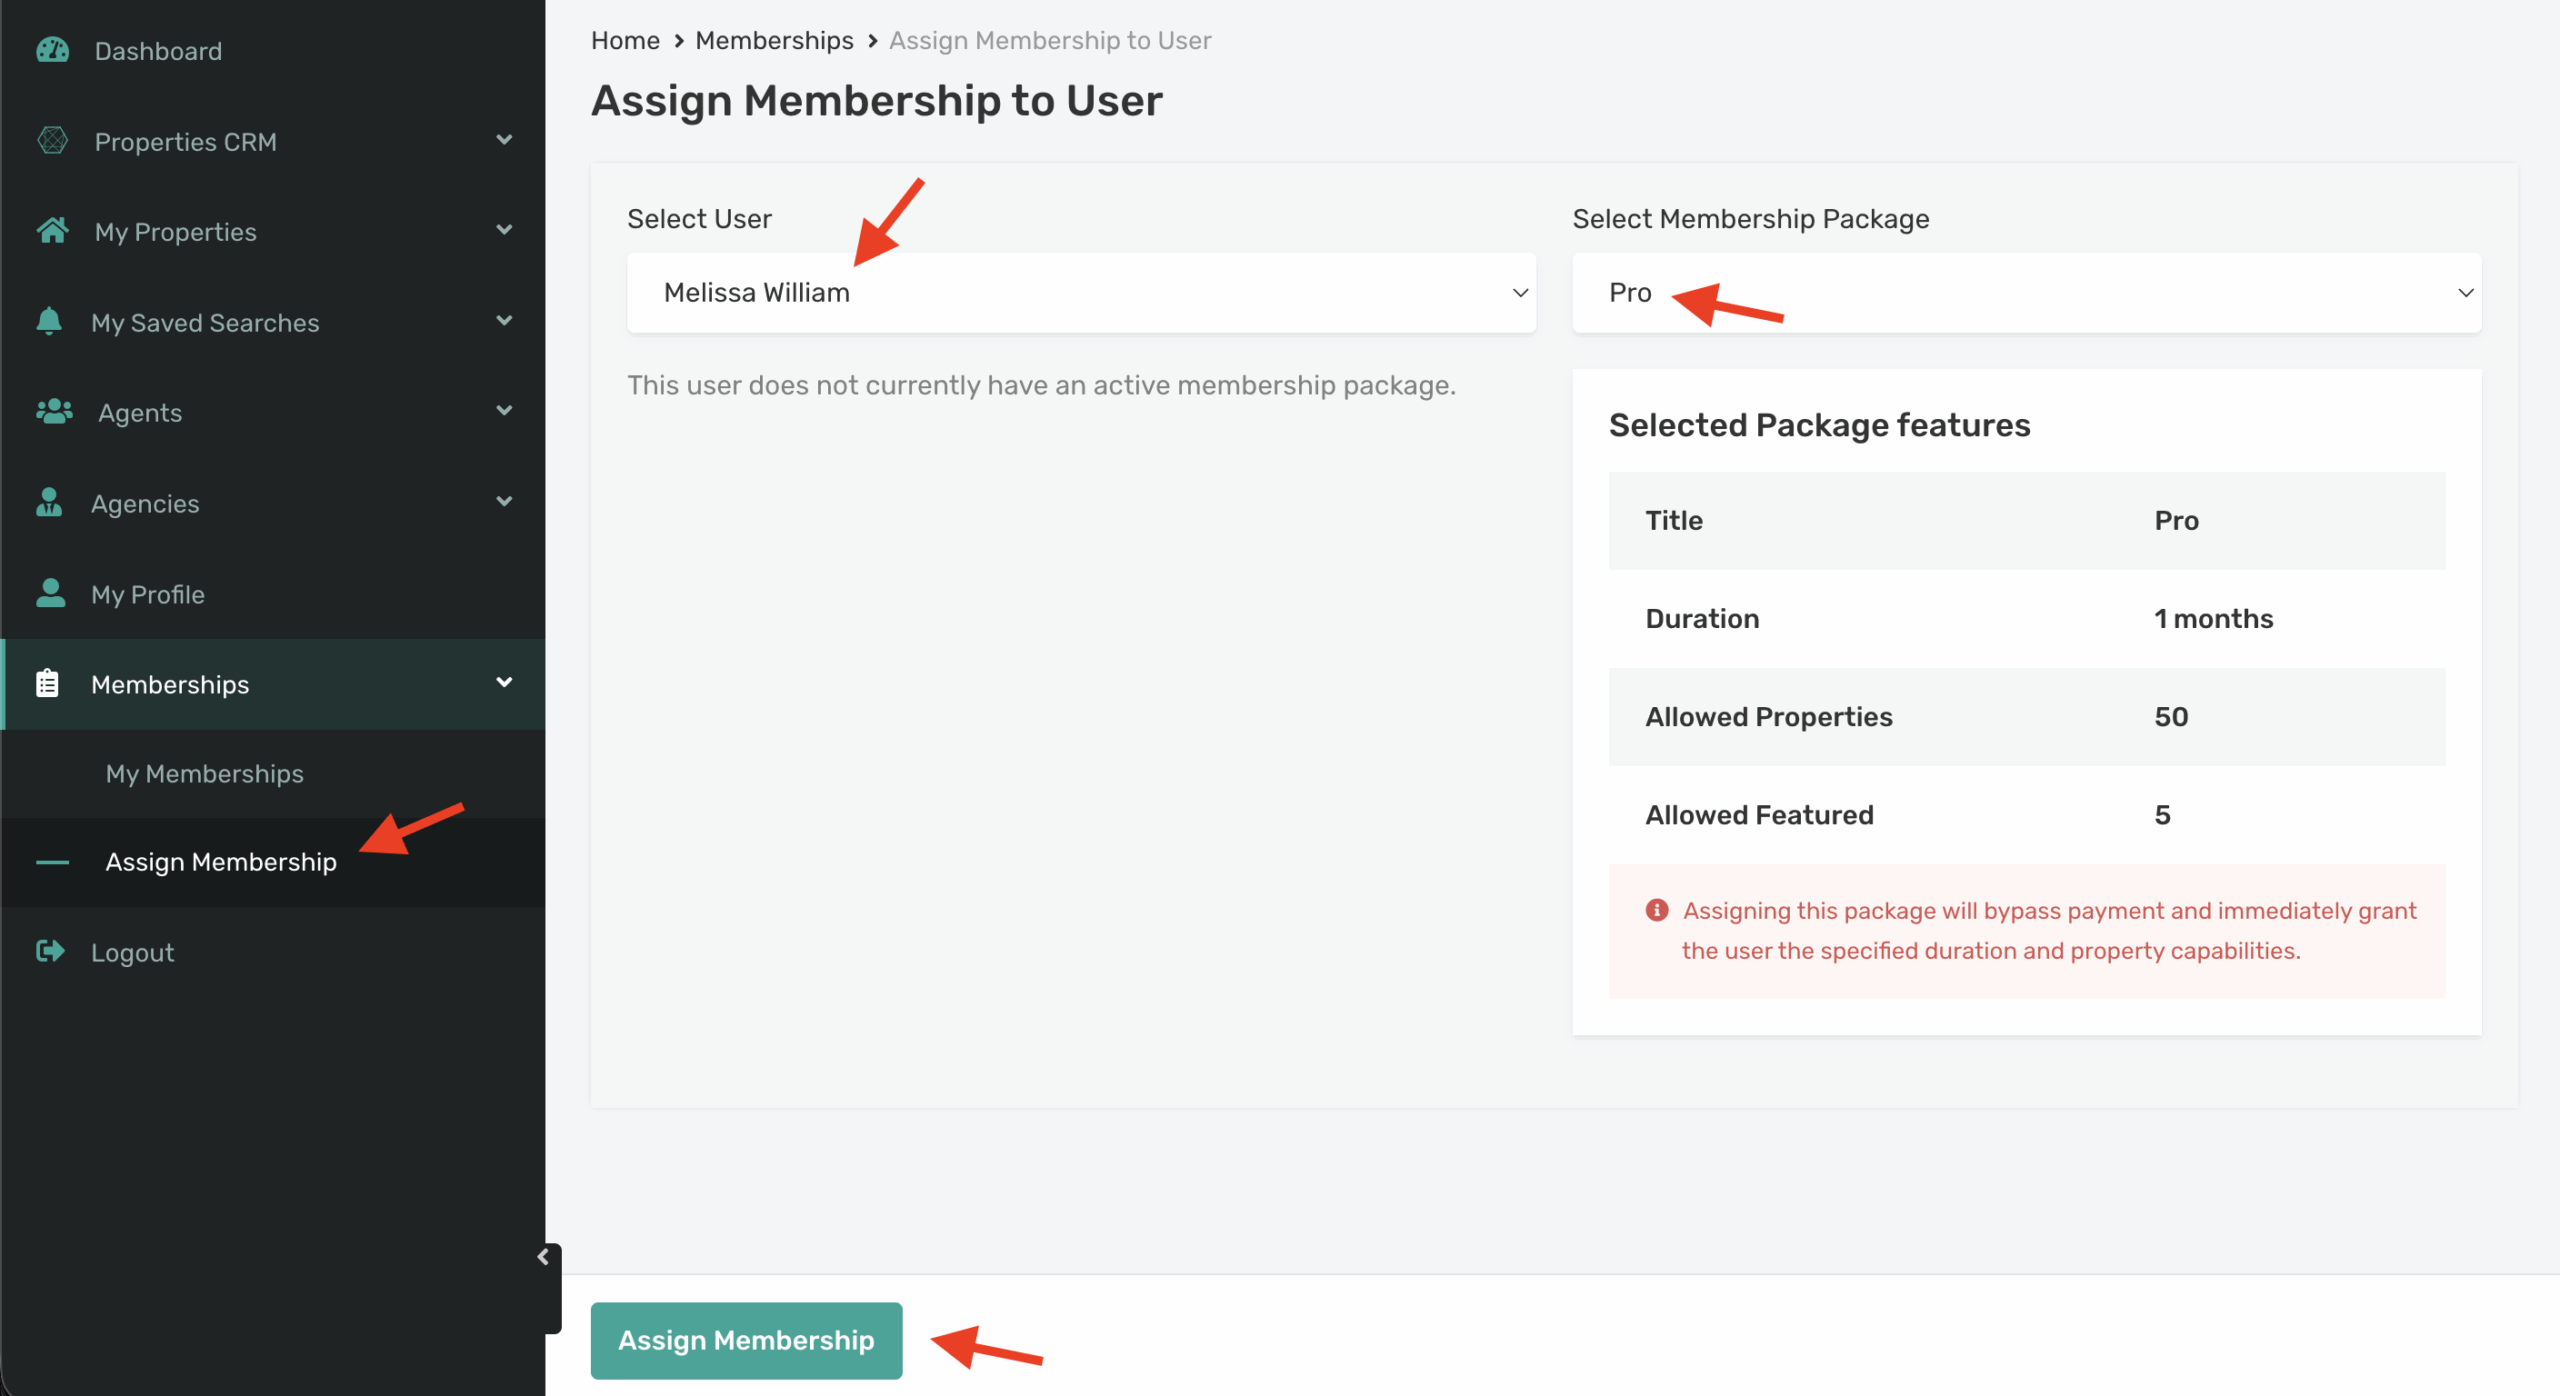
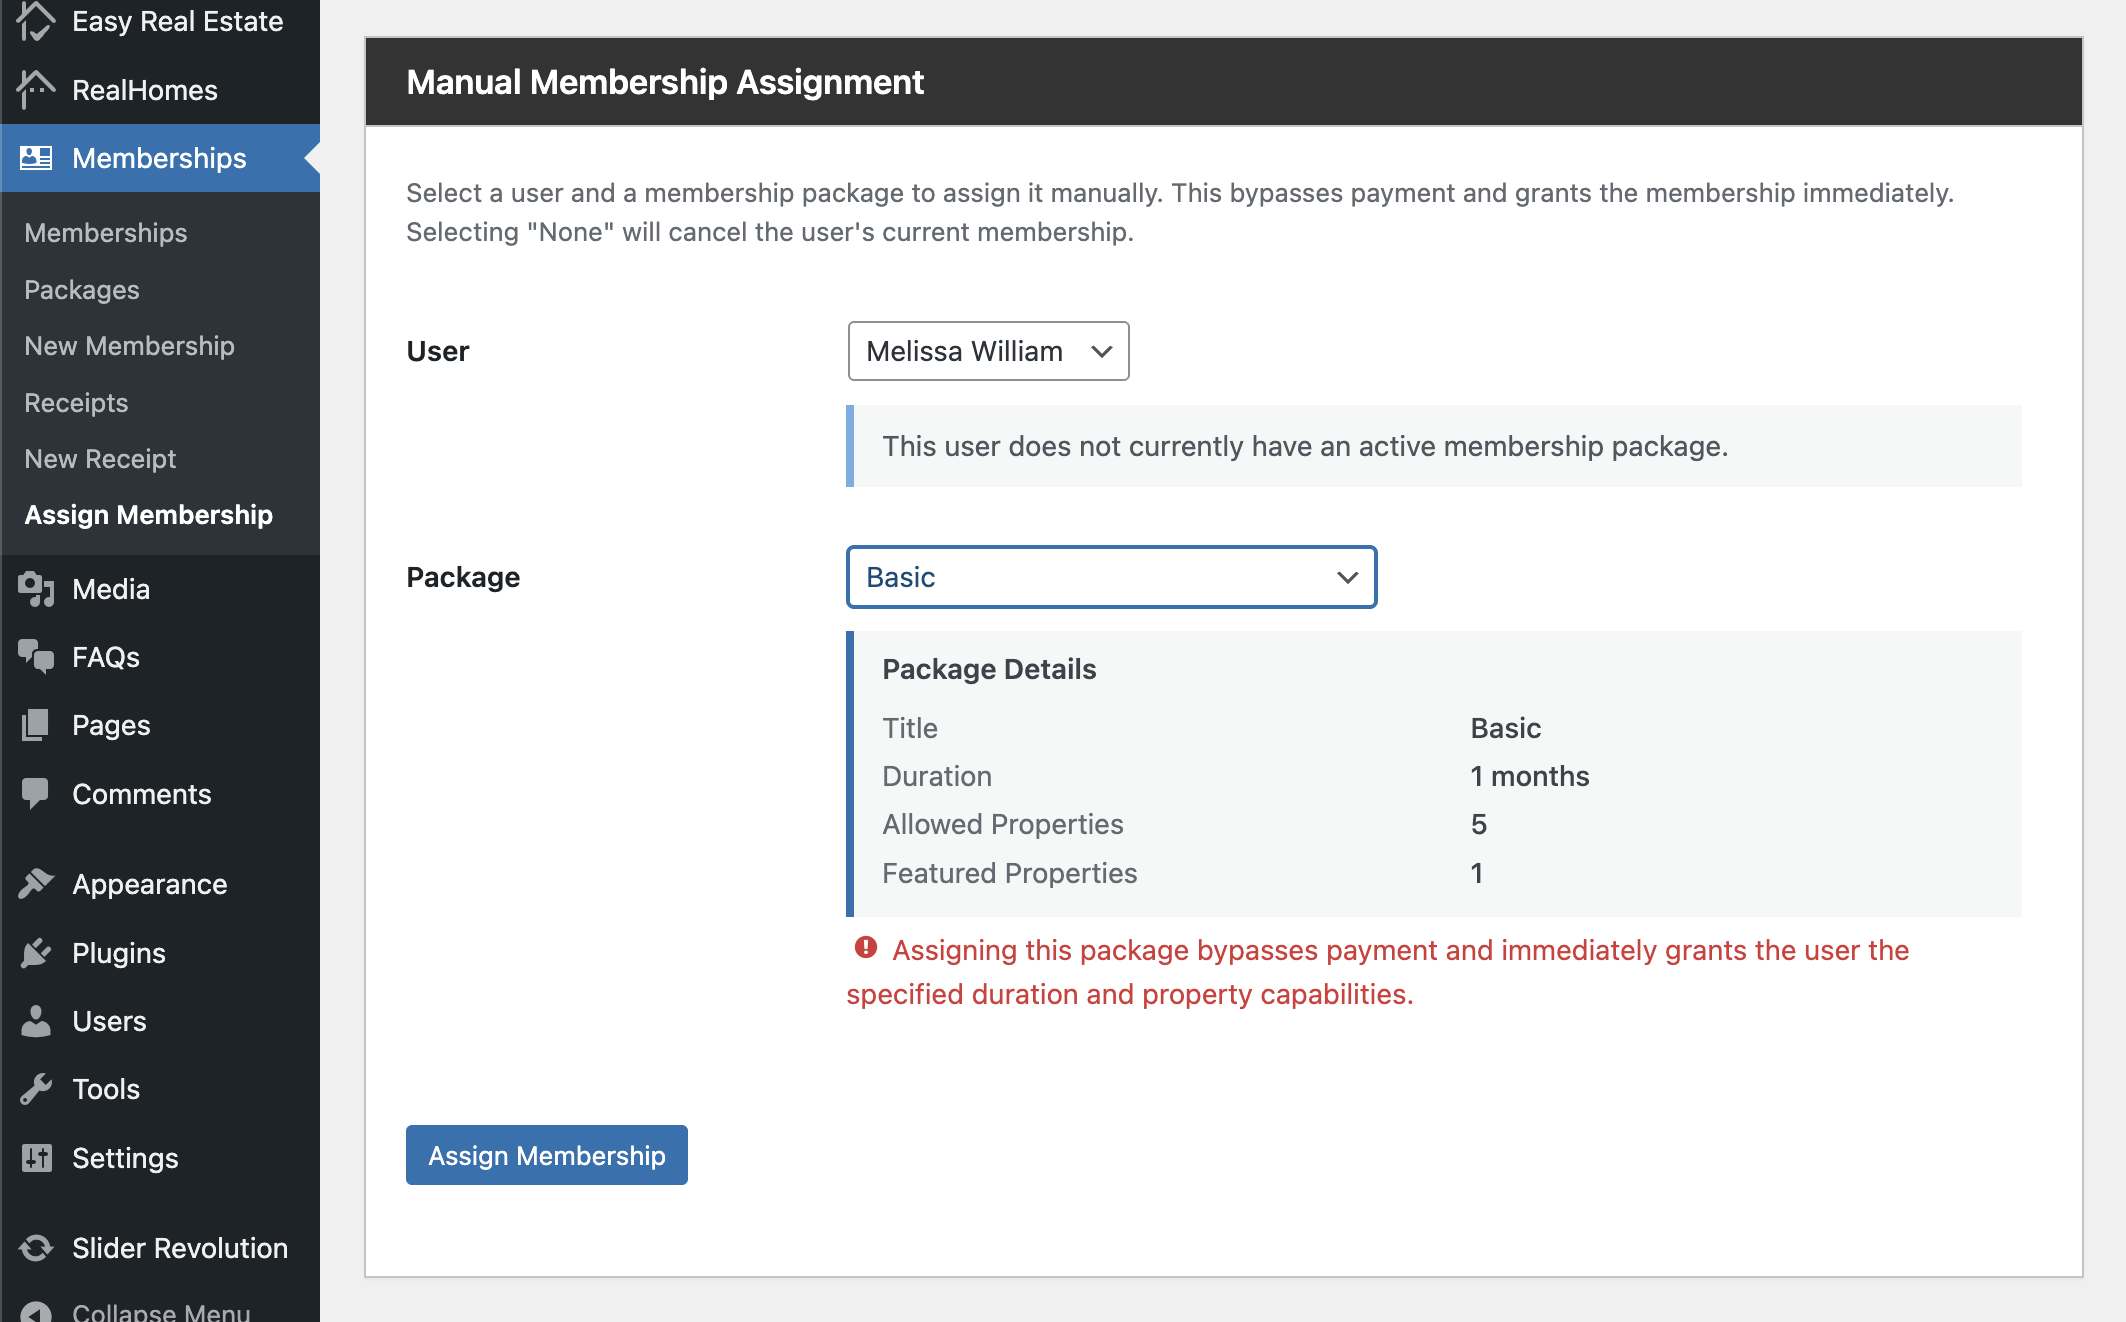
Assign Membership Manually
You can also assign memberships to each user on your website manually. This feature is available at the backend and in the RealHomes Dashboard (frontend) as well.
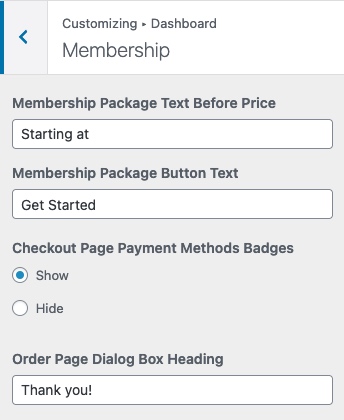
Labels Settings
You can change the Packages, and Thank you page labels and show/hide Payment Methods Badges by navigating to the WordPress Dashboard > Customizer > Dashboard > Membership options panel. A related screenshot is given below.
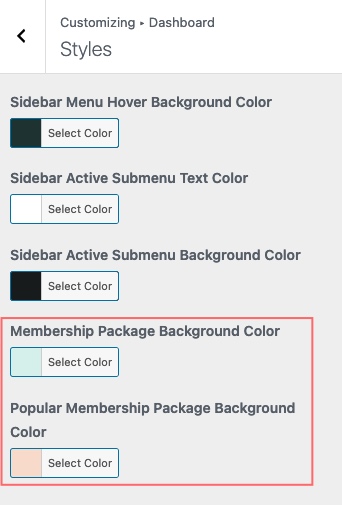
Styles Settings
The package’s colours can be changed from the Dashboard → Customizer → Dashboard → Styles option panel at the bottom, as displayed in the following screenshot.
Create a Membership Plan Page
Memberships are available in the dashboard for logged-in users. To display membership packages to a general audience, create an Elementor-based Membership Packages page.
The first step is to download the JSON files, which you can use to import the Membership Packages page. Click here to download the ZIP package, which contains the JSON files.
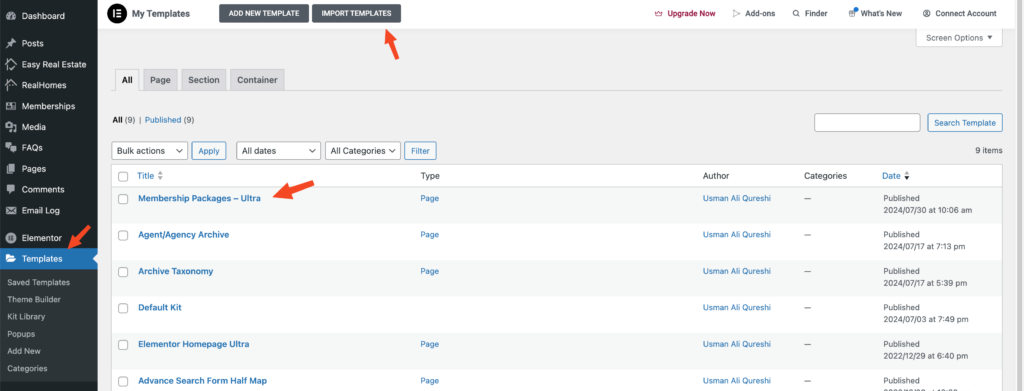
The next step is to extract the ZIP package, go to Dashboard → Templates → Saved Templates, and click “Import Templates“. You must only import the template according to the design you are using. For example, you should import the “membership-packages-ultra.json” file for Ultra design.
In the next step, create a page and give it a name according to your requirements, either “Membership Plans” or “Membership Packages“, and publish it. Once published, click on Edit with Elementor to open it in the Elementor editor.
Next, click the Gear icon to set the page template to “Elementor Full Width“. After setting the page template, click the folder icon to open the “Saved Templates“. Click on “Insert” next to the “Membership Packages – Ultra“.
After inserting the desired template, you can change the content and replace the information with your Membership Packages. One important thing is to assign the Membership IDs to the “Get Started” buttons. If you don’t assign them, the user won’t be redirected to the check-out page or login popup.
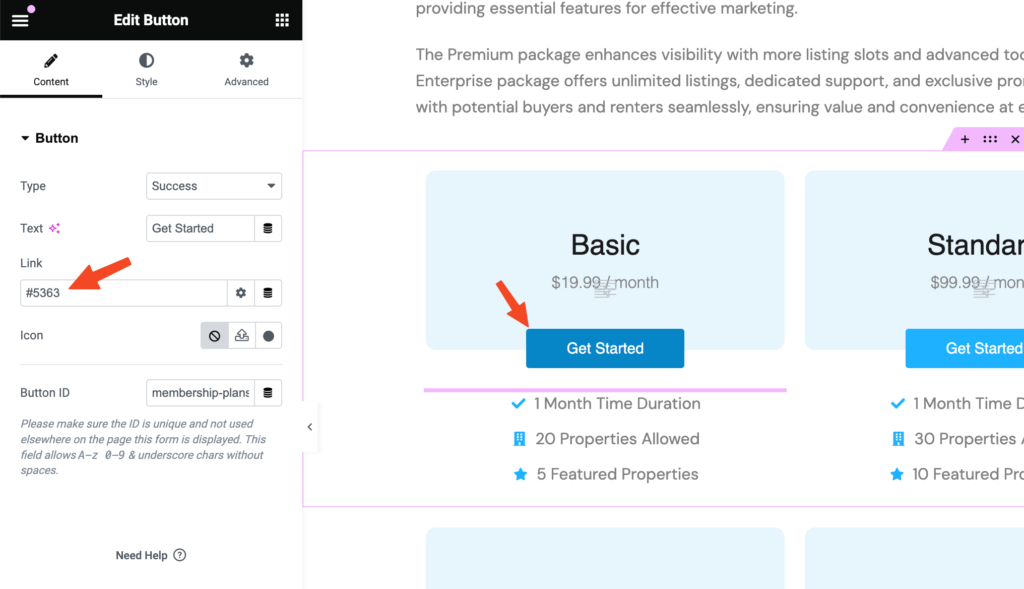
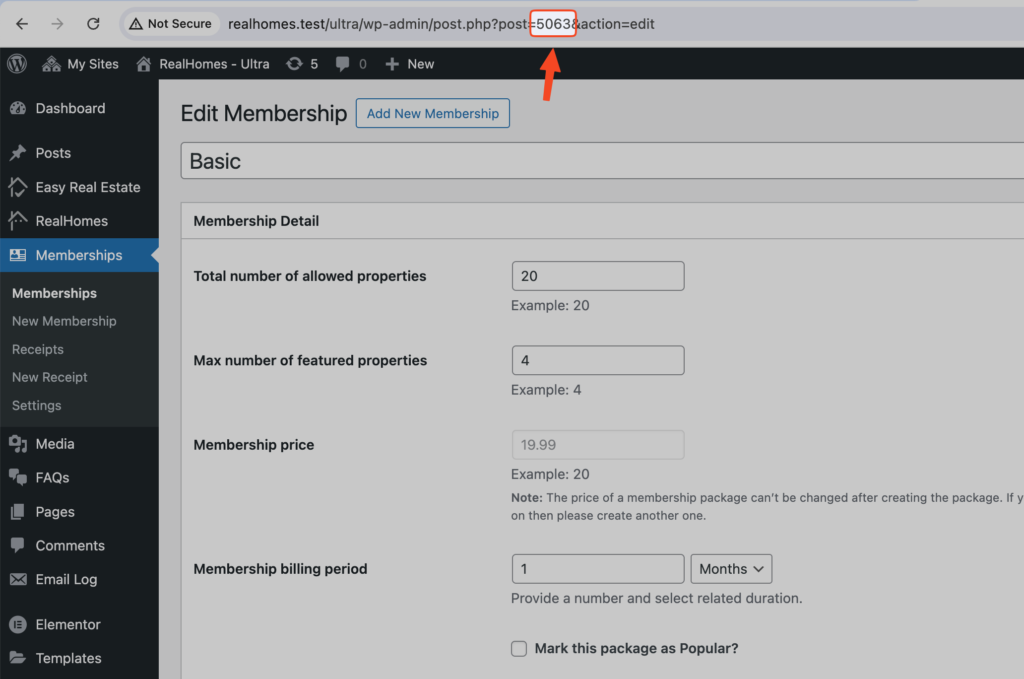
You can get the Membership ID by navigating to Dashboard → Memberships and editing the Membership plan. Then, you will find the Membership ID in the URL address bar.
If you followed the guide above and still need assistance with any step or section, our dedicated support team is here to help. You can reach them through our support platform.
We value your feedback, if you have any suggestions for improving the plugin or its documentation, please share them with us by clicking here.