
RealHomes Social Login Setup
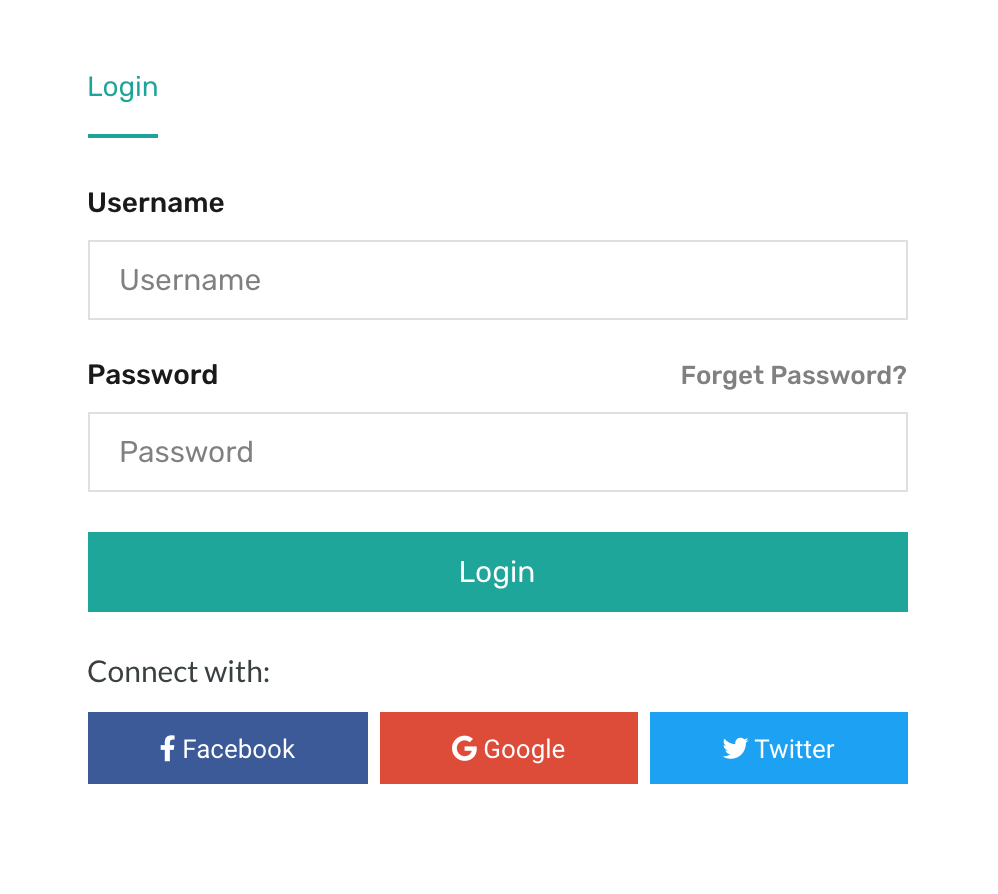
In this step-by-step guide, we will show how to set up login/registration with social networks Facebook, Google, and Twitter on a RealHomes website, as you can see in the following screenshot.
Prerequisites: ensure the RealHomes theme and Easy Real Estate plugin is installed and activated on your website before you follow this guide. For security reasons, whenever a user logs in, they receive a One-Time Password (OTP) via email. They need to verify this OTP to complete the login process. This extra step helps keep their account safe from potential threats.
This post will take you through the following sections.
- One-Time Password Page Setup
- Social Login Settings
- Facebook Login Setup
- Google Login Setup
- Twitter Login Setup
One-Time Password Page Setup
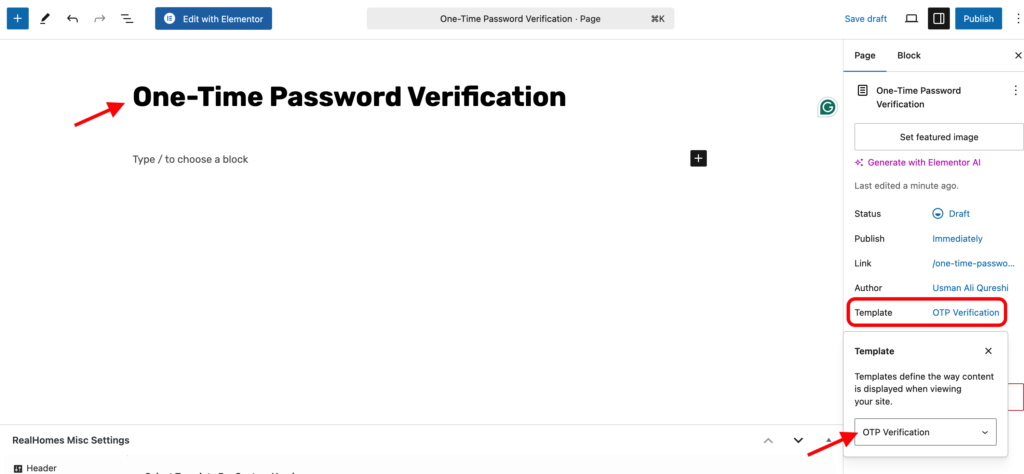
Before setting up any service for Social Login, you must set up the One-Time Password Page. First of all, please create a page and assign OTP Verification template to it.
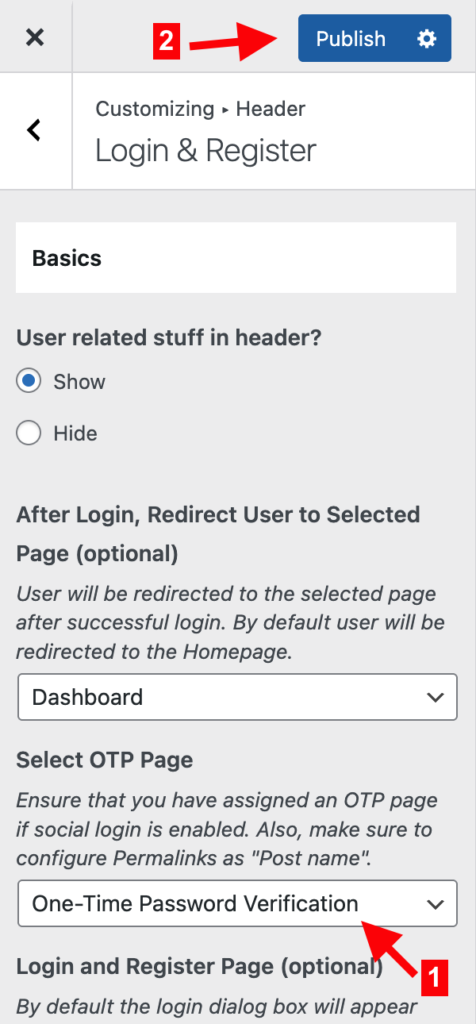
After creating the page, kindly navigate to Dashboard → RealHomes → Customize Settings → Header → Login & Register and select the page as demonstrated below.
Social Login Settings
For the social login settings, navigate to the Dashboard → Easy Real Estate → Settings → Social tab and look for the Social Login Settings section.
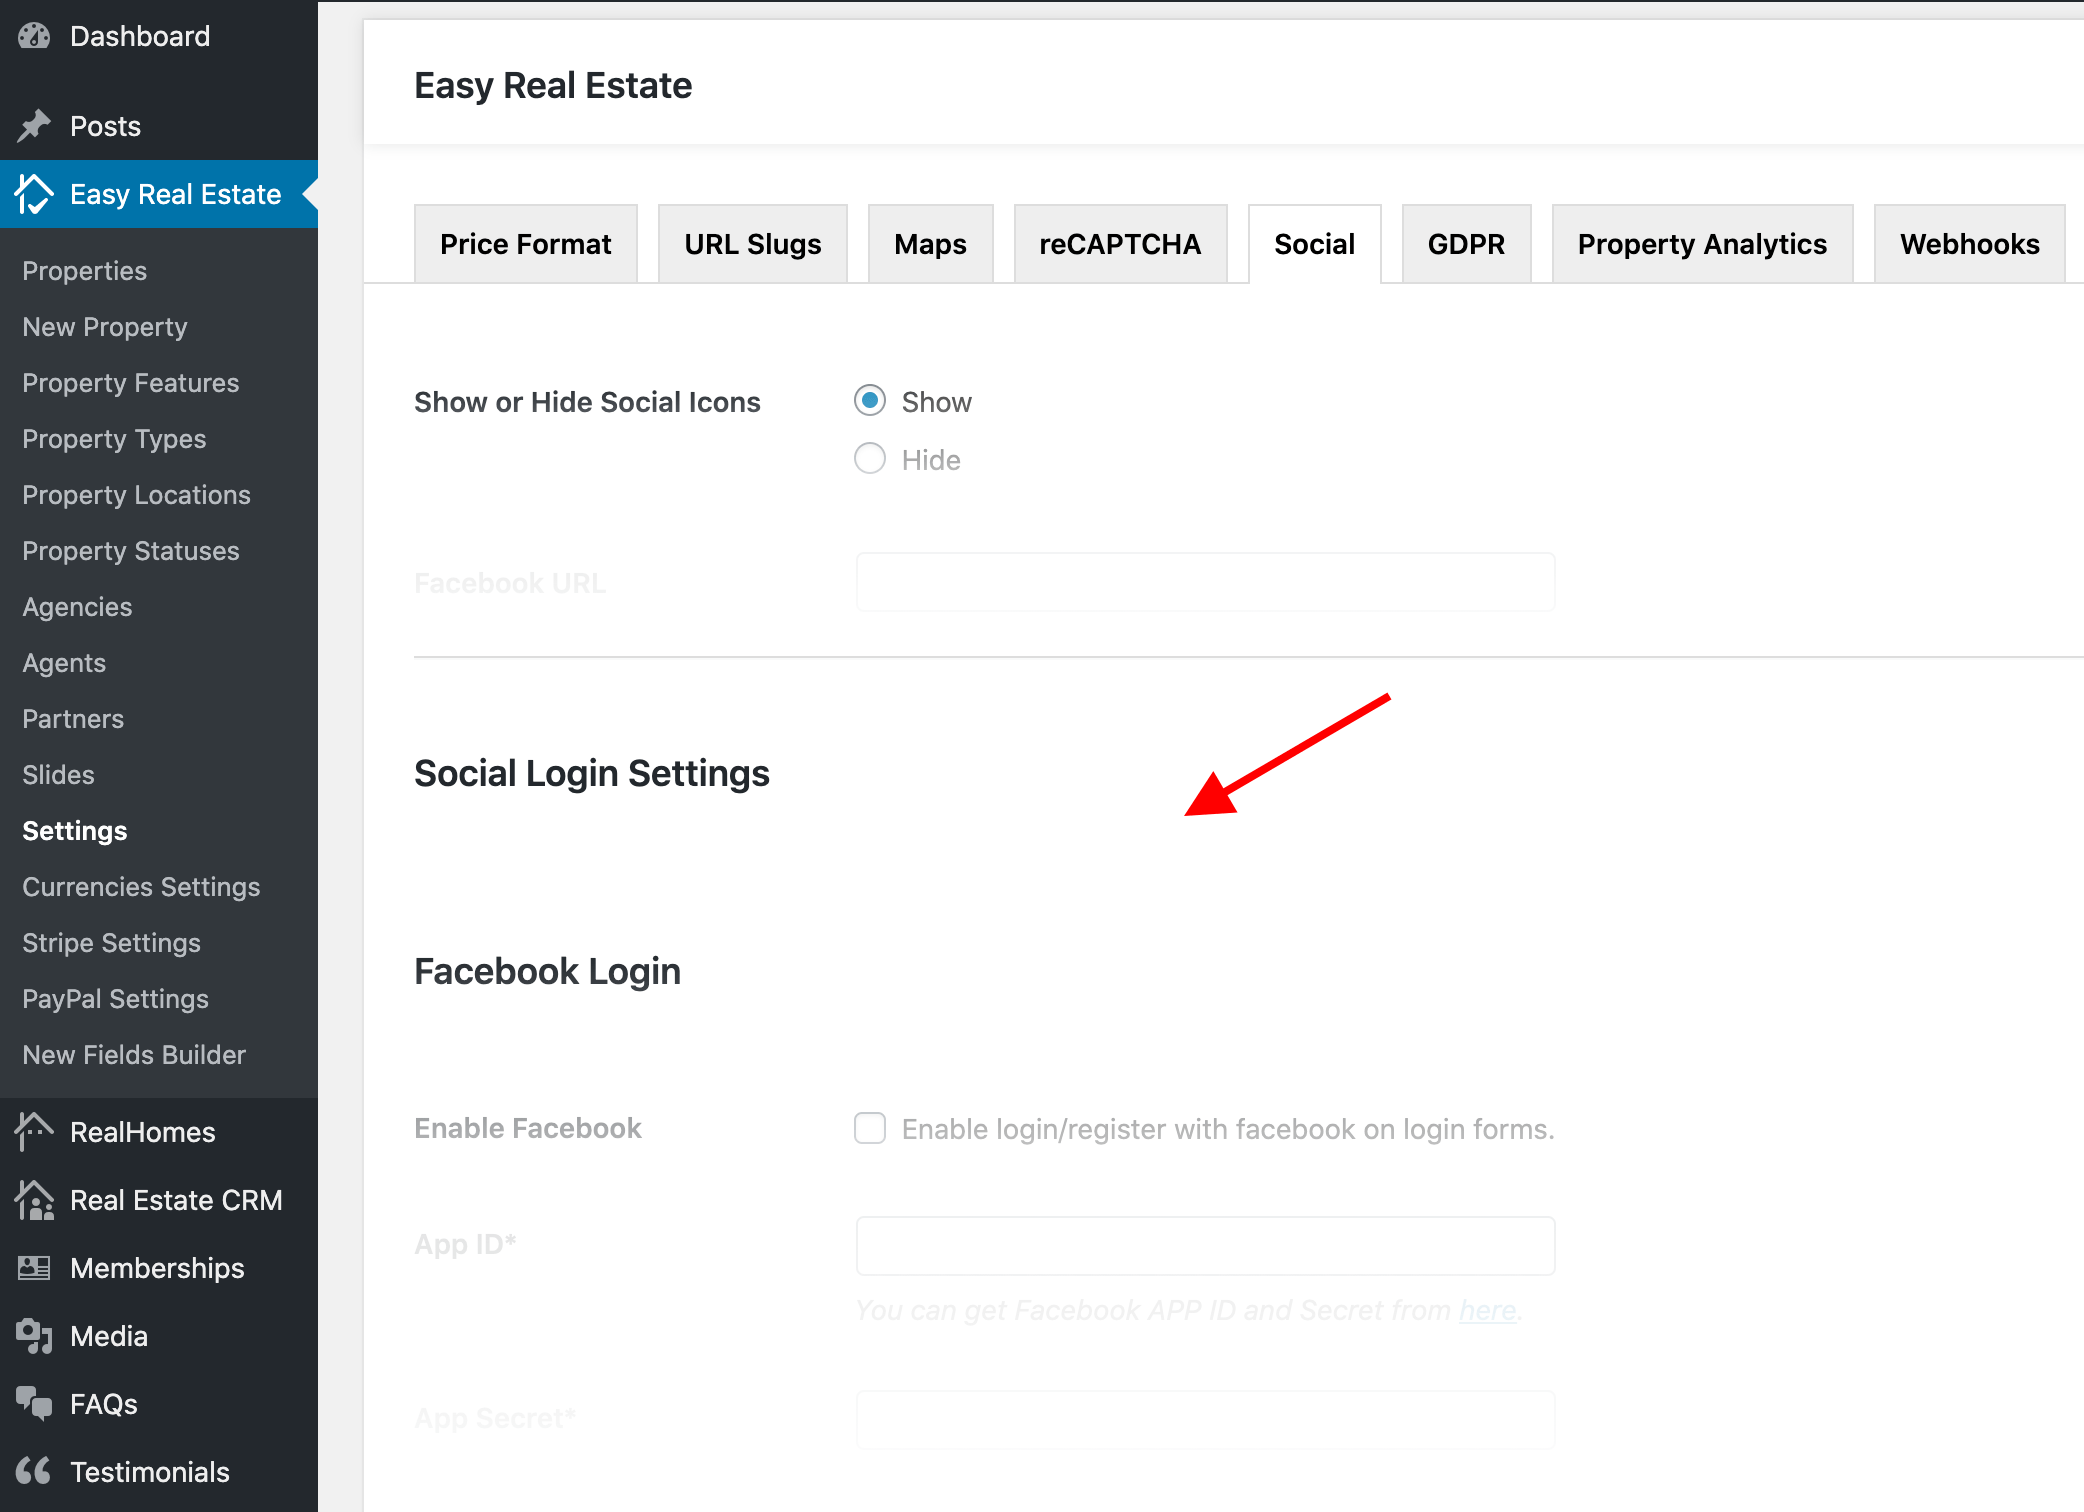
Facebook Login Setup
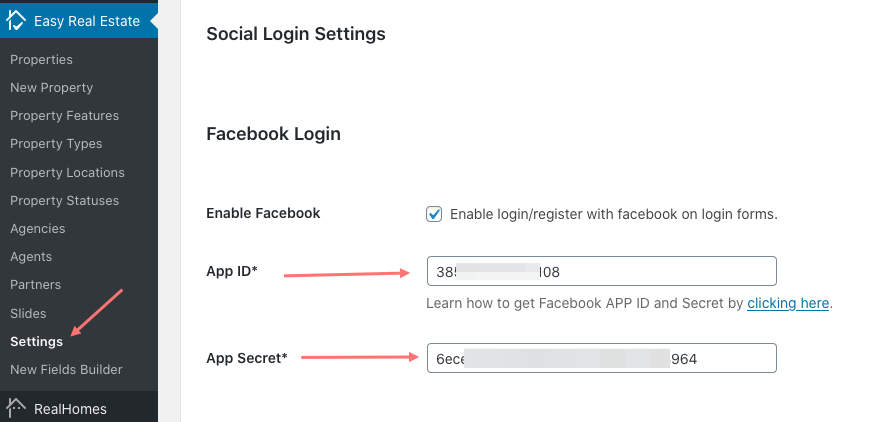
This section allows you to Enable/Disable the login/register with Facebook on login forms and set the App ID* and App Secret* values.
Get your Facebook App Keys
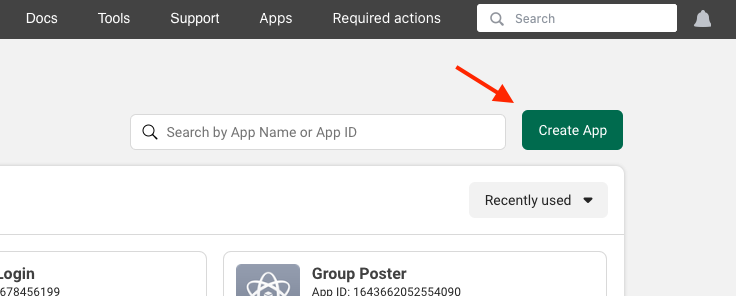
You would need to create a Facebook Login App. Log in to the Facebook Developer account using your Facebook account access credentials. After logging in, go to the Facebook Apps page and click on the Create App button.
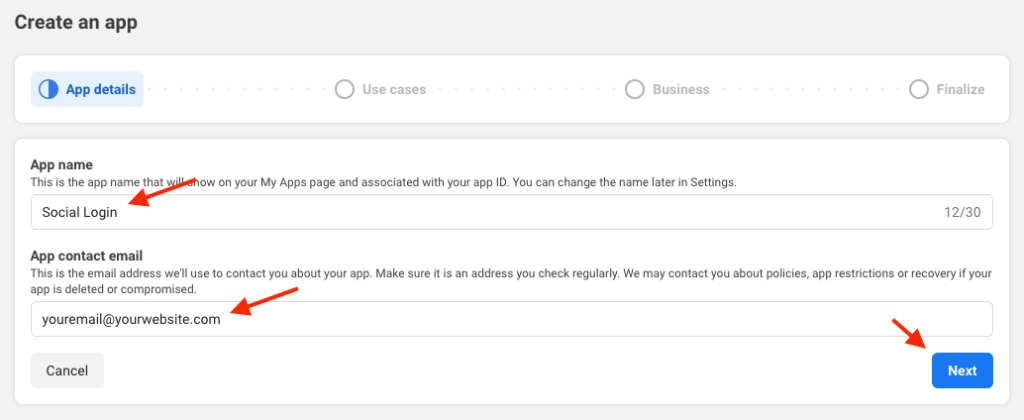
On the next page, you will see a Dialog. Click on Create App, provide the following details, and click “Next.”
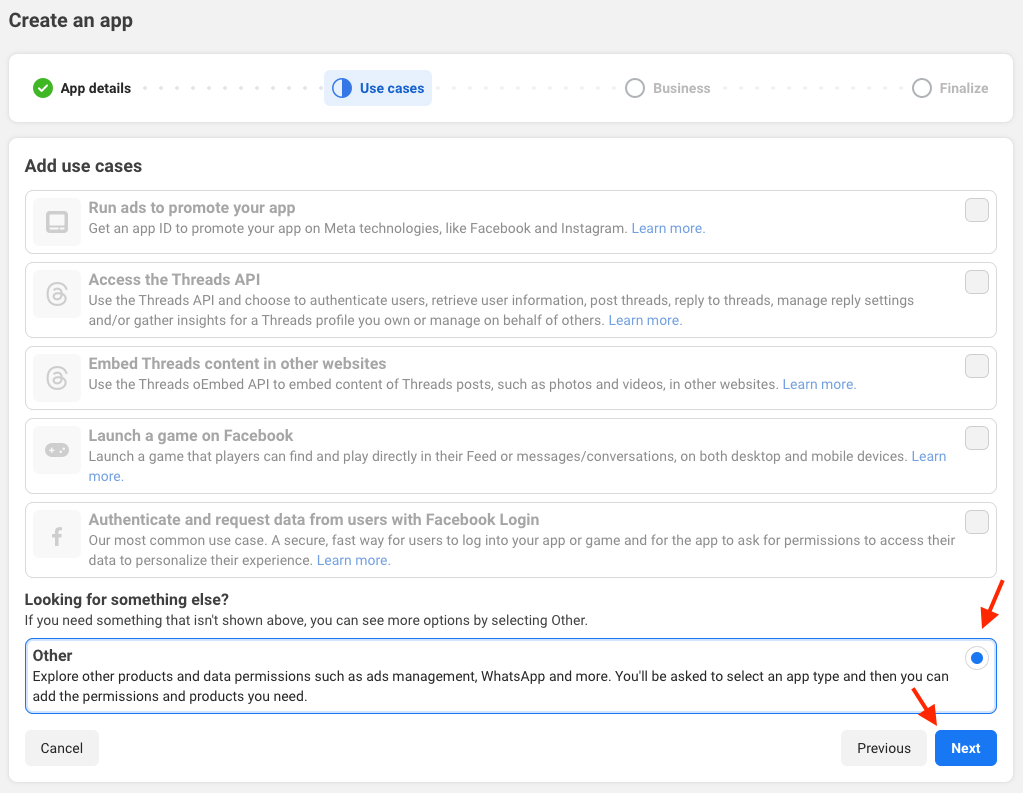
Next, you must select a use case for your application. Please select “Other” and click “Next“.
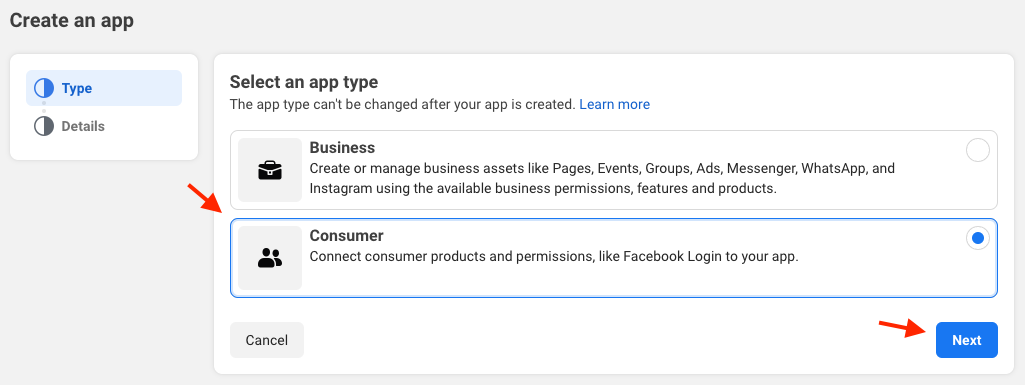
Select “Consumer” as the application type, as demonstrated below, and click “Next“.
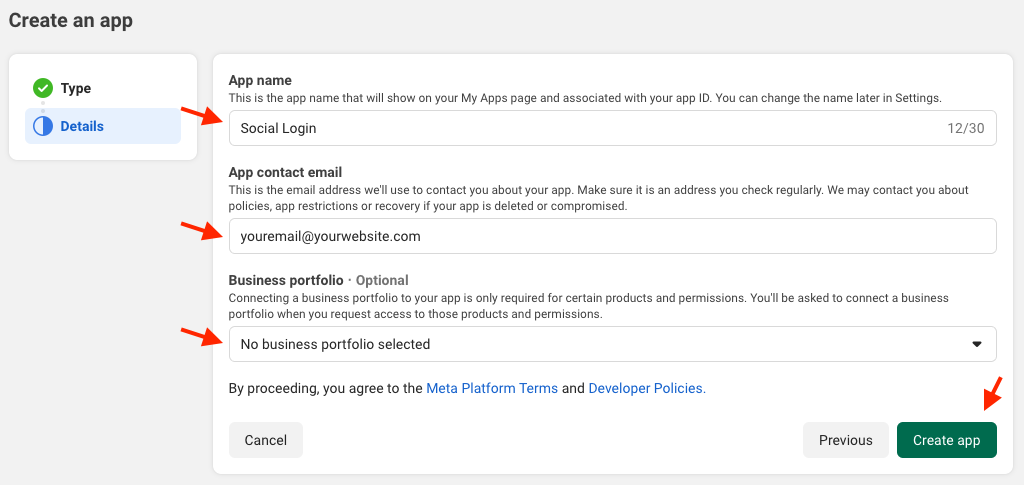
Provide the App Name and Contact Email address, leave the third field as it is, and press the Create App button.
There might be a reCaptcha security check. Once you pass that check, you will be redirected to the Add a Products page.
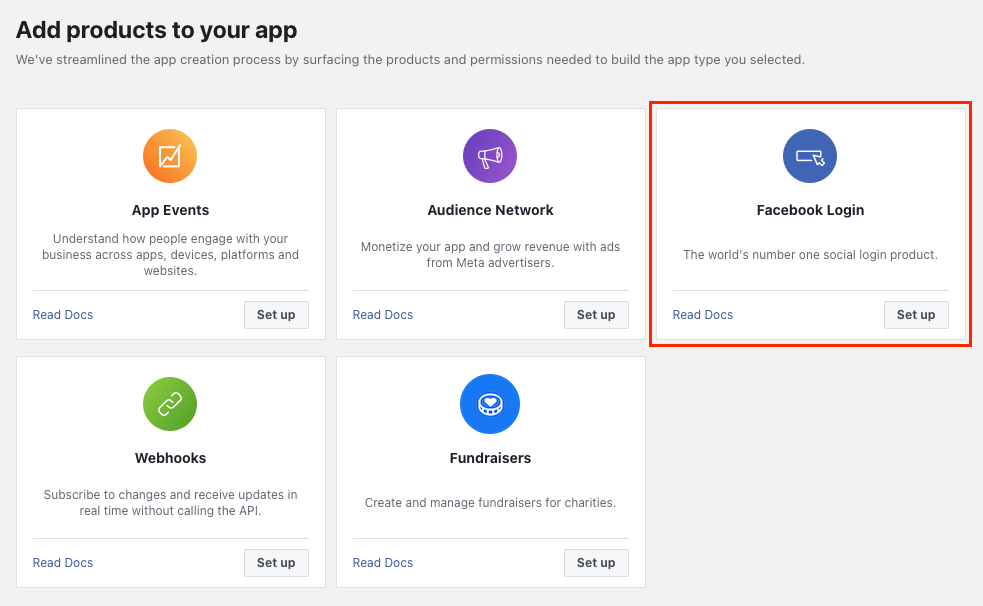
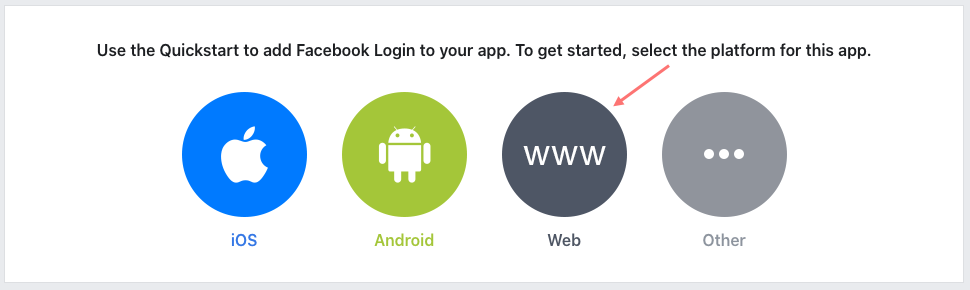
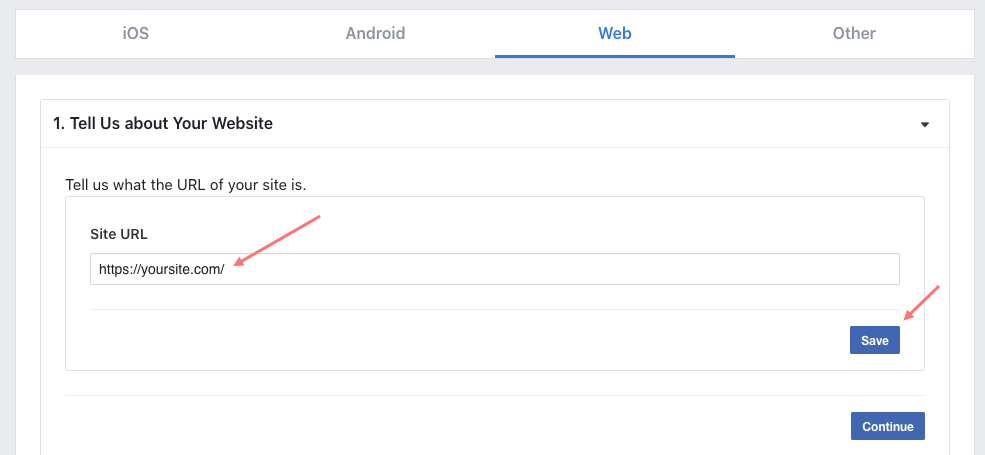
Click on the Set Up button of the Facebook Login product, which will take you to the Quickstart. Choose Web and provide your Site URL, as displayed in the screenshots below.
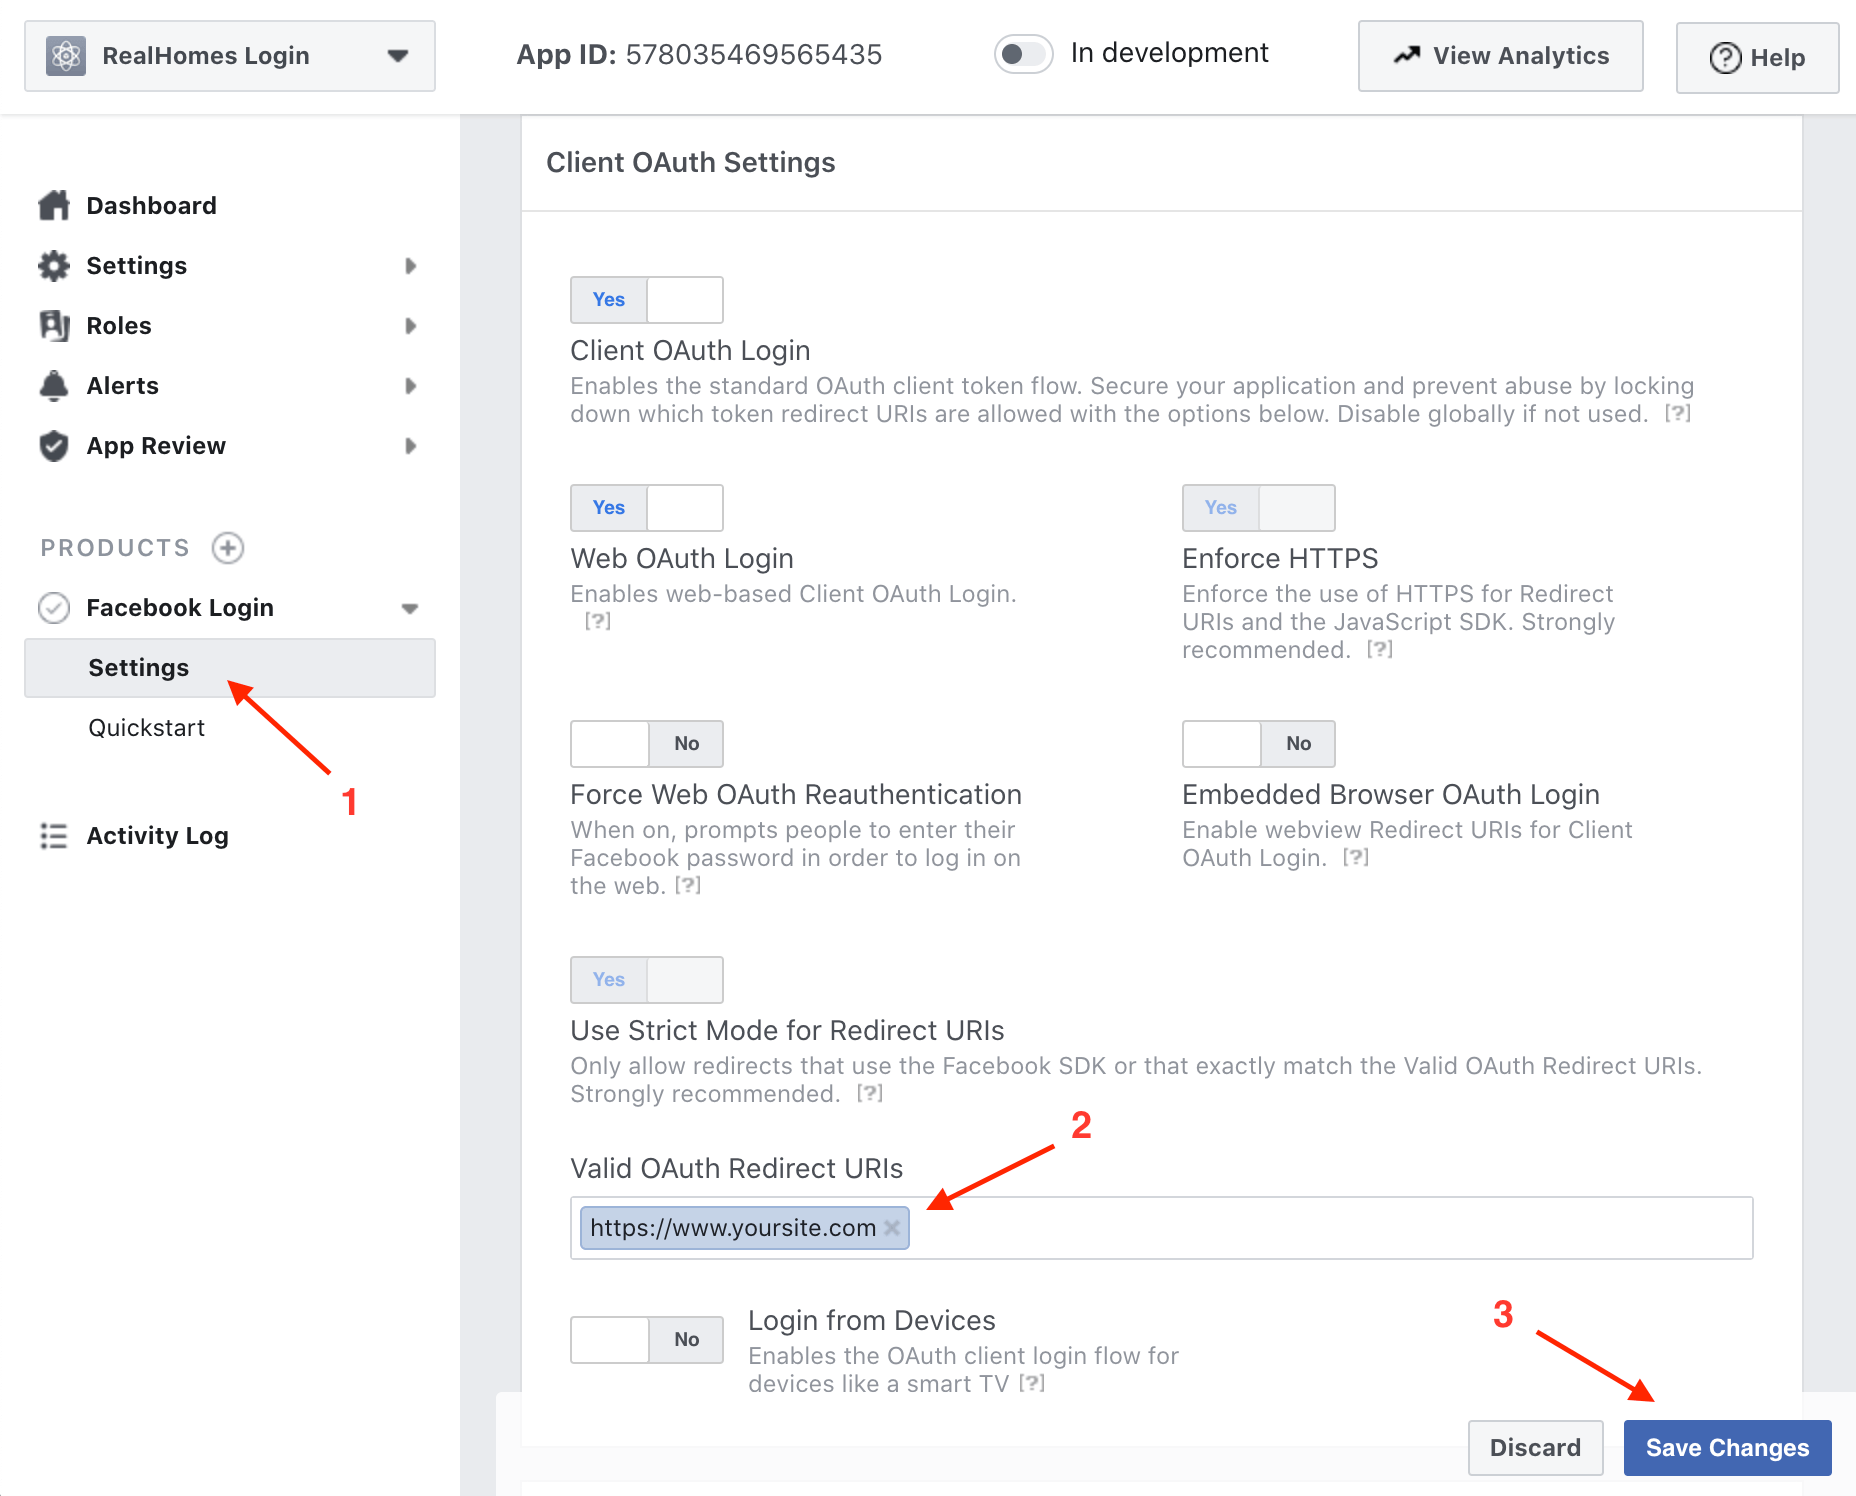
After saving the Site URL, navigate to the Settings page of the Facebook Login. In the Valid OAuth Redirect URIs field, provide your website URL, and click on the Save Changes button.
Go to the Facebook App Settings → Basic, provide the Privacy Policy URL, Terms of Services URL, App Domain, and Choose a Category, then click the Save Changes button.
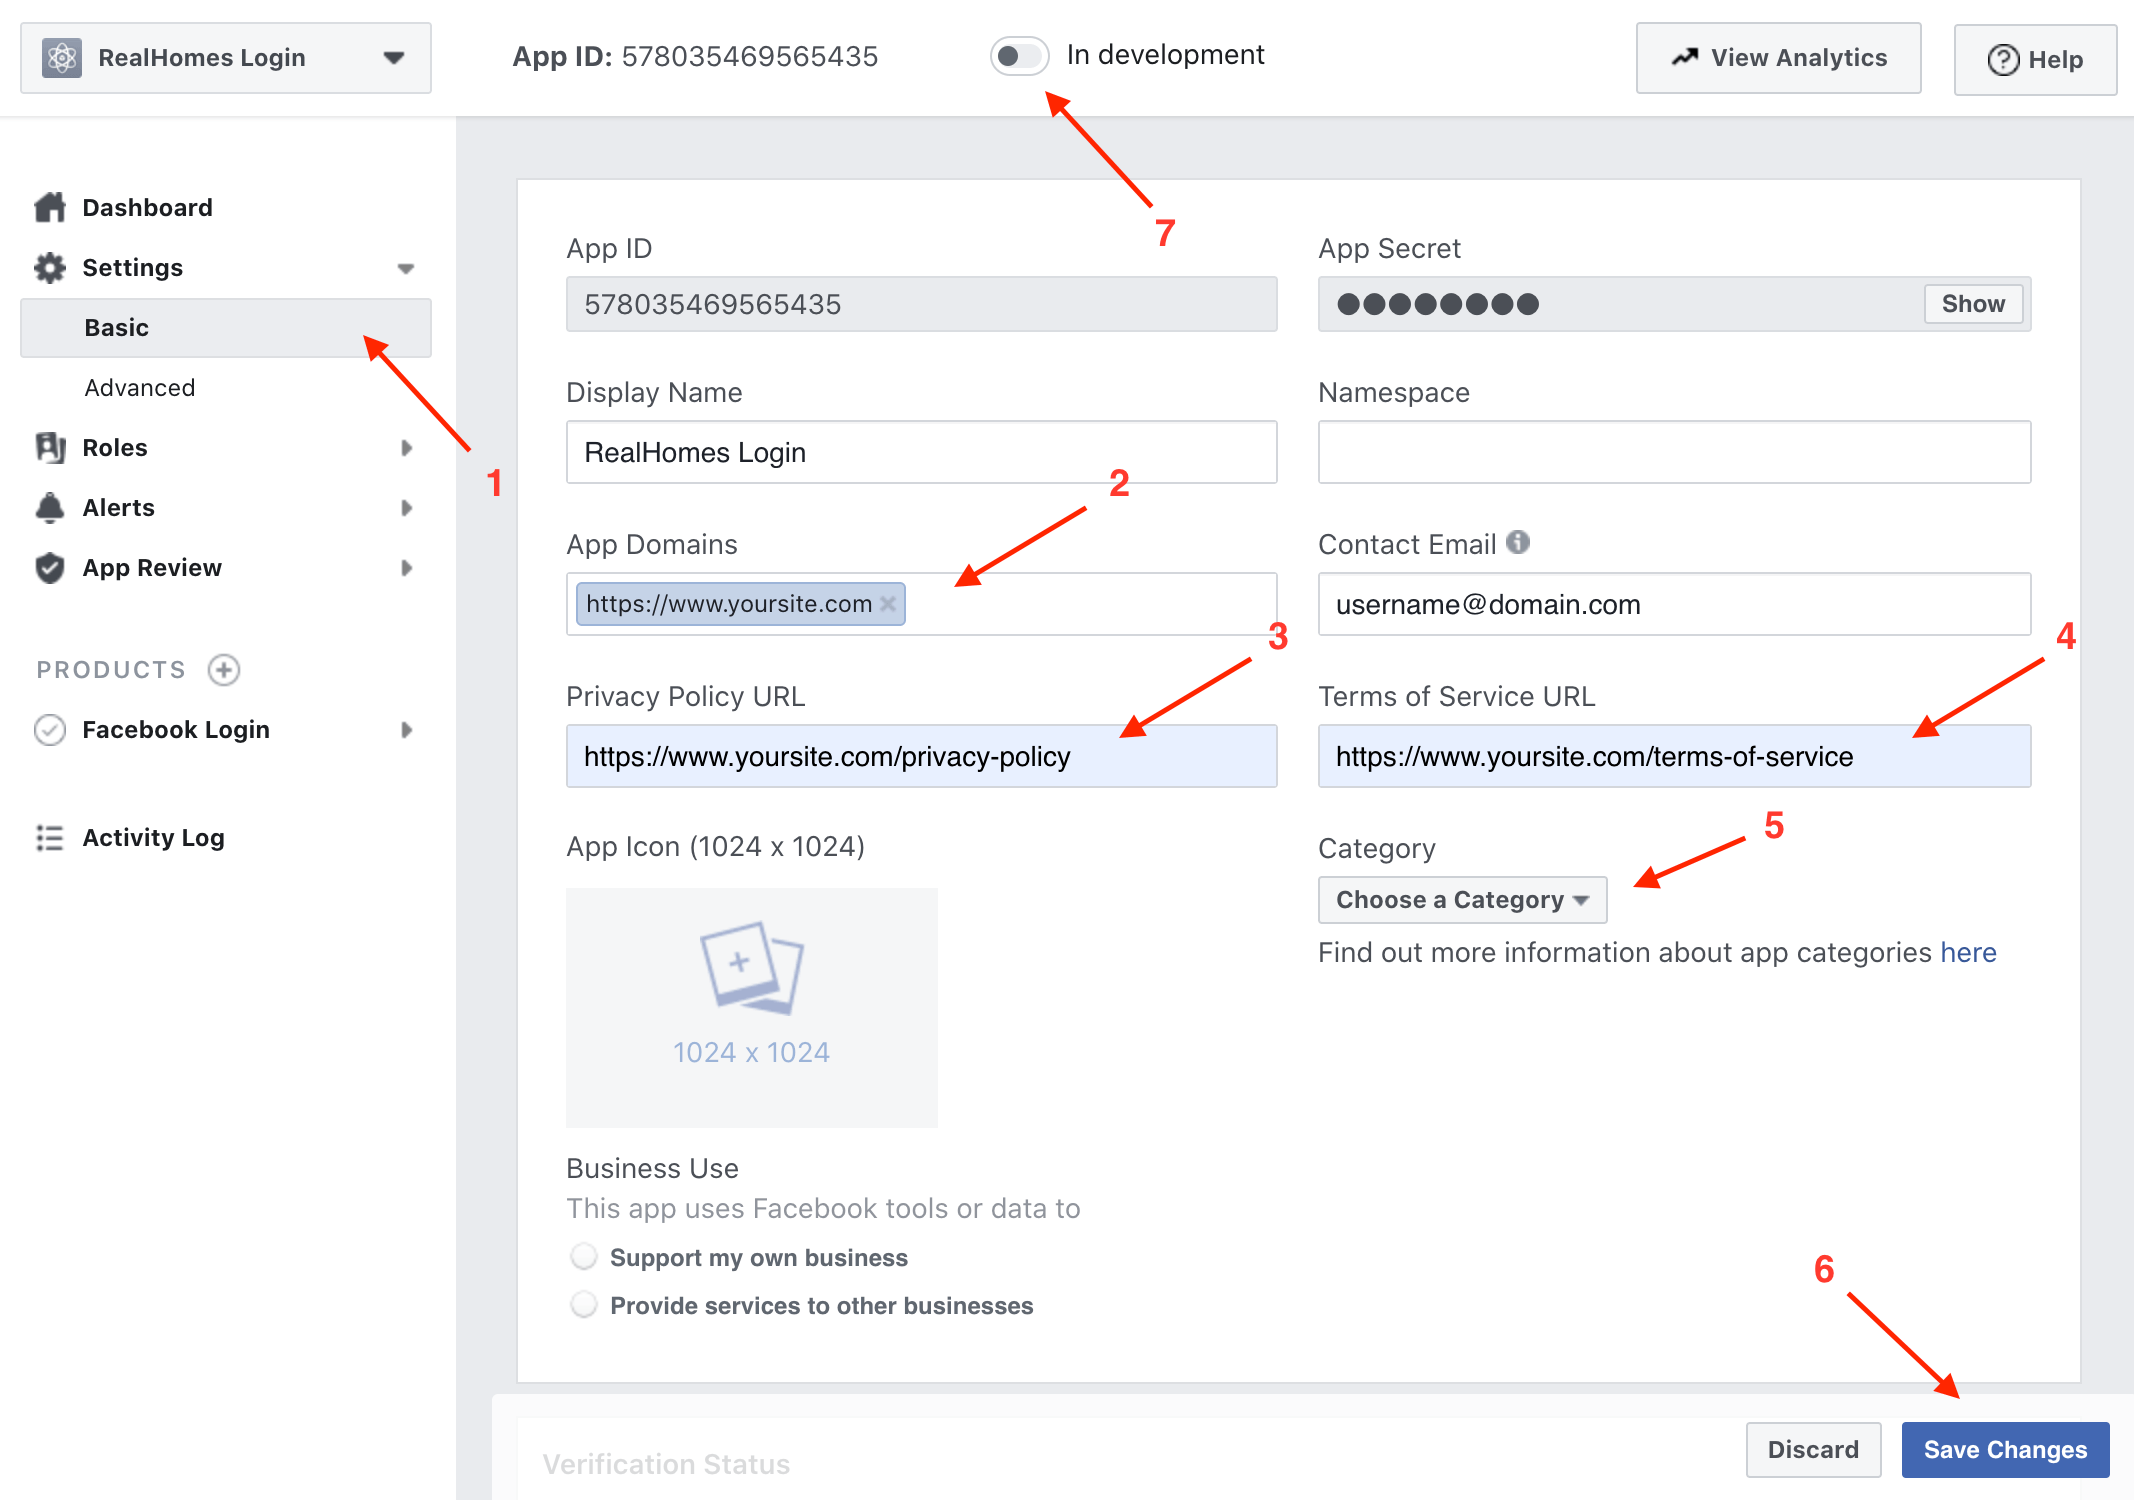
After that, click on the small switch button next to the In Development label in the top bar to make your Facebook App Live, as guided in the following screenshot.
Now copy the App ID and App Secret to your website’s Facebook Login settings.
Google Login Setup
This section allows you to Enable/Disable the login/register with Google on login forms and set the API Key*, Client ID*, and Client Secret* values.
Get your Google API and Client Keys
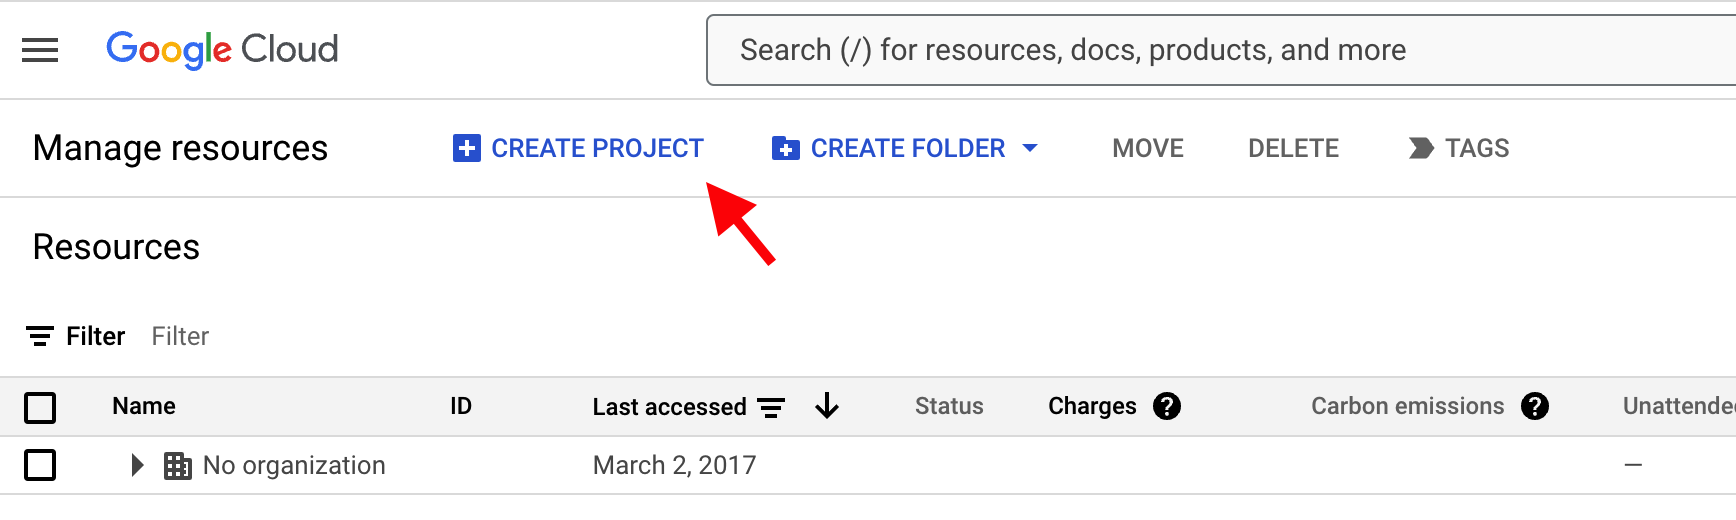
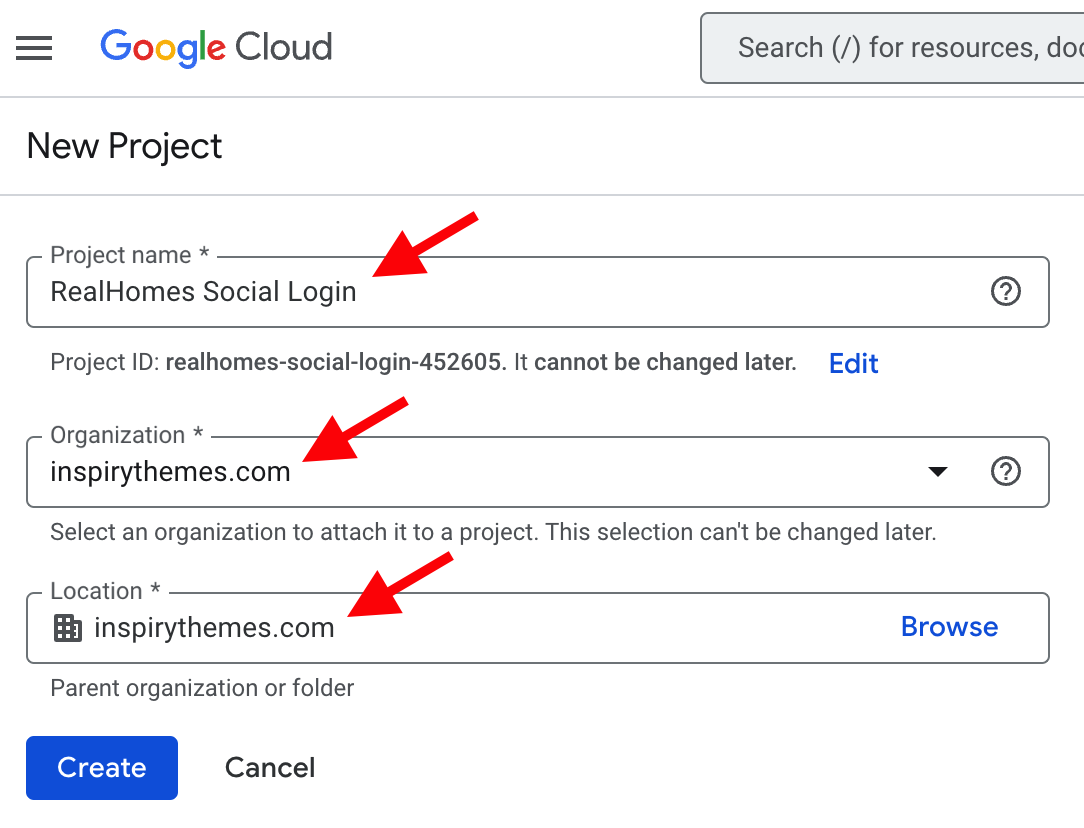
You would need to create a Google Project. Login to Google Developer Console with your Gmail account access credentials. Go to the Cloud Resource Manager page and click the CREATE PROJECT button.
Enter the Project name, select an Organization, select Location, and press the CREATE button.
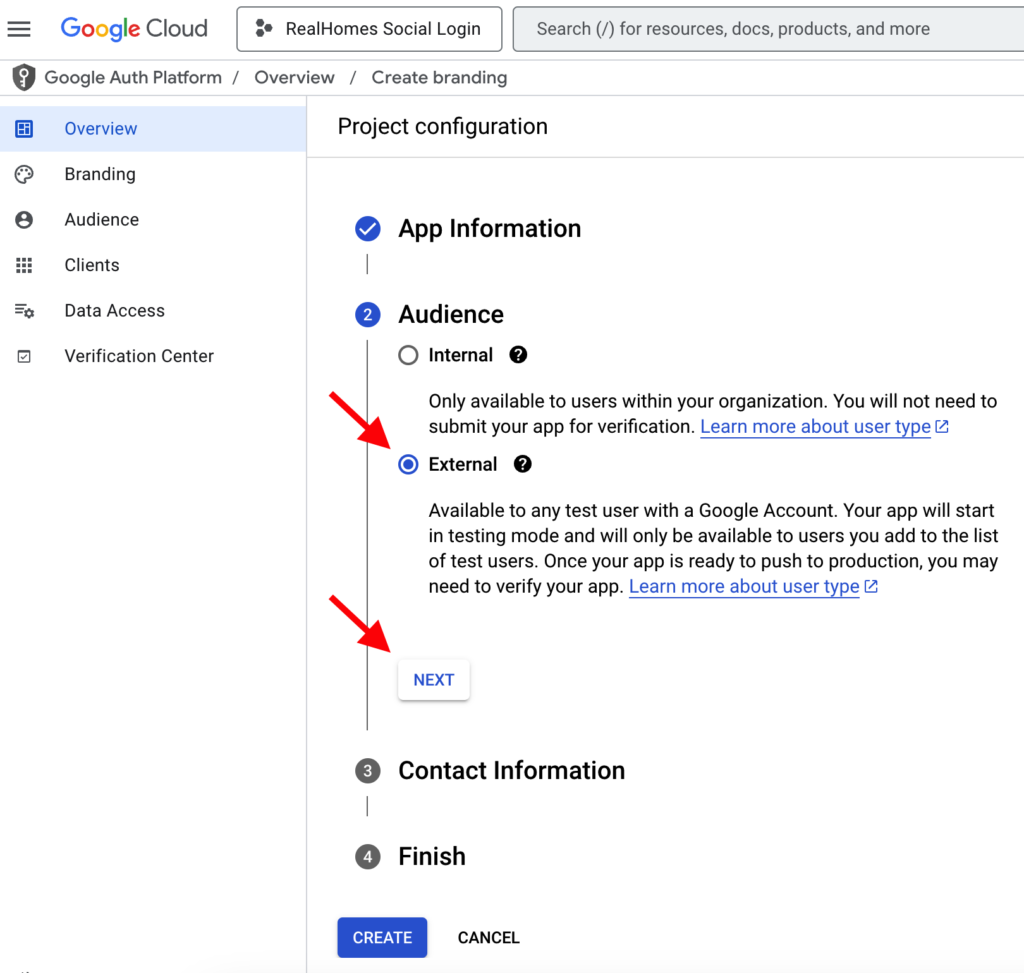
Once the project is created, select it, go to its OAuth consent screen page, and click Get Started. In the first step, provide the App name and User support email.

In the second step, select External for audience.
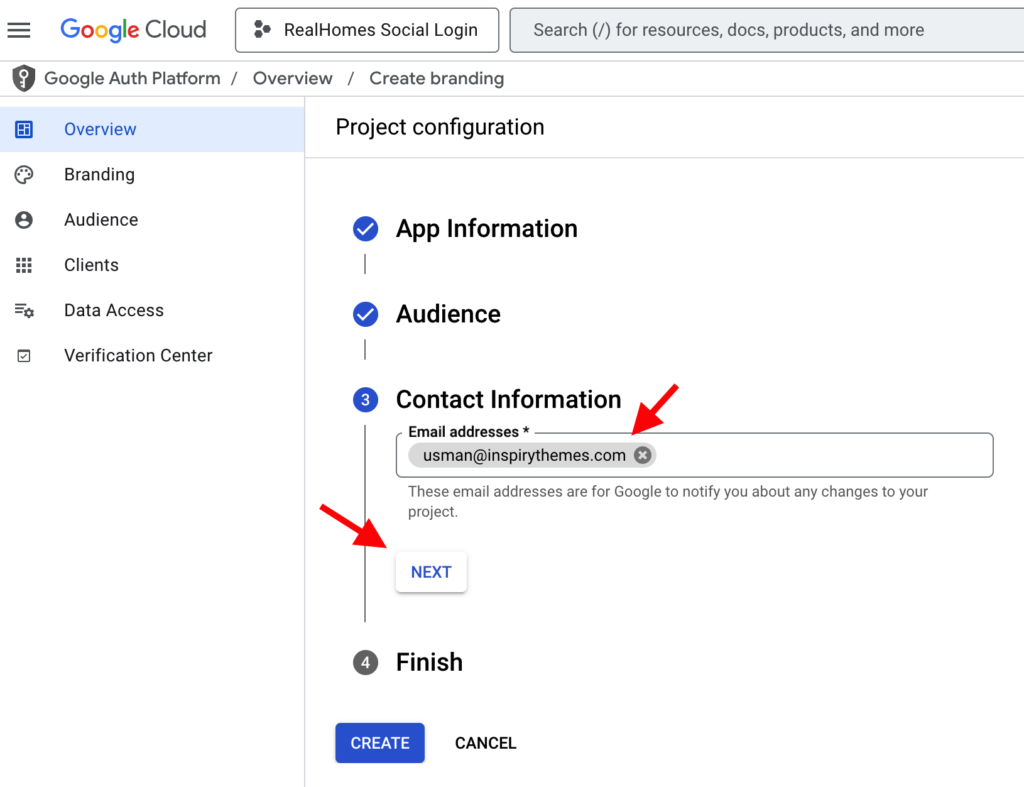
Enter the Contact Information in the third step.
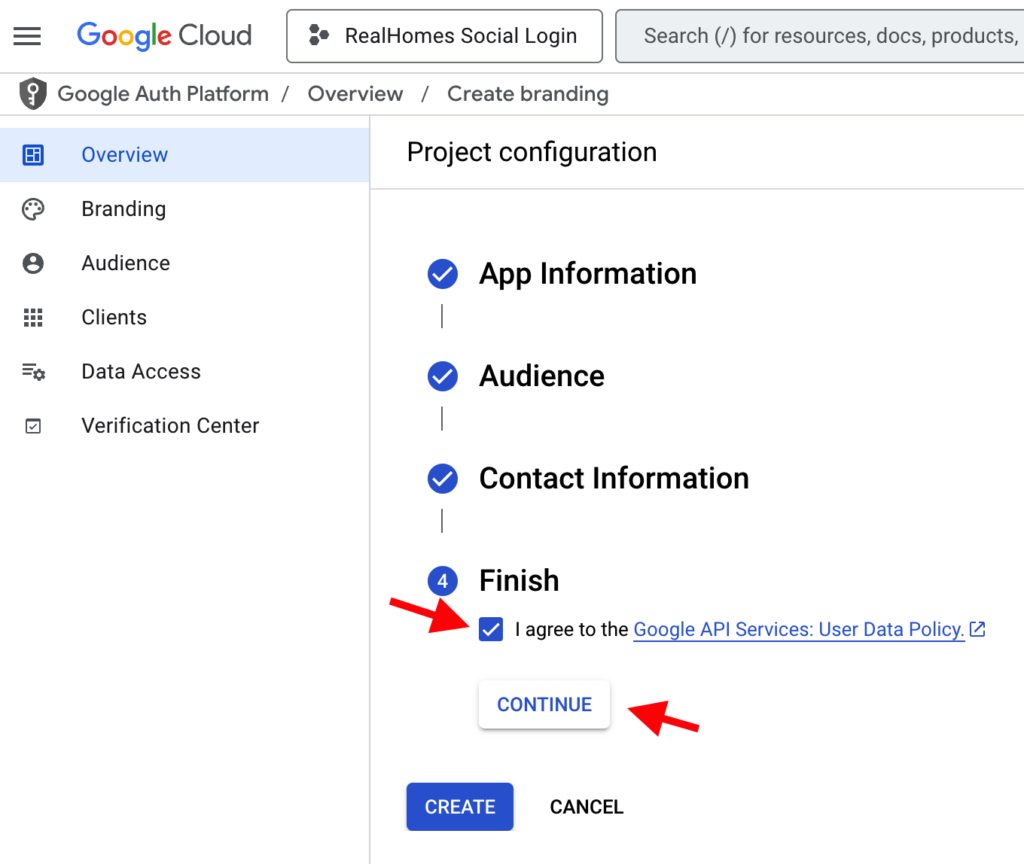
In the final step, click I agree.. check box and click CONTINUE.
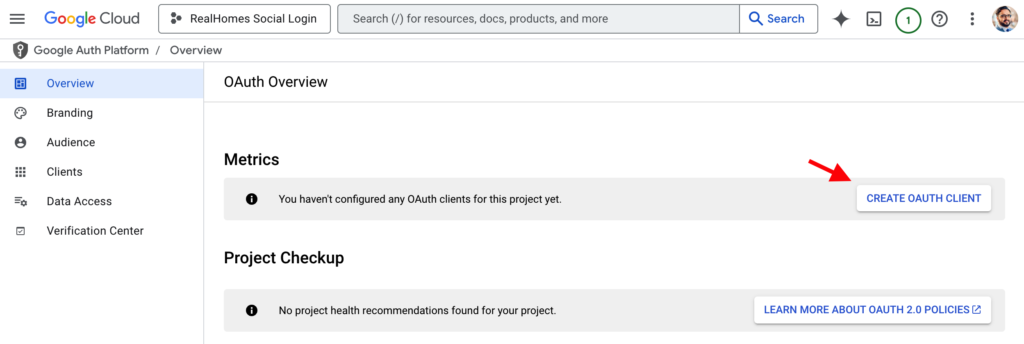
Next, click CREATE OAUTH CLIENT.
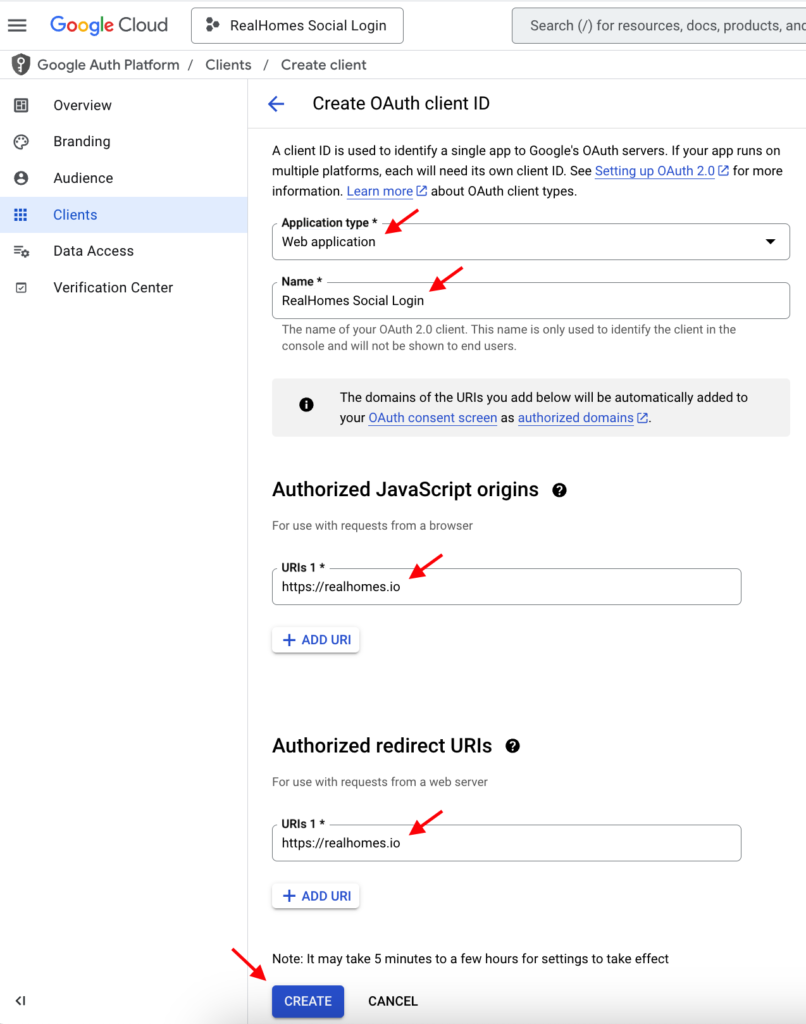
In the next step, fill in all the details to create the OAuth Client ID. The important information here is that you must use your own website domain (realhomes.io is just an example for demonstration).
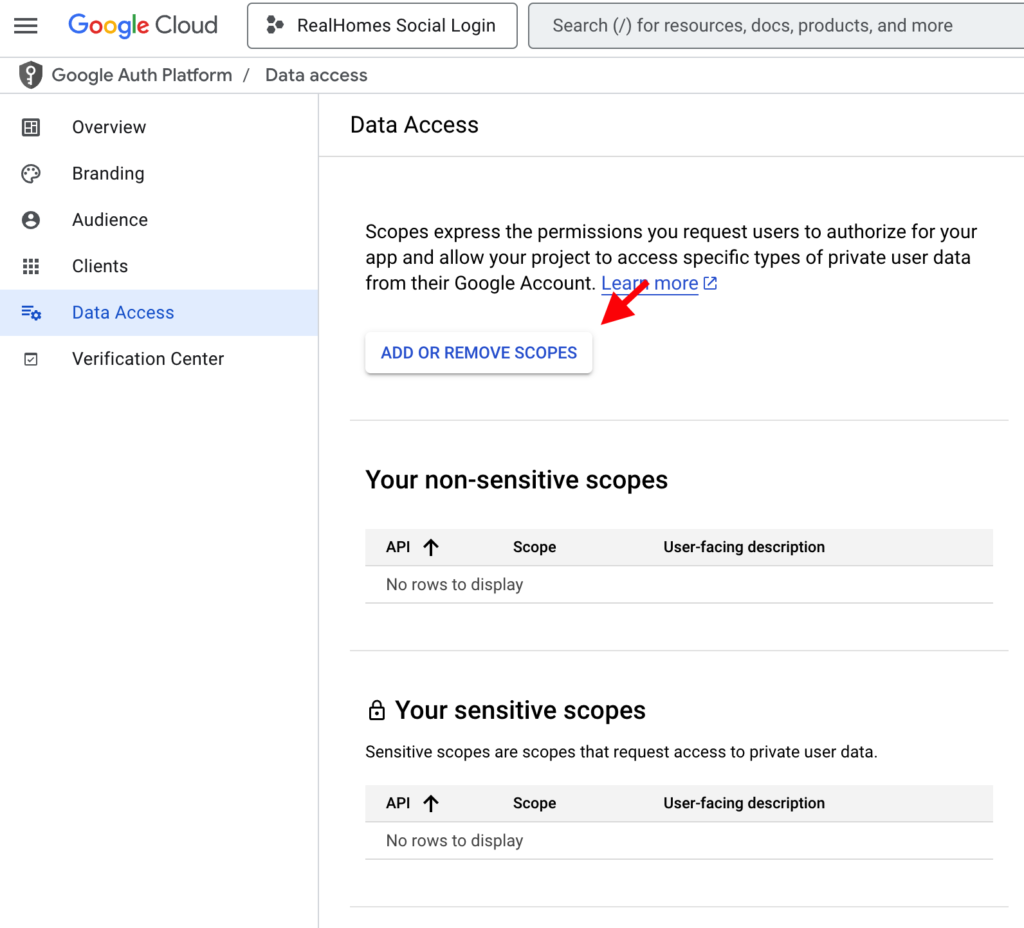
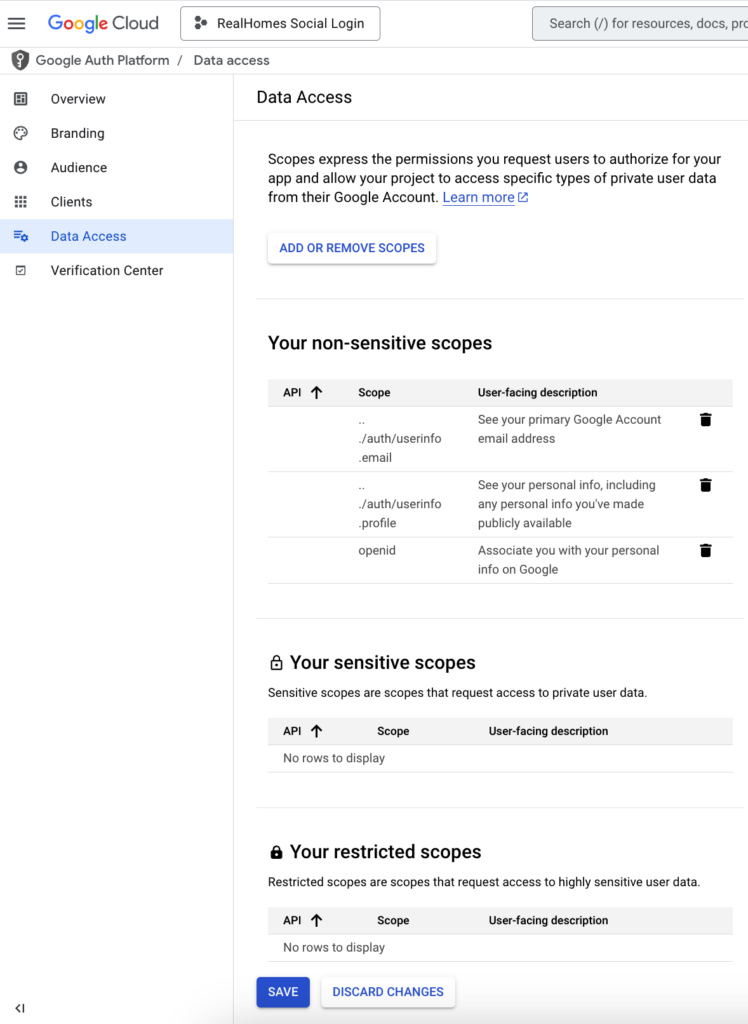
Click on the ADD OR REMOVE SCOPES button.
Add Scopes for Google APIs. Ensure the required scopes email, profile, and openid are added.
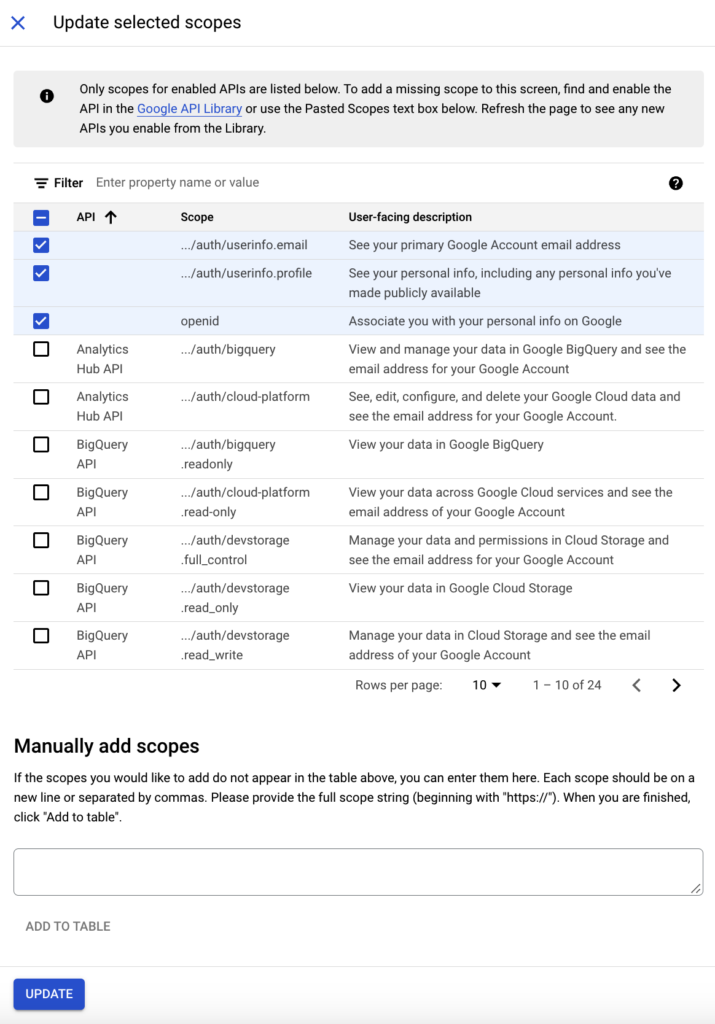
Click the SAVE AND CONTINUE Button.
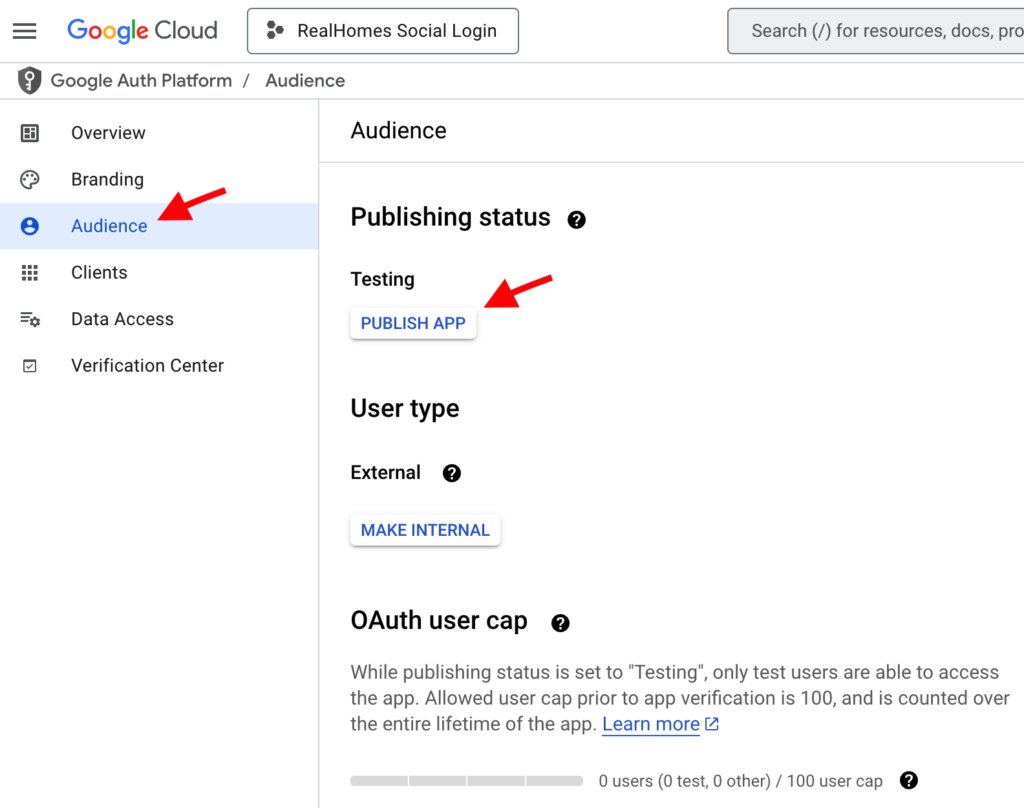
Click the Audience button, then click the PUBLISH APP button.
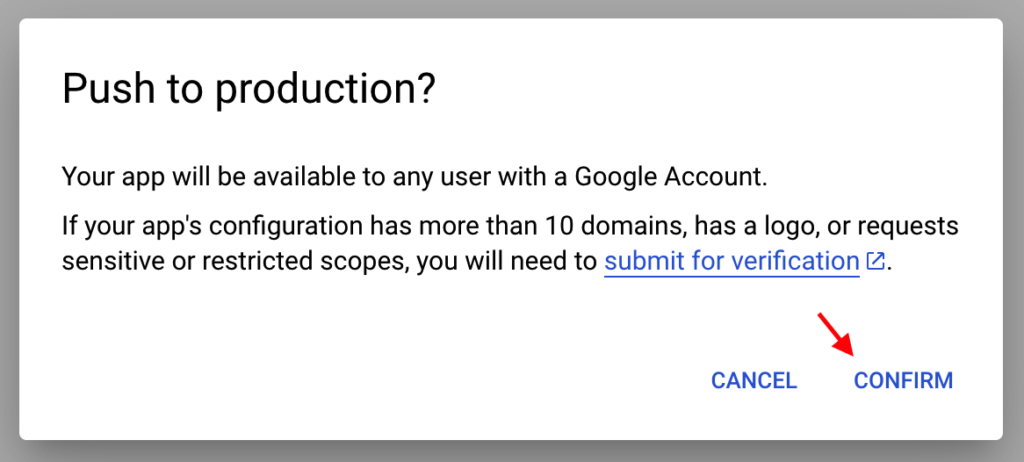
Click on the CONFIRM button.
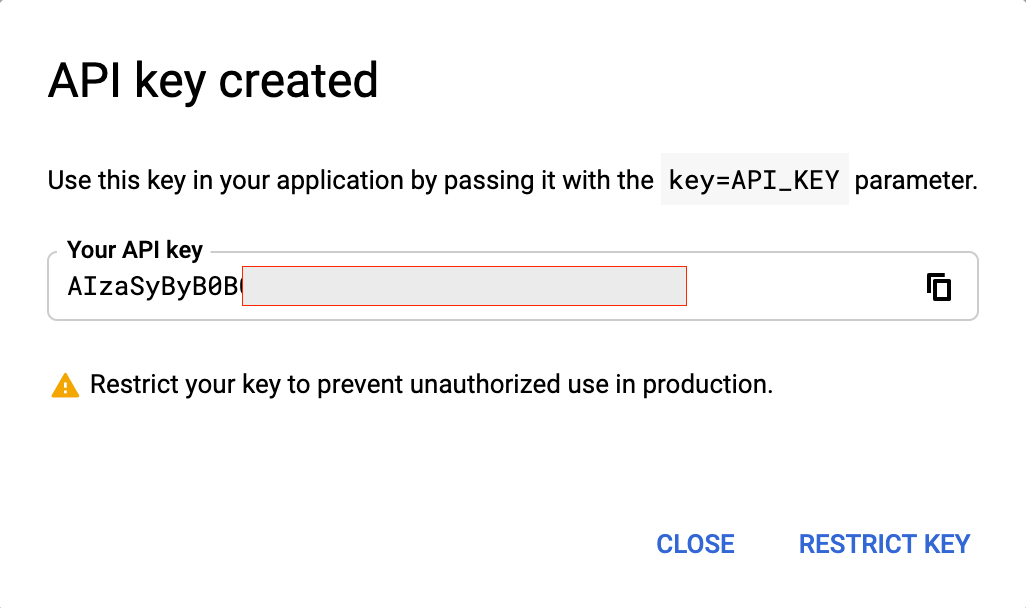
Now go to the Credentials page and click the CREATE CREDENTIALS → API key button.
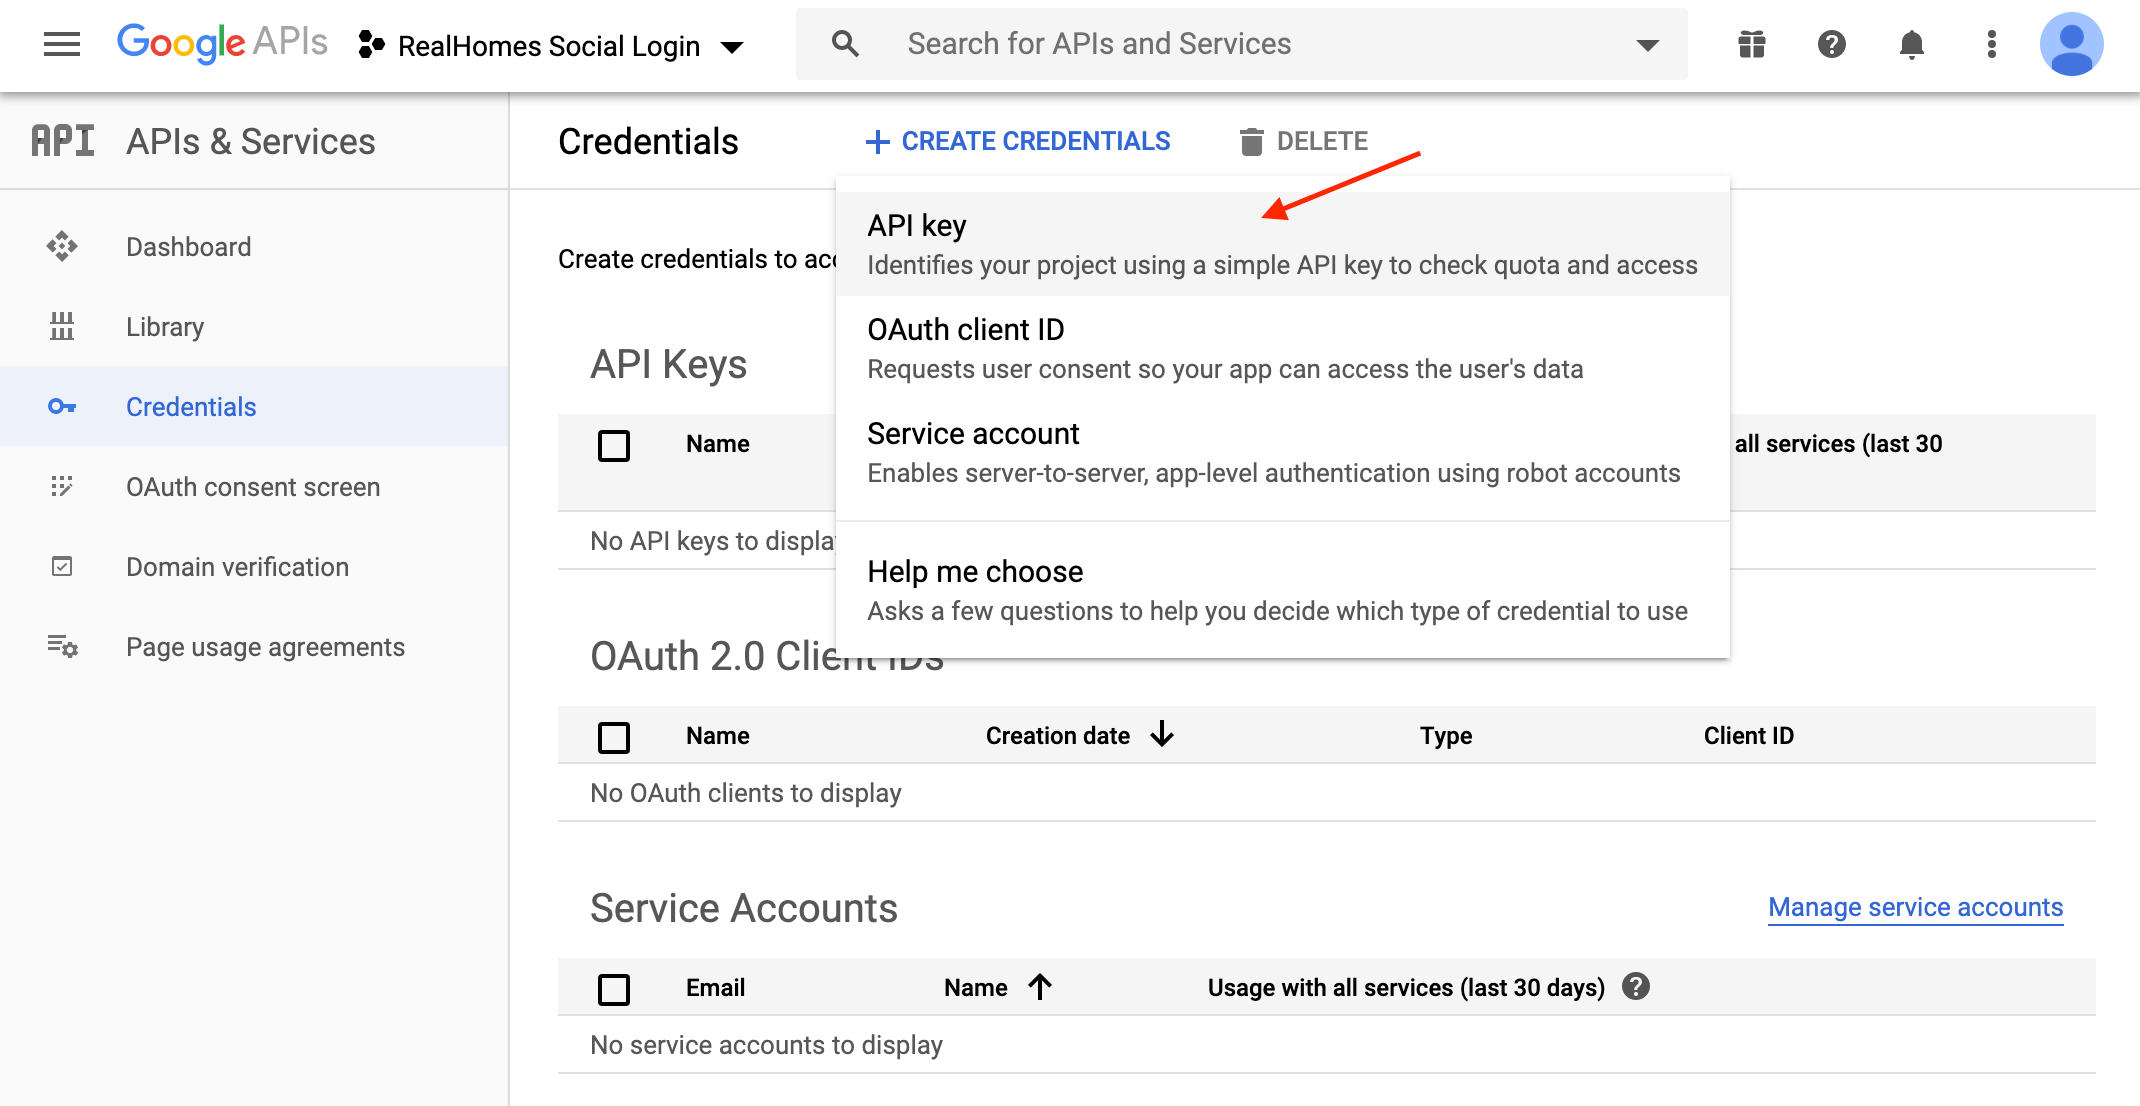
An API Key will be created, and you can copy it to the Google Login settings on your website.
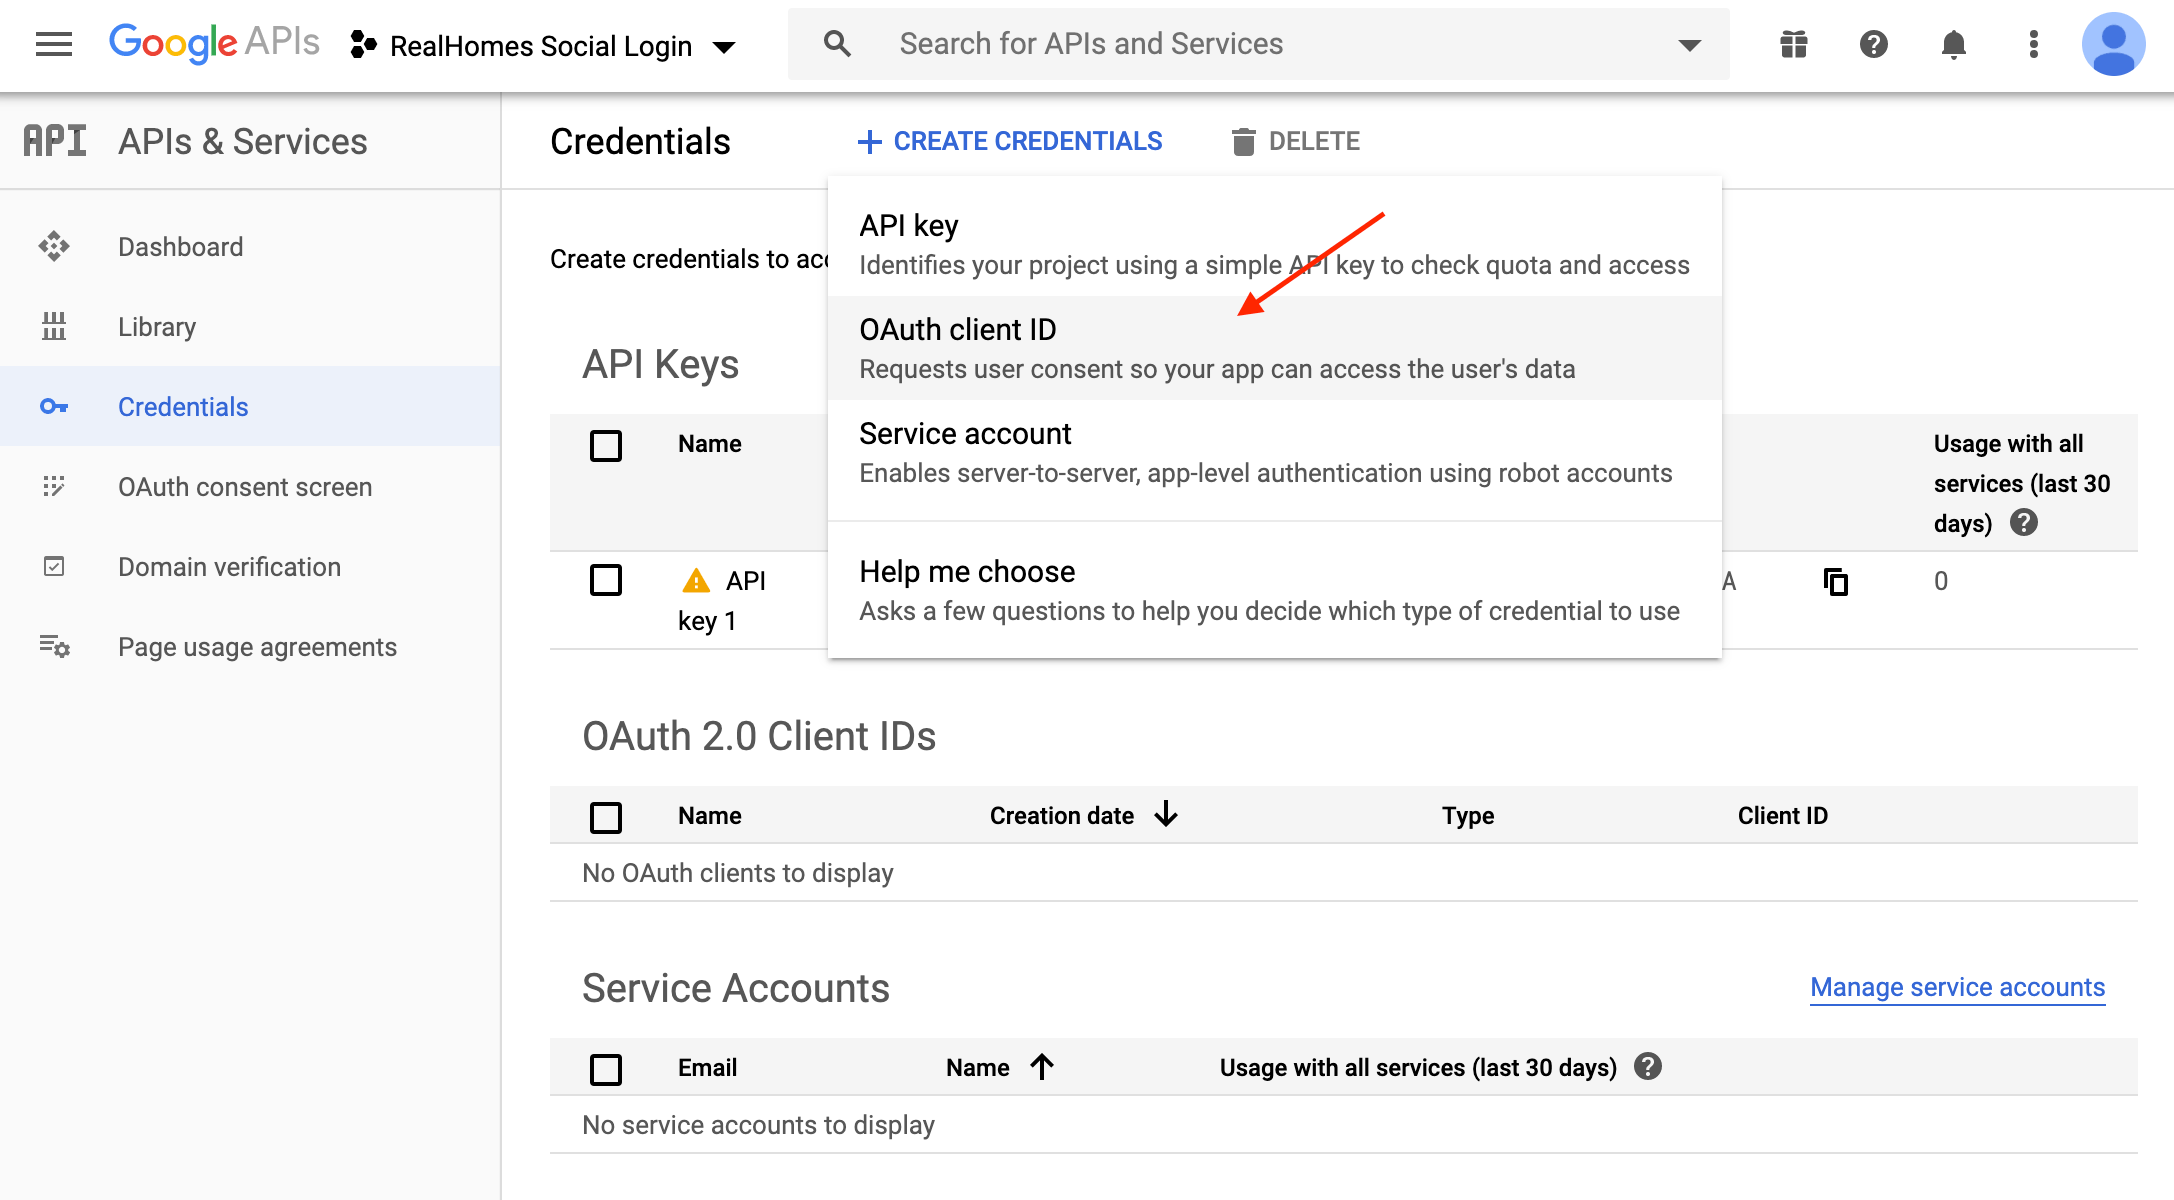
After that click on the CREATE CREDENTIALS → OAuth client ID button.
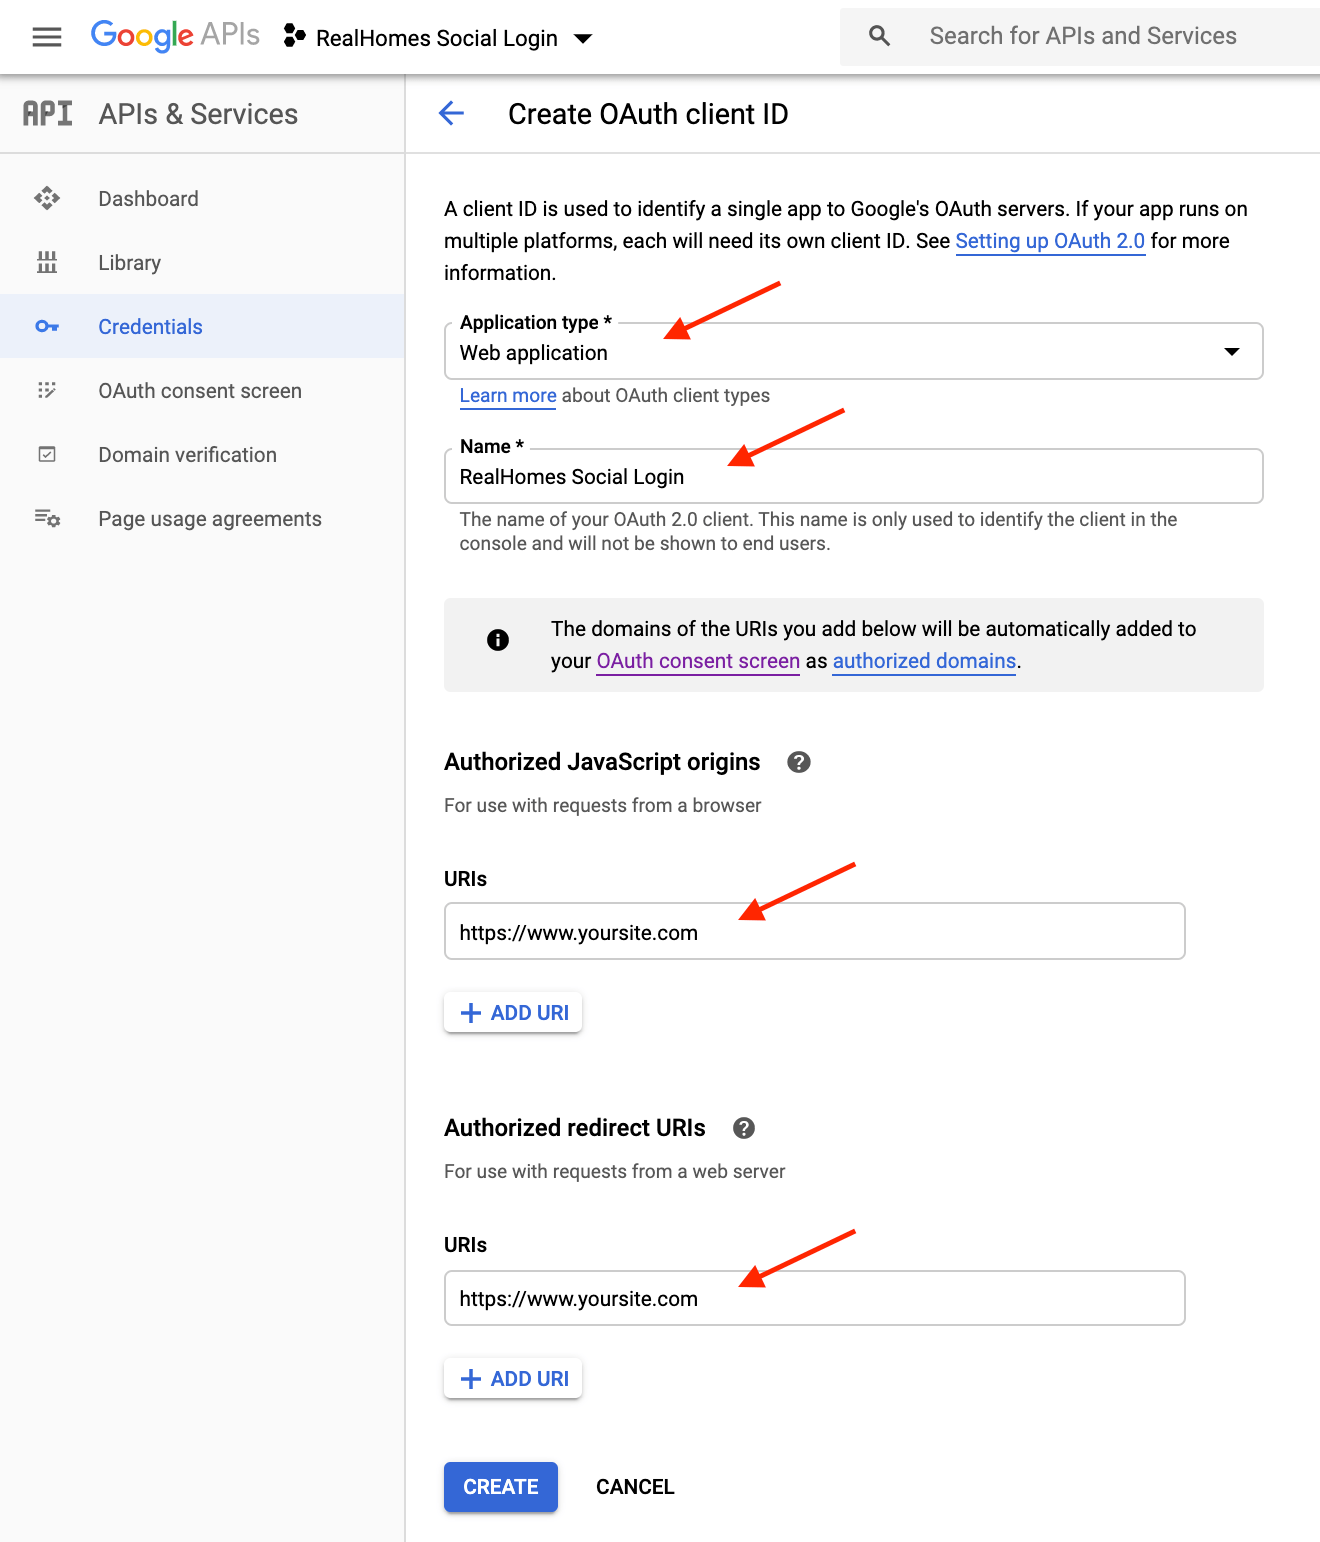
Select the Application type as a Web application and enter Name. Then, set Authorized JavaScript origins and Authorized redirect URIs to your website URL and press the CREATE button.
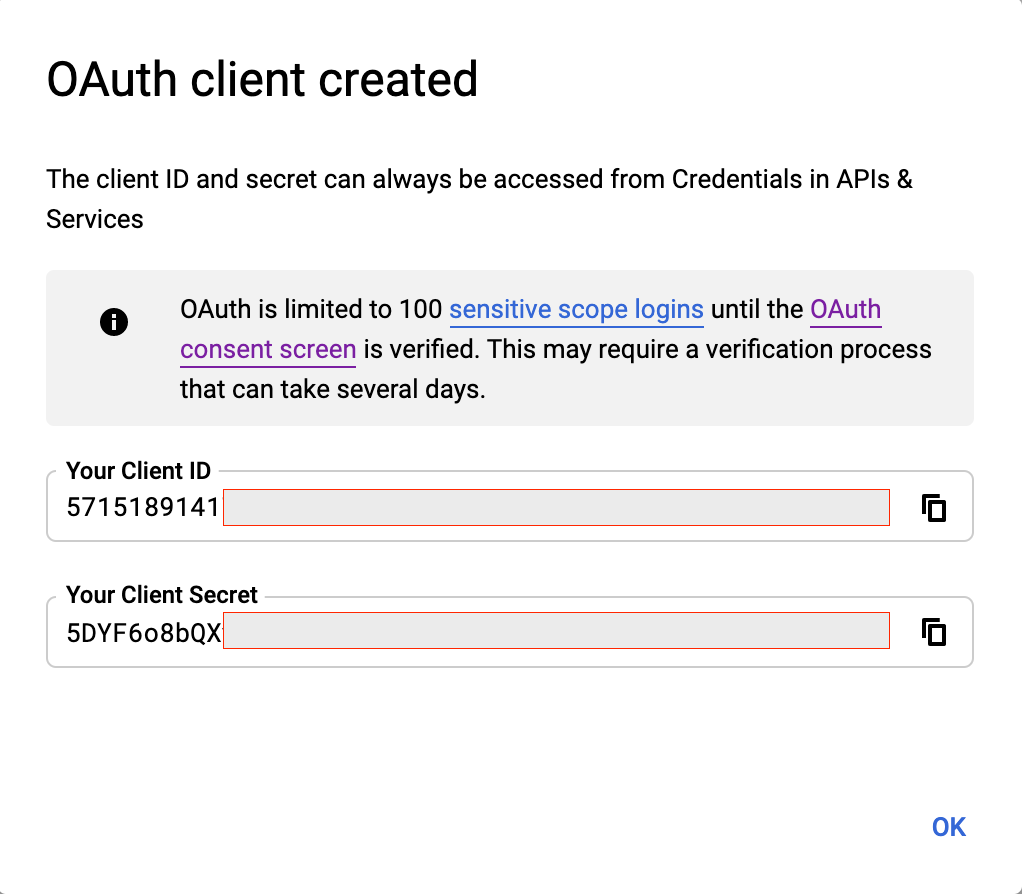
Client ID and Client Secret will be created and you can copy these keys to the Google Login settings on your website and test login/register with Google from the frontend side of your website.
Twitter Login Setup
This section allows you to Enable/Disable the login/register with Twitter on login forms, set Consumer Key* and Consumer Secret* values.
Get your Twitter App Keys
You would need to create a Twitter App, and for that purpose, you must have an approved Twitter Developer account. It will take 1 to 2 weeks to get an approved Developer account. For more details, read and follow the Developer application process.
Login to your approved Twitter Developer account using your Twitter account access credentials. Go to the Twitter Apps page and click on the Create an app button.
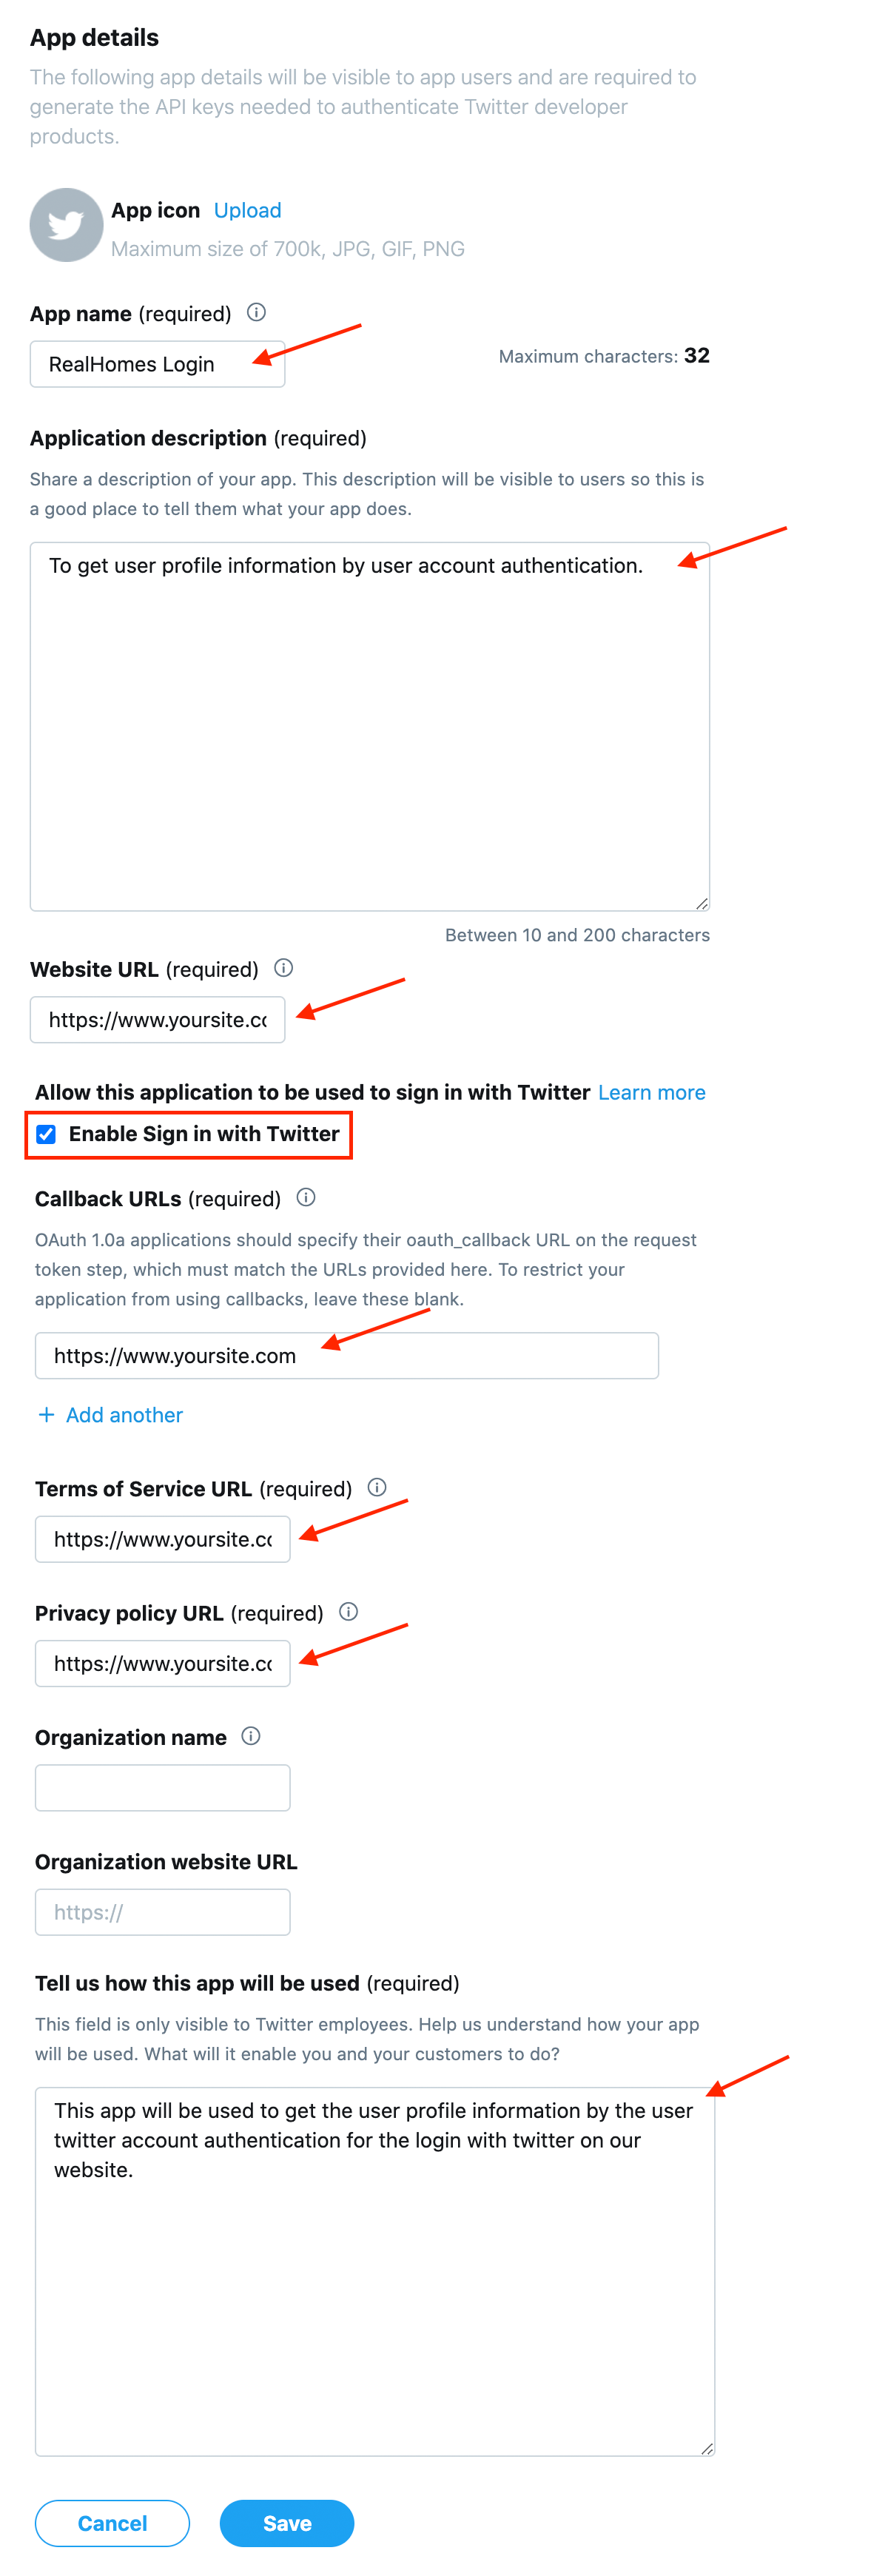
Provide the fields of the App details pointed out in the following screenshot, then press the Create/Save button.
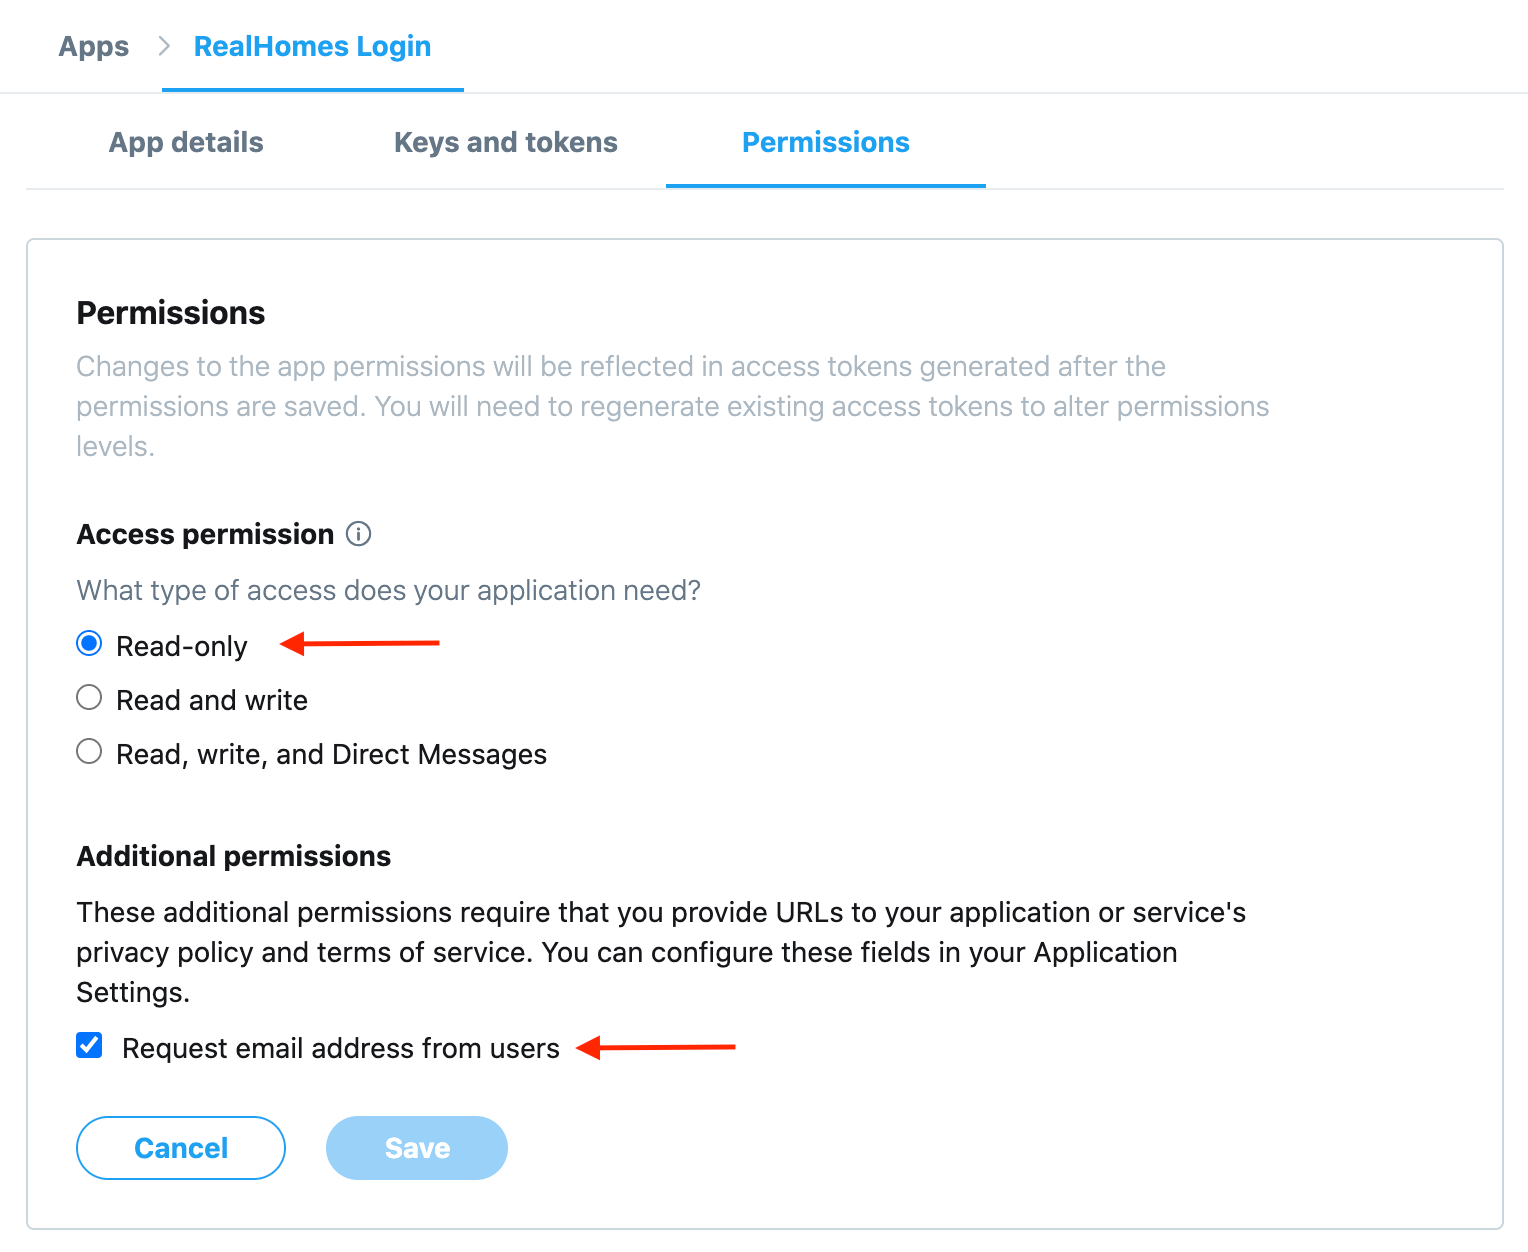
Go to the Details of the App you just created and click on the Edit permissions button.

Ensure App permissions are set correctly according to the screenshot given below.
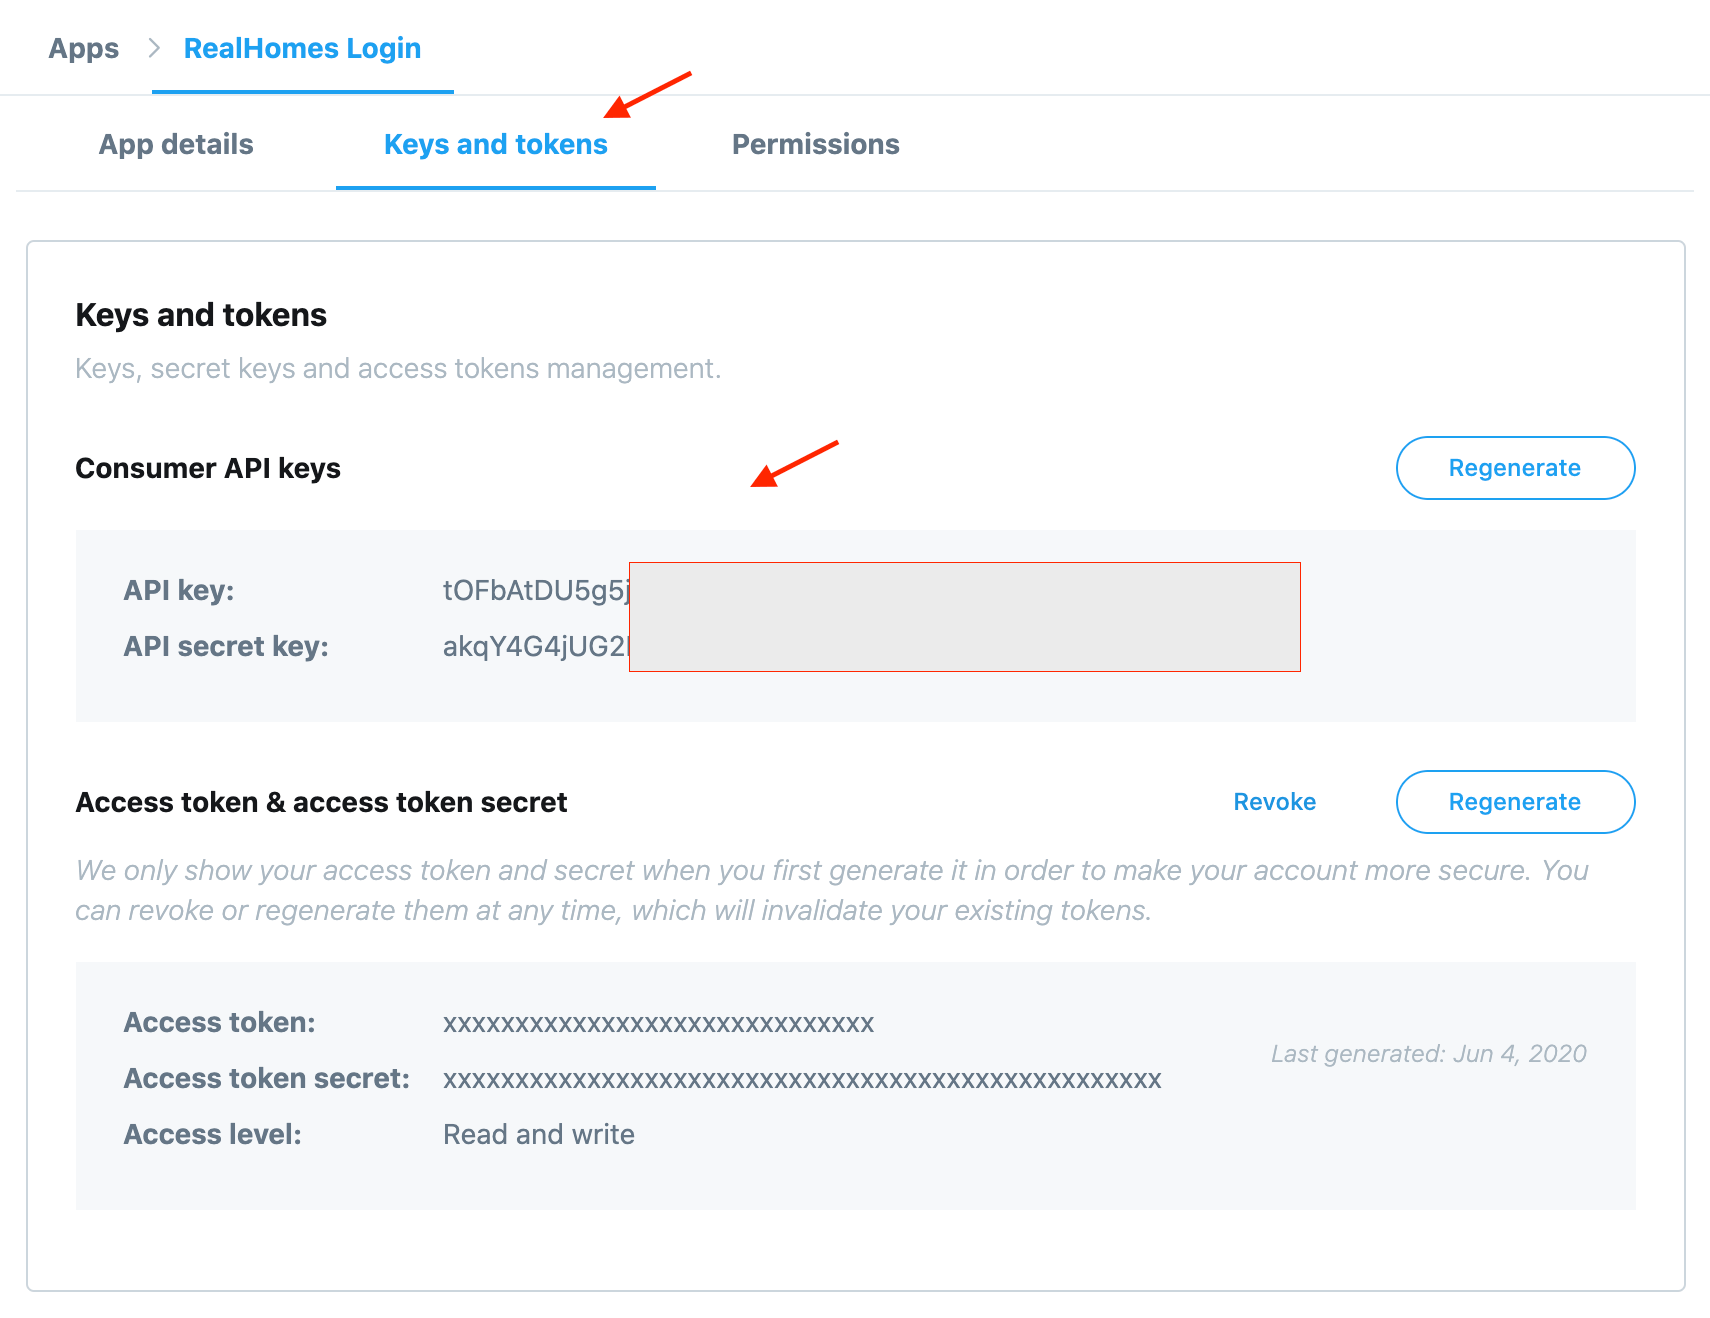
Now go to the Keys and tokens tab and copy the Consumer API Keys to the Twitter Login settings on your website and test login/register with Twitter from the frontend side of your website.
If you follow the above guide properly and need further assistance regarding any step/section, you can reach our dedicated support team through our support website by clicking here.
If you have any feedback about this feature or guide improvement, you can share it with us via the feedback form by clicking here.